Hey everyone. It’s Deborrah with DivaLady Designs, and I’m so glad you’ve joined me today.
I love interactive cards! I follow many people on Instagram and Pinterest to learn about different types of interactive cards. This past week, I found a pop-up card that captured my interest and I found myself experimenting and creating over the weekend. I came up with this card using some of my favorite newer products from PinkFresh Studios. I’ve linked all products below in the instructions. I hope you have fun creating your own version of this very fun card!
How to Create the Card
Cut three pieces of cardstock as follows:
Piece #1: 6 ½” x 4 ¼” – Score at 1 ¼” and 1 ¾”
Piece #2: 6 ½” x 3 ¼” – Score at 1 ¼” and 1 ¾”
Piece #3: 1″ x 2 ½”
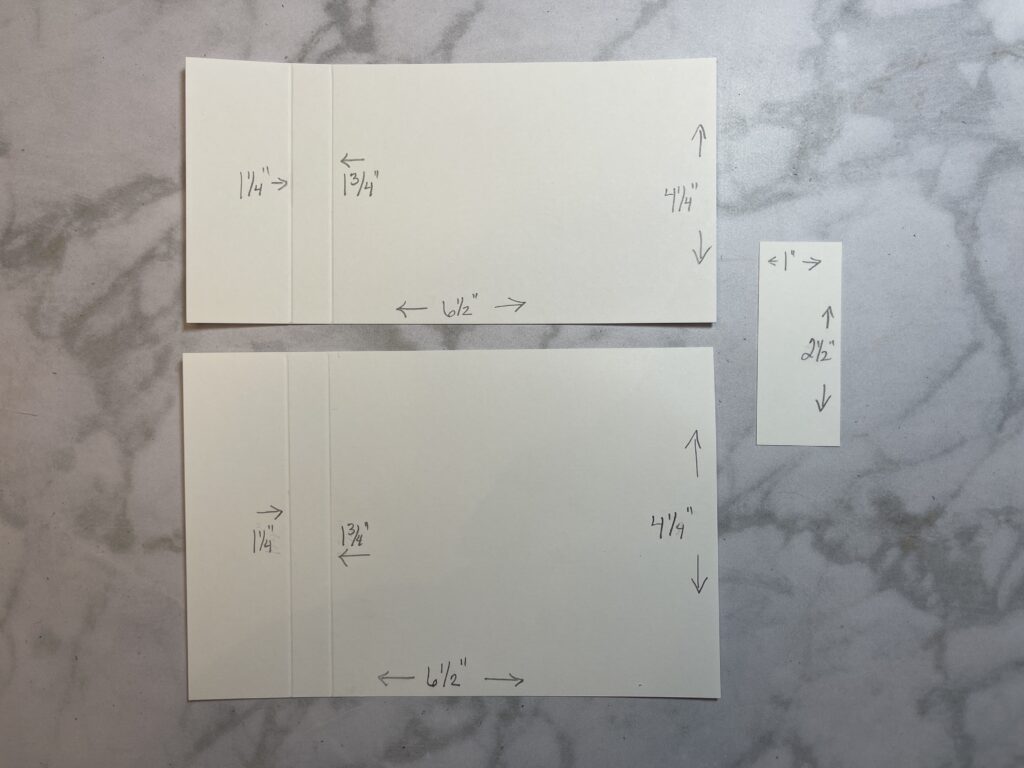
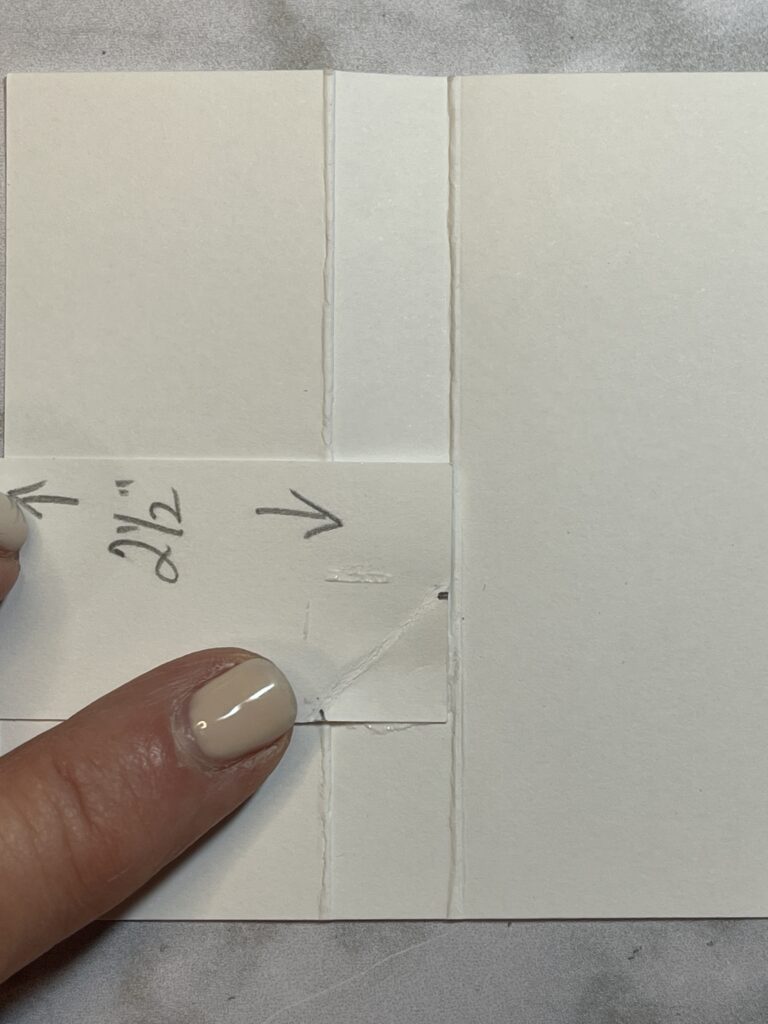
Notch the bottom corner of Piece #3 – ½” from left, and ½” from bottom. Score and fold up.

Turn over Piece #2 and glue Piece #3 as shown below:
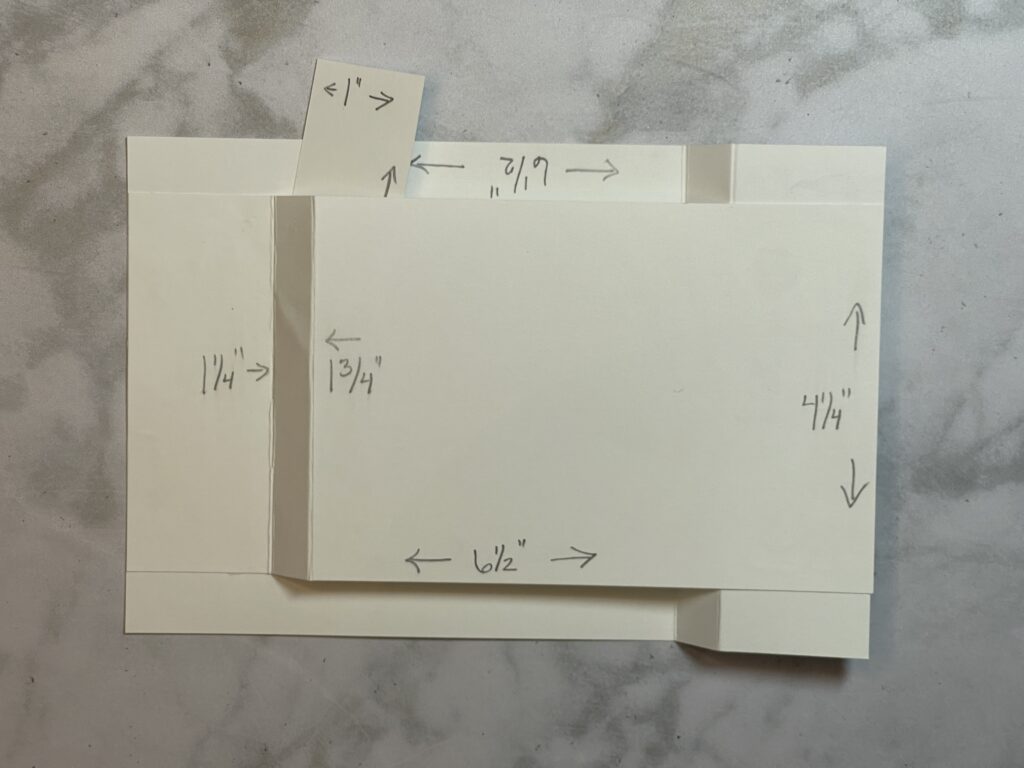
Assemble the card, laying Piece #2 over Piece #1. The completed card should look like the one below.
Thanks For All You Do
PinkFresh Studio Intricate Stitched Ovals Coverplate Die
PinkFresh Studio Happy For You Stamps
PinkFresh Studio Happy For You Stencils
PinkFresh Studio Happy For You Dies
PinkFresh Studio Ombre Glitter Drops: Sparkle & Shine
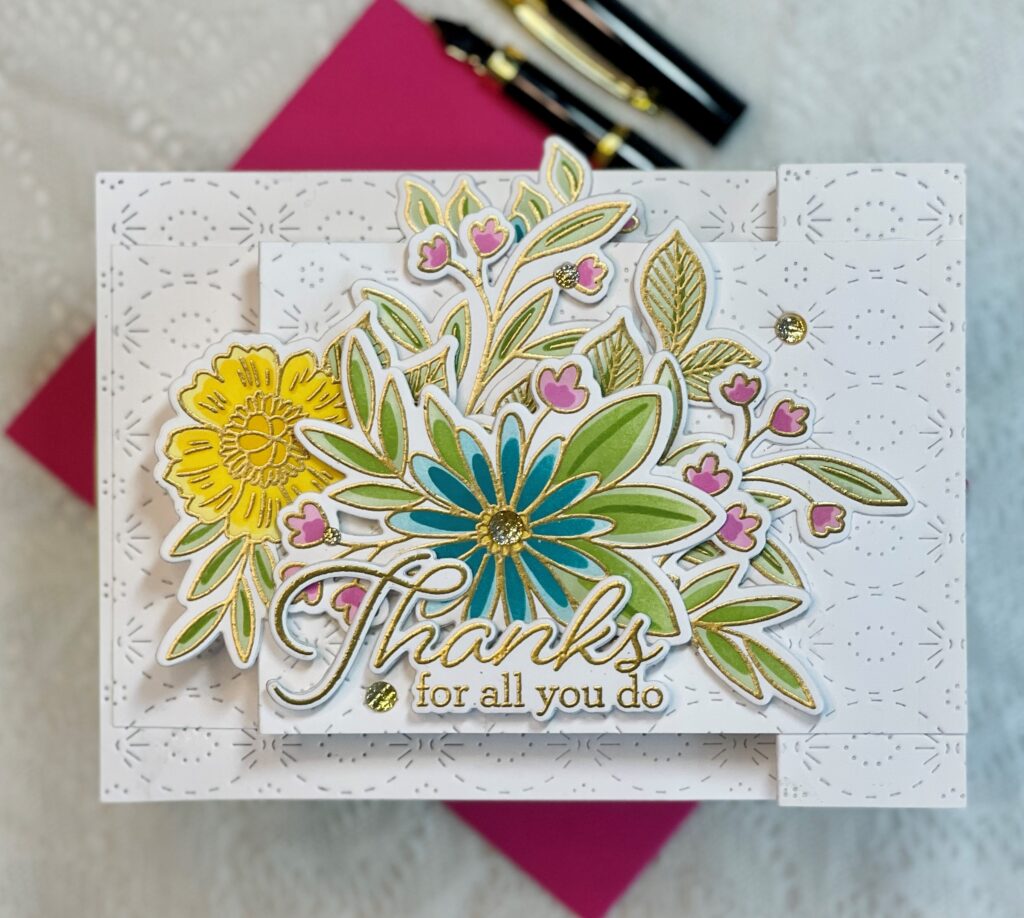
To create my card, I ran Pieces #1 and #2 through a die cut machine using the PinkFresh Studio Intricate Stitched Ovals Coverplate Die. I had to run each piece twice, the cardstock pieces are longer than the die. (It wasn’t difficult to line up the edges.) I scored the cardstock as instructed and then assembled the card as shown above.
I used the PinkFresh Studio Happy For You Collection. I stamped the main image of the PinkFresh Studio Happy For You Stamp set with VersaMark ink, then embossed it with gold embossing powder. I also stamped and gold-embossed the two sentiments (both from the stamp set). I colored the image using the PinkFresh Studio Happy For You Stencils and Sparkling Rose, Lemon Whip, Marigold, Olive, Fresh Pear, Ocean Breeze, and Tidal Pond Premium Dye Inks.
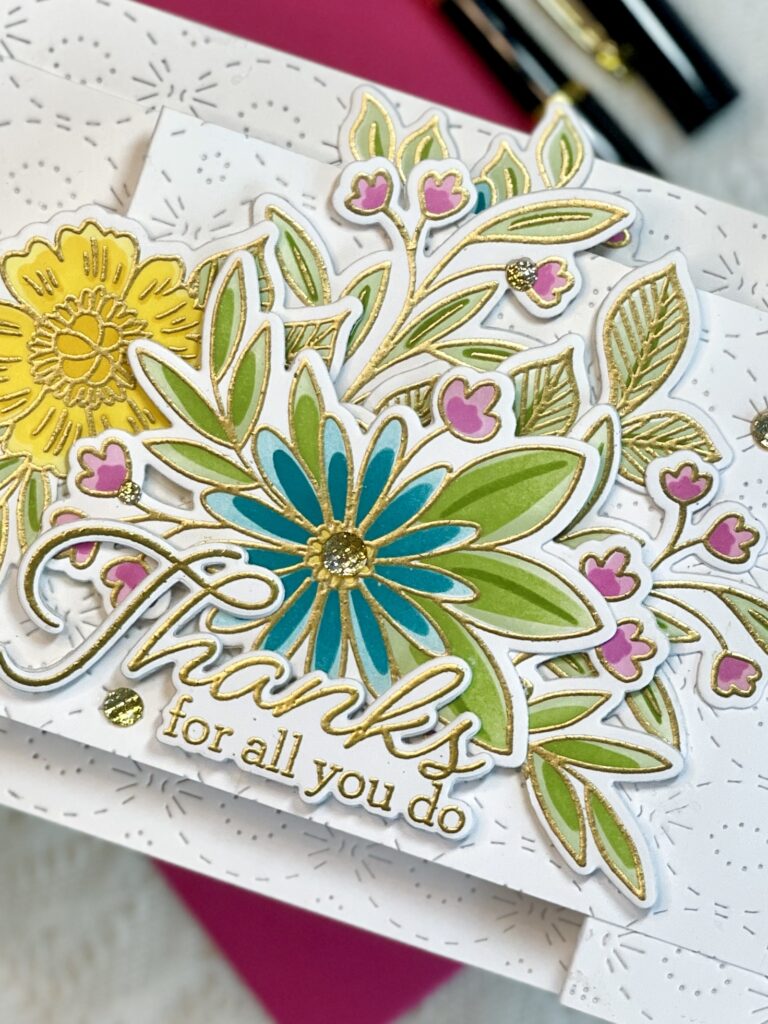
I cut out the images and sentiments using the PinkFresh Studio Happy For You Dies. I also cut out additional pieces from plain white cardstock to stack under the colored die cuts. I like dimension.
I arranged the pieces as shown, then added some PinkFresh Studio Ombre Glitter Drops: Sparkle & Shine. I love how they pick up the light!
If you have any questions, please leave me a comment and I’ll help out as I can. Have fun, and happy crafting!!
 Spring Online Card Camp 2022
 Painting with Shimmer
 Creating Mood with Color
