Hello and welcome to my blog!
Do you ever have trouble coming up with an idea for a card? I feel your pain! Most times, I’m inspired by other card designers. But there is always that day when I just don’t know what to create. When that happens, I fall back on my basic card-making formula and I’m here to share that formula with you today. I have two cards to share with you with lots of photos. I’ve listed and linked many of the products I used at the end of this post for your convenience.
(Supplies I used to make these cards were purchased by me and are linked to sources in this post. I may use compensated affiliate links at no cost to you. For more information about affiliate links, see my disclosure page. Thank you for helping me bring you more crafty stuff on my blog.)
________________________________________________________________________________________________________________
________________________________________________________________________________________________________________
For each of these cards I used the same formula, but ended up with two different cards. Basic Rule: Don’t limit yourself! Mix and match and above all, have fun!
Step 1: Choose your focal image
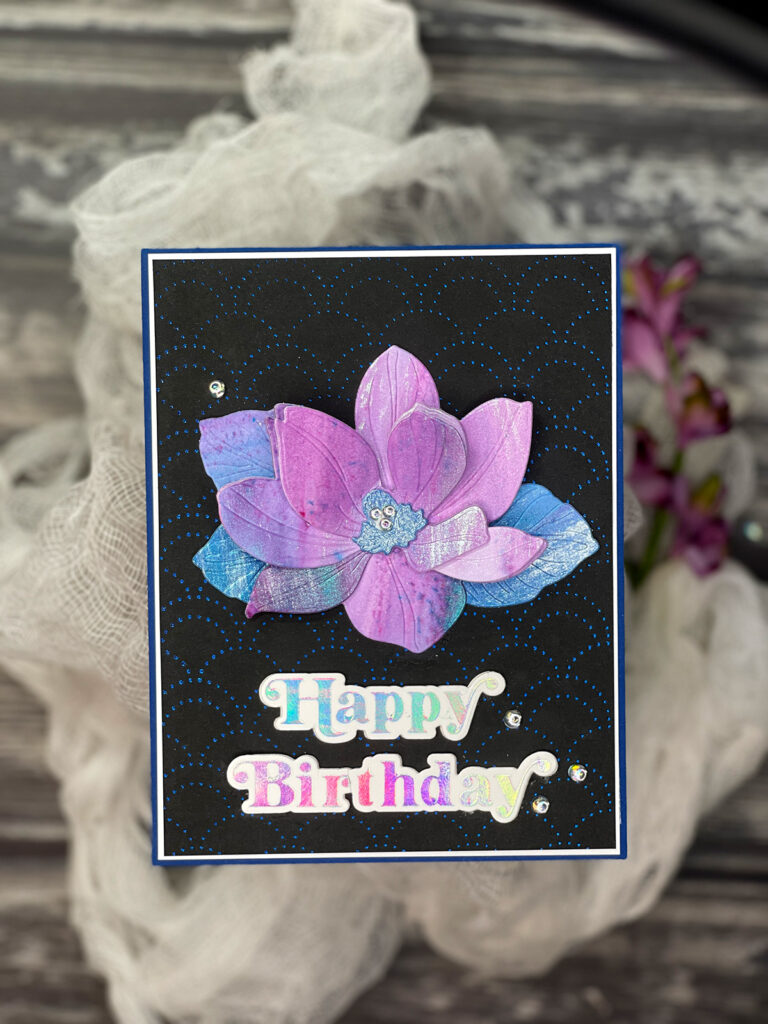
Every card has a focal image, the place to where your eye is immediately drawn. I was anxious to play with Honey Bee Stamps Lovely Layers: Magnolia – Honey Cuts. I’ve been exploring layering dies lately, and this particular die set caught my eye. It is simply an amazing die set. The pieces are well made and cut beautifully, but for me the most important thing is that they layer together logically and beautifully.
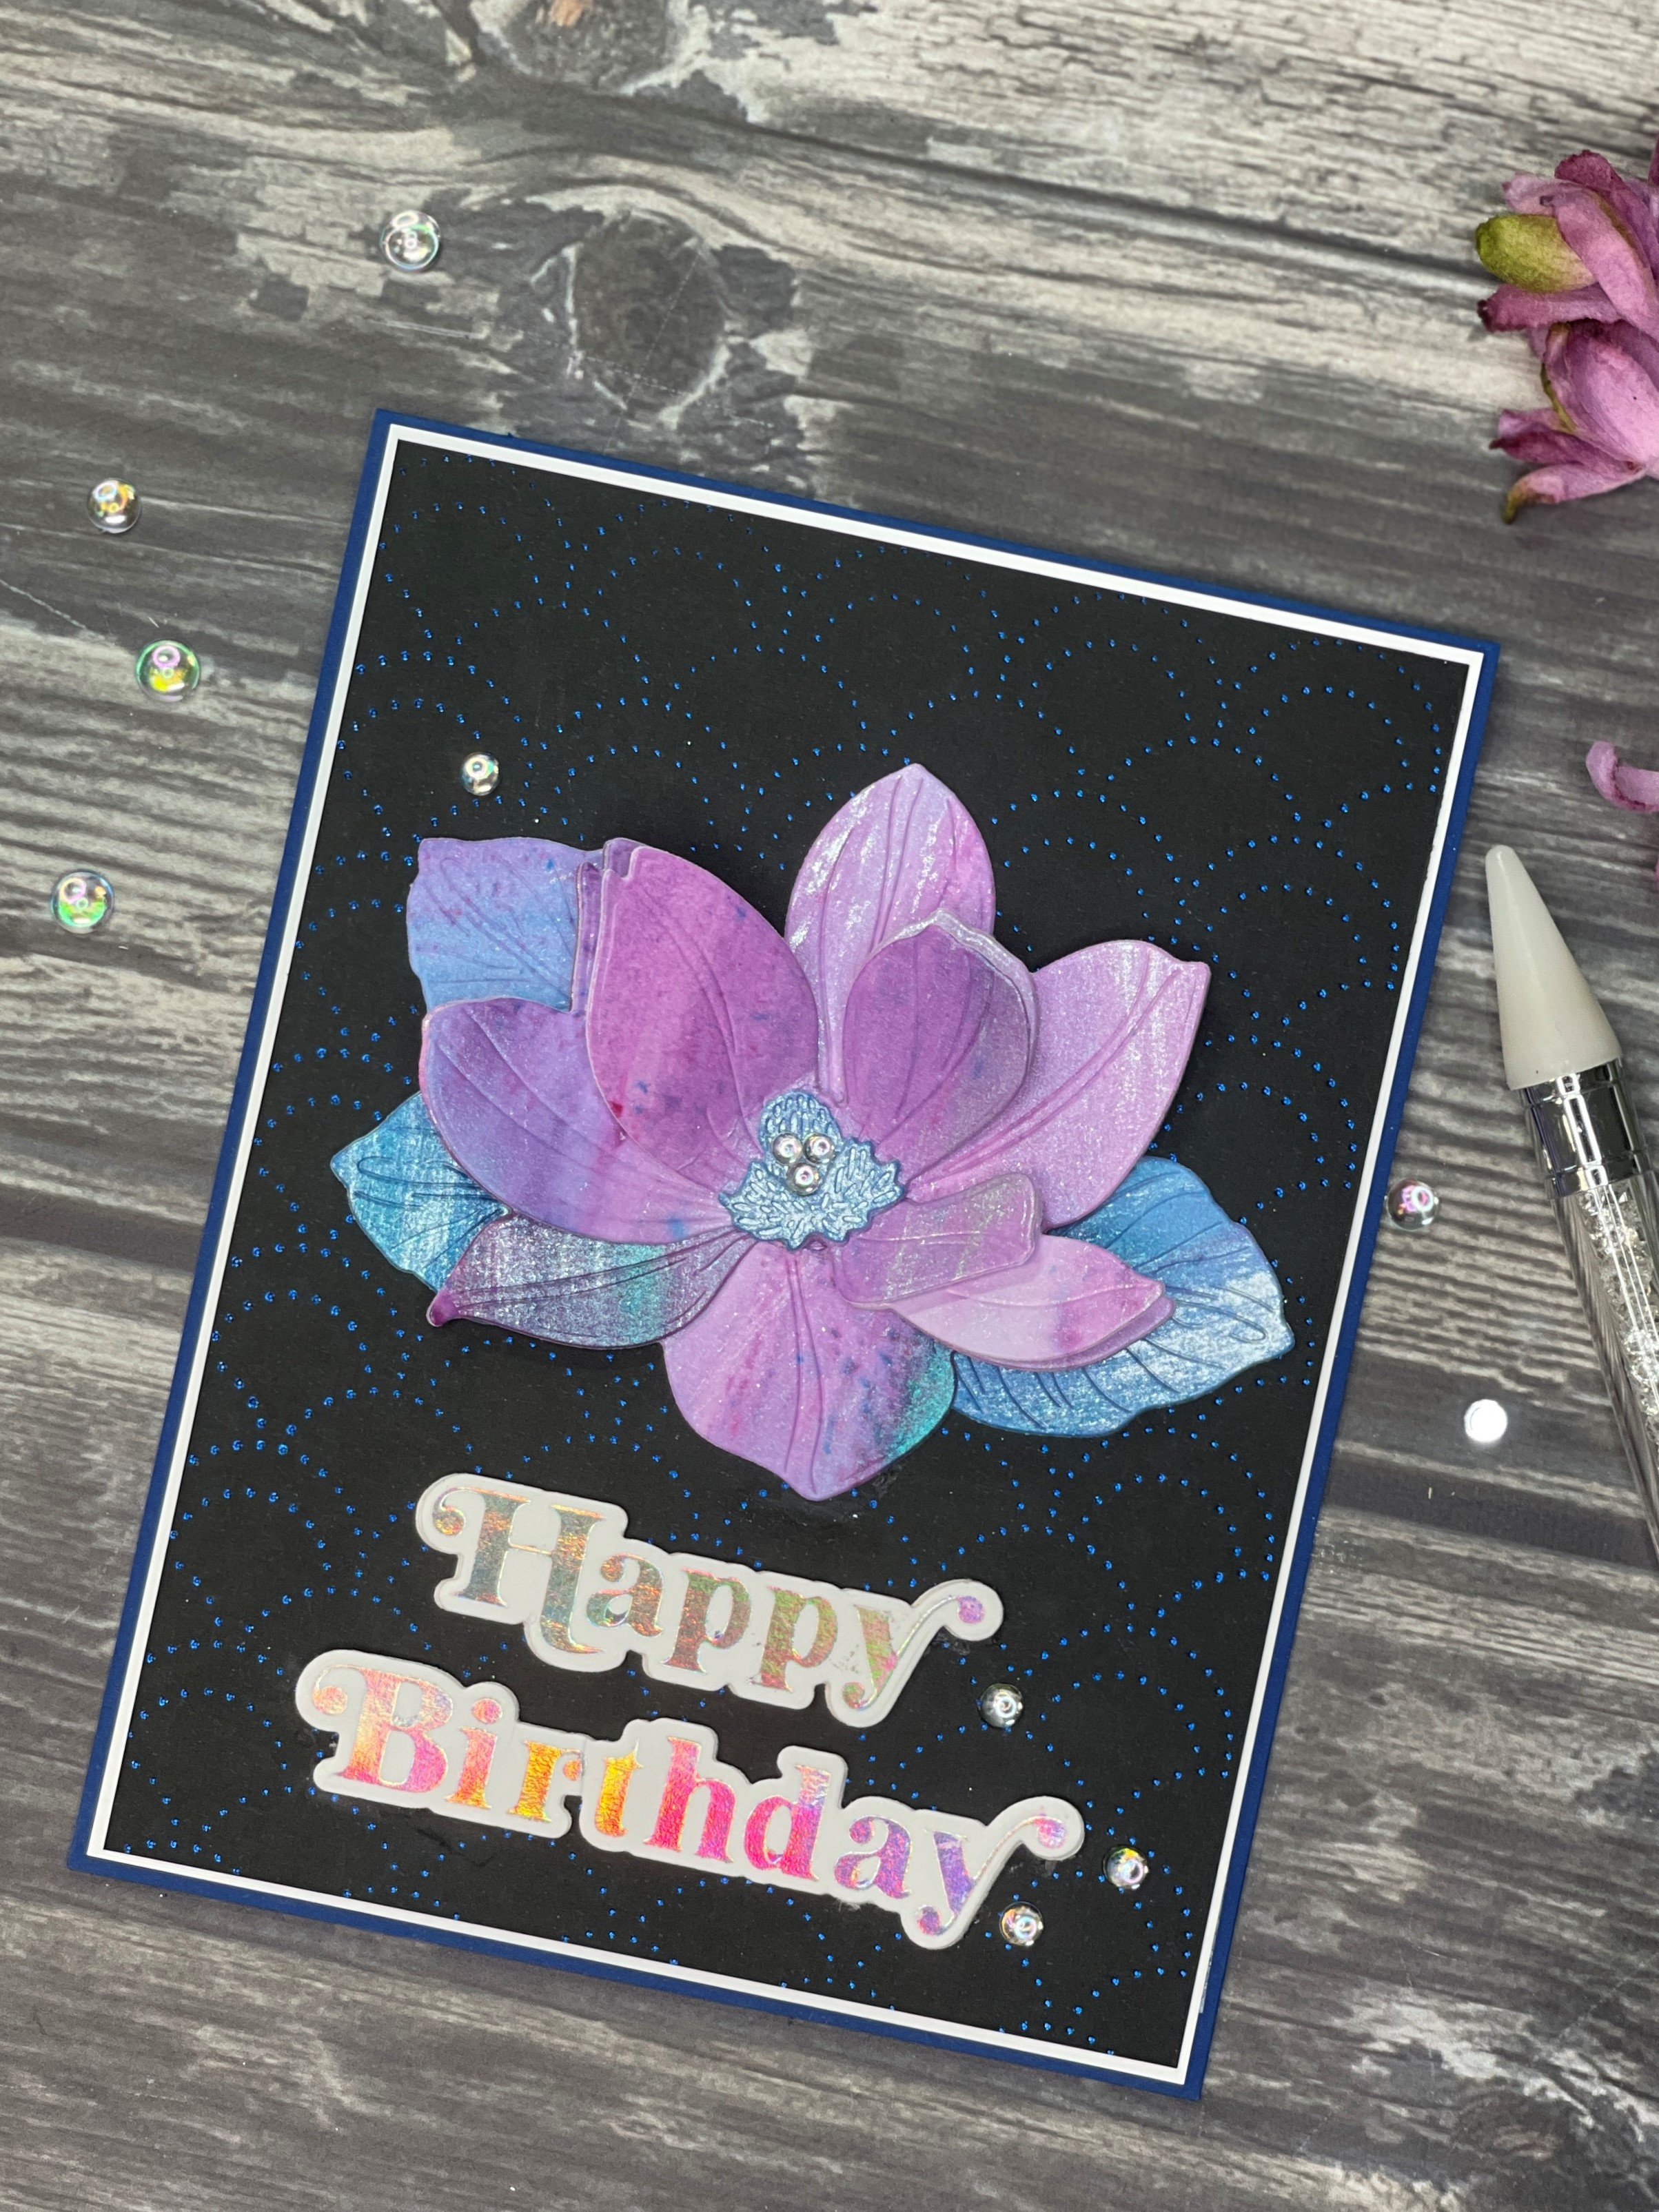
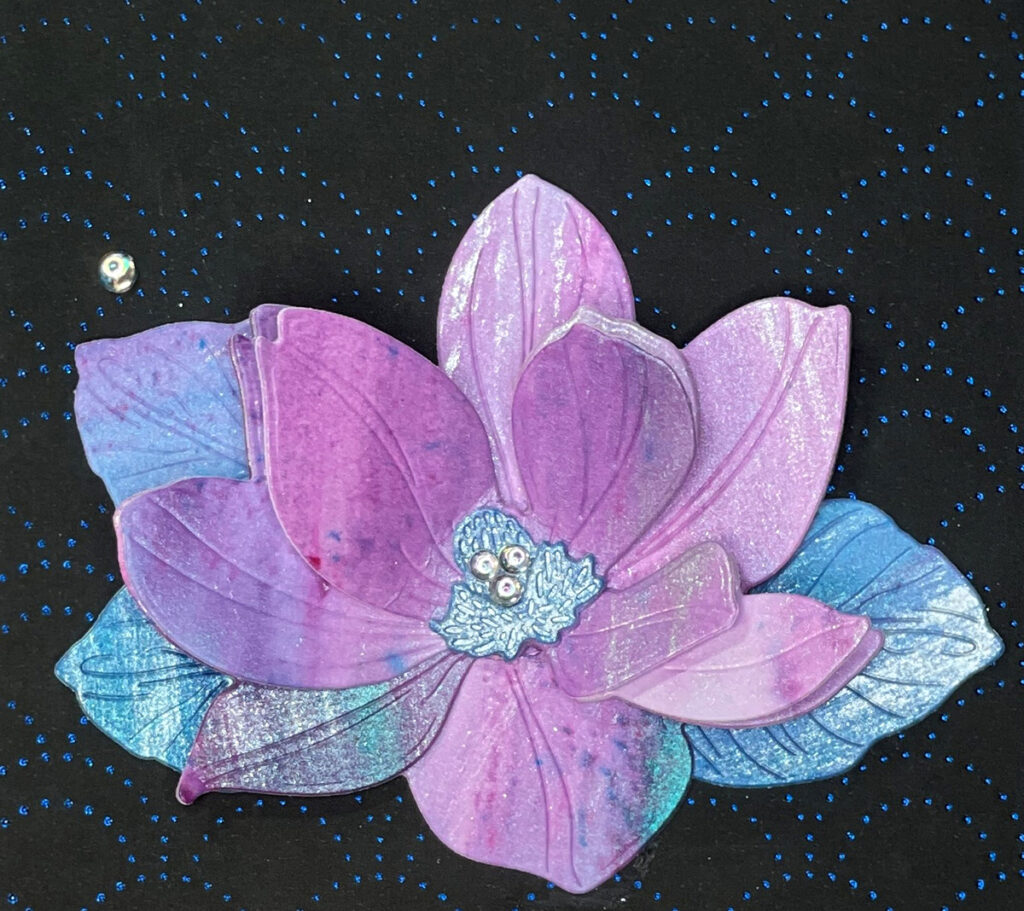
I used various techniques to create my magnolias. For the first card, I created a background using Lindy’s Stamp Gang Magical Powders. These powders create absolutely gorgeous shimmery shine! I thought it would be the perfect coloring to show off the layering of this die set.
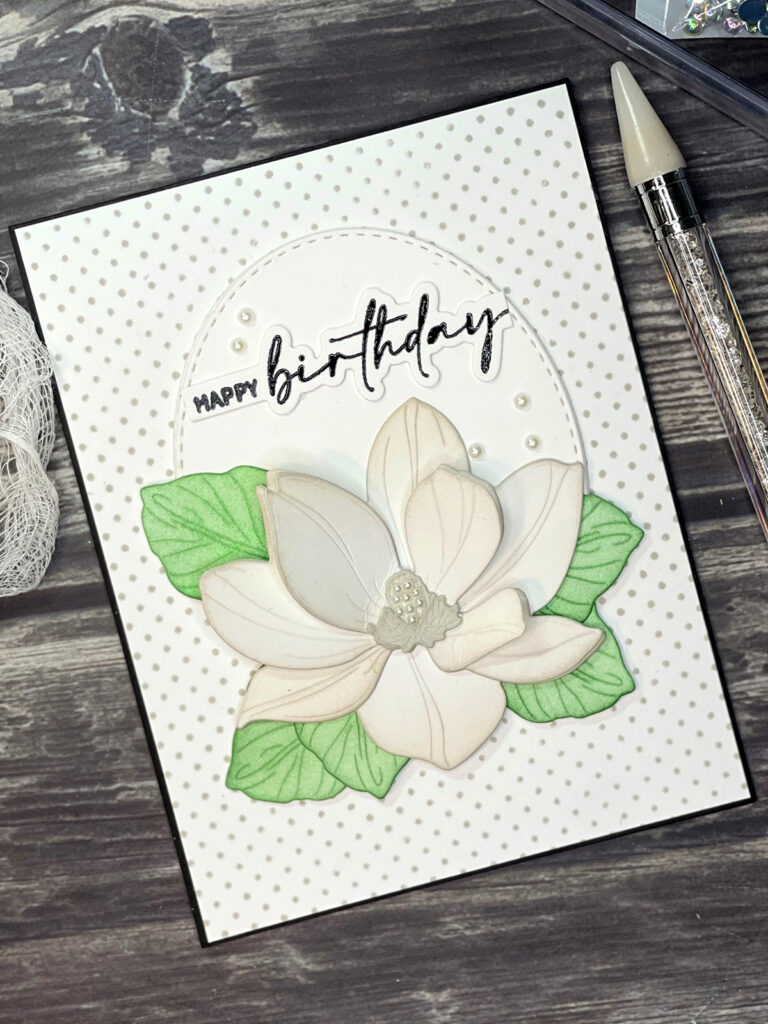
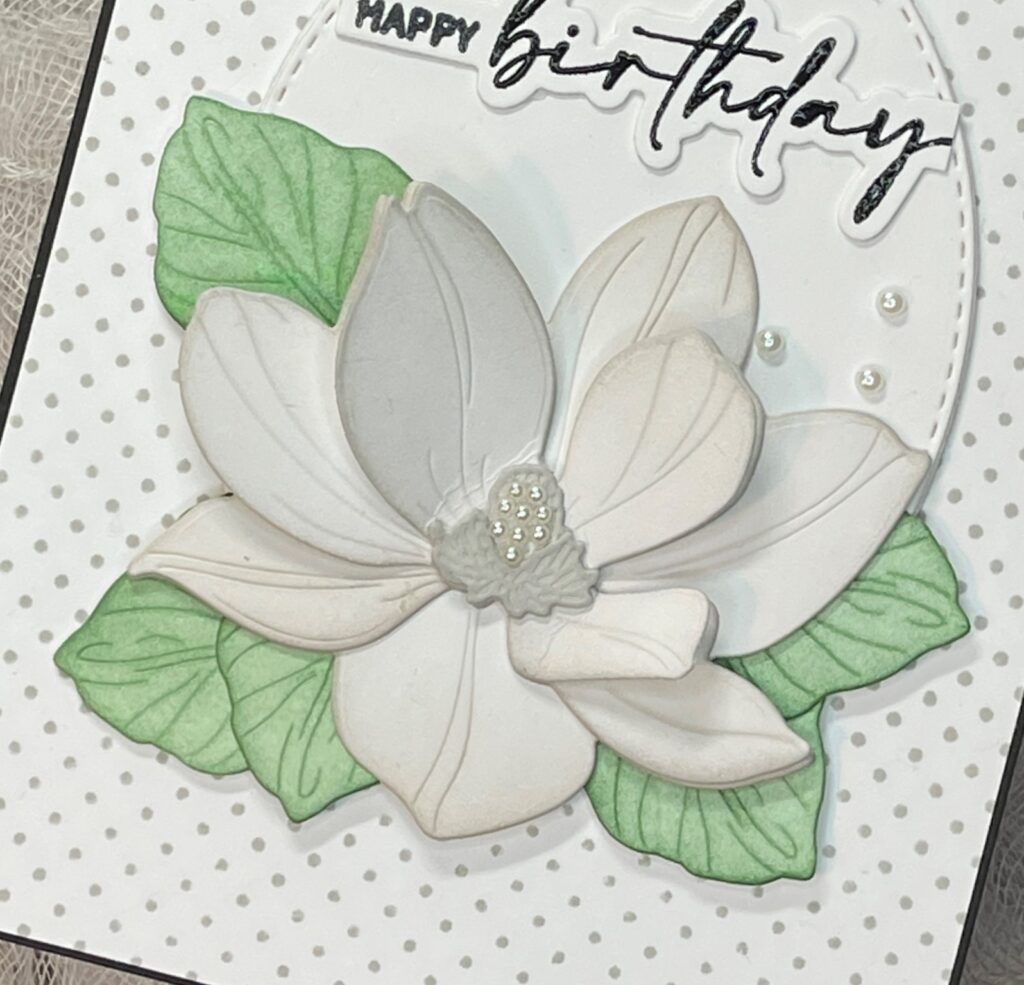
For my second card, I cut the layers from white cardstock and inked the edges with a light grey ink, in this case Altenew Silver Lake Crisp Dye Ink. I also cut and inked the leaves using Altenew Mountain Pine Crisp Dye Ink. I just received these particular inks and couldn’t wait to use them. Look at the fabulous layered effect this die set gives!
________________________________________________________________________________________________________________
Step 2: Create a background
A good background can take a card design from “meh,” to “WOW!” Now, you can always place your focal point on a plain white or colored panel, and sometimes that’s the right choice. But I find that texture and dimension give a lot of visual interest to cards, so I like to create backgrounds. Sometimes the background is the focal point (or star) of the card, but often it’s there to enhance the main image. For each of my cards, I tried to create a background that enhanced the main image.
For my first card, I loved the blue accent color on my magnolia, so I chose PinkFresh Studio Dotted Scallops Cover Plate Die and foiled it on a panel of black cardstock with Spellbinders Cobalt Blue foil. YES! You can use a die with a foil machine! It’s the same process, but the result will be a fine-lined image which was exactly what I wanted for this card. The blue foil gives a subtle shimmer that brings out the blue shimmer of the magnolia.
For my second card, I wanted to play up the gray colored ink I used on the flower, so decided to stamp my background using Altenew Dainty Swiss Dots Stamp. I loved the result, but it was a little overpowering for my flower. So, I die-cut a white oval for the center. It covered the dots in the center and allowed my flower to shine. And, it gave me a perfect place for my sentiment!
Step 3: Choose your sentiment
I. Love. Sentiments. This is my favorite part of card making. Which sentiment will be the perfect size and font and say exactly what I want? My stamp collection used to have gazillions of sentiment stamps and I would enjoy searching through them for the perfect one. Now, I’ve added die-cut sentiments and foiled sentiments, so you would think that it wouldn’t be so hard to find what I wanted, right? Nope. I still spend a good bit of time choosing the perfect sentiment for my cards.
These cards today feature the Be Bold Glimmer Sentiments from Spellbinders. It has a fabulous font and was just the right size to balance my colorful magnolia. I originally wanted to foil it in Cobalt Blue, but it was too much, so I settled on Prism. The other sentiment set is from The Ton. If you are not familiar with this company, check them out! I love their Easy Expressions Stamp sets. It’s a two-part stamp process which results in wonderful greetings. I used their Birthday set for my second card.
Step 4: Choose appropriate embellishments
In my world, every card needs a little bling. Sometimes a lot, sometimes a little. It’s like jewelry – it gives a little ooommph to the total look.
For my cards, I chose to use embellishments from Studio Katia. They have an amazing collection of beautiful beads that are perfect for cards. My other go-to embellishments come from Spellbinders and PinkFresh Studio and you can see those on many of my cards. So many choices!
So there you have it! Four steps to card-making. Give this formula a try and see what happens. Thanks for reading and happy crafting!!
Featured Products
Honey Bee Stamps Lovely Layers: Magnolia – Honey Cuts
PinkFresh Studio Dotted Scallops Cover Plate Die
Spellbinders Be Bold Glimmer Sentiments
Lindy’s Stamp Gang Magical Powders
Altenew Dainty Swiss Dots Stamp Set
Altenew Crisp Dye Inks
The Ton Easy Expressions Birthday
 Painting with Shimmer
 My Altenew Educator Adventure
 Card Set Creation – For Him
 Layers and Butterflies

