Hello everyone and welcome to my blog. I’m super excited to share this heat embossing technique with you today.
I recently completed a course entitled, Impressive Heat Embossing, as part of Level 2 of the Altenew Educator Certification Program. The course was taught by Svetlana Marchenko, and she covered many different techniques for working with embossing powder.
Embossing powder is a fast melting powder compound that can be applied to a smooth surface to create a raised image through the application of heat. The color of the powder can be matt, metallic or even clear. Once you’ve stamped a design using pigment ink or a sticky ink like VersaMark Ink, you sprinkle the powder over the top, so it adheres to the stamped design, tap off any excess powder then melt it with a heat tool, to create gorgeous, shimmering effects.
There are many other ways to use embossing powder. You can use it to create a faux metallic look for an embellishment or focal point, or using clear embossing powder to create a resist effect. It was these two ideas which inspired me to search for a different way to use this amazing product. The technique I’m going to show you today uses an embossing folder to create a raised image (or the resist) and uses embossing powder to create the shiny or faux metallic background that allows the raised image to pop. It’s a lot easier to show you than explain, so there’s video below, followed by a quick explanation.
(Supplies used in today’s post are linked to sources. I may use compensated affiliate links at no cost to you. For more information about affiliate links, see my disclosure page. Thank you for using these links and helping me bring you more designs and ideas!)
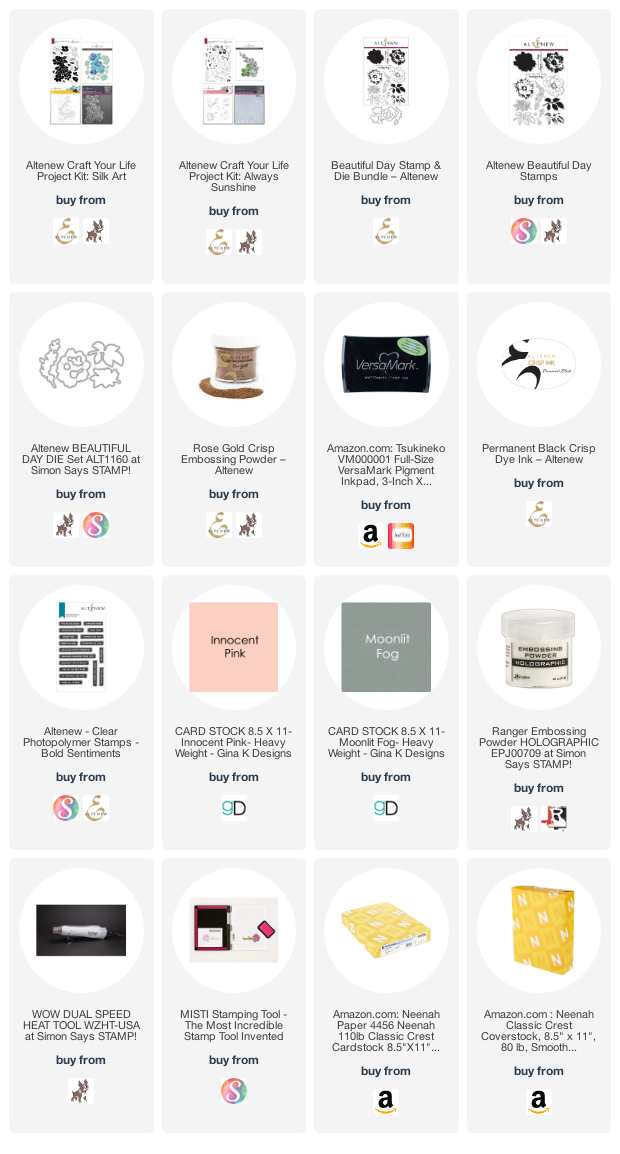
Featured Products
Altenew Beautiful Day Stamp and Die Bundle
Altenew Craft Your LIfe Project Kit Always Sunshine
Altenew Craft You Life Project Kit Silk Art
Altenew Be Bold Sentiments Stamp Set
Altenew Rose Gold Crisp Embossing Powder
Ranger Holographic Embossing Powder
For my first card, I used the embossing folder from Altenew Craft Your LIfe Project Kit Always Sunshine. I thought it would be perfect for creating a faux metallic background. I’ll also be using Altenew Beautiful Day Stamp and Die Bundle, and using some Rose Gold Crisp embossing powder. I used VersaMark ink to hold the powder, and used a brayer to apply the ink to the embossing folder. Finally, I chose a sentiment from Altenew’s Bold Sentiments stamp set.
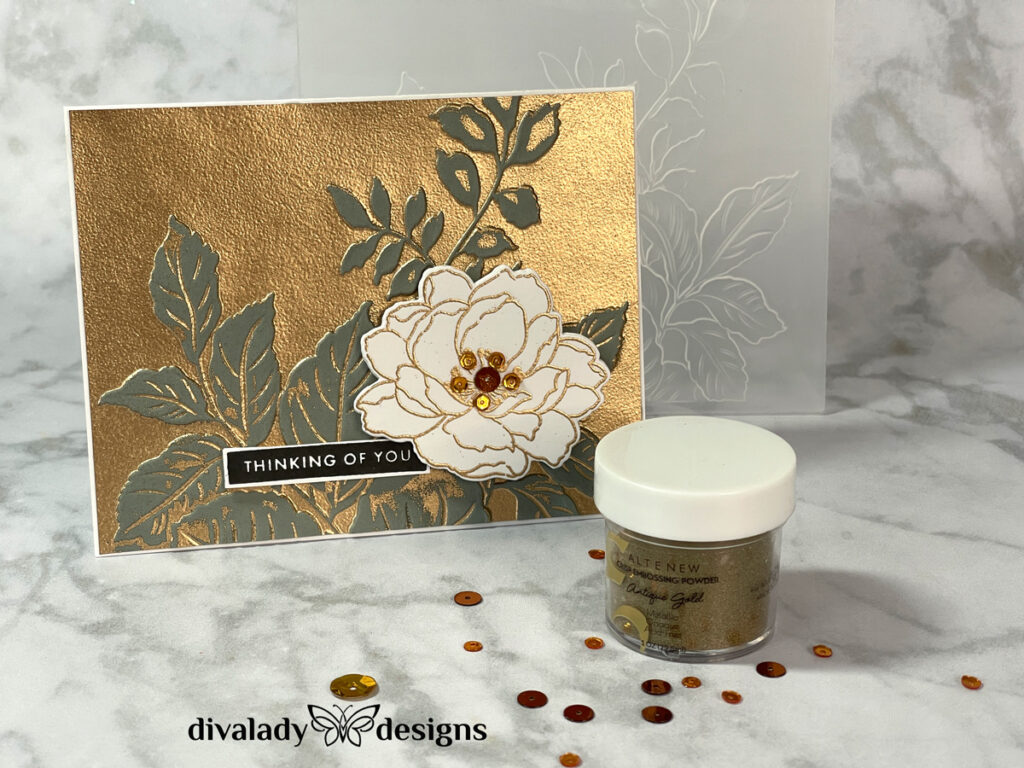
To create the card, I rolled LOTS of VersaMark ink on the “indented side” of the embossing folder and ran it through my die cut machine. I used a piece of Gina K Designs Moonlit Fog cardstock, cut to 5-1/2 x 6”. When you open the folder, you’ll see that the VersaMark ink has covered the entire piece of cardstock. It actually looks darker. Cover the entire piece of cardstock with Altenew’s Rose Gold Crisp embossing powder, making sure to cover every part of the cardstock. Heat up your heat gun and emboss.
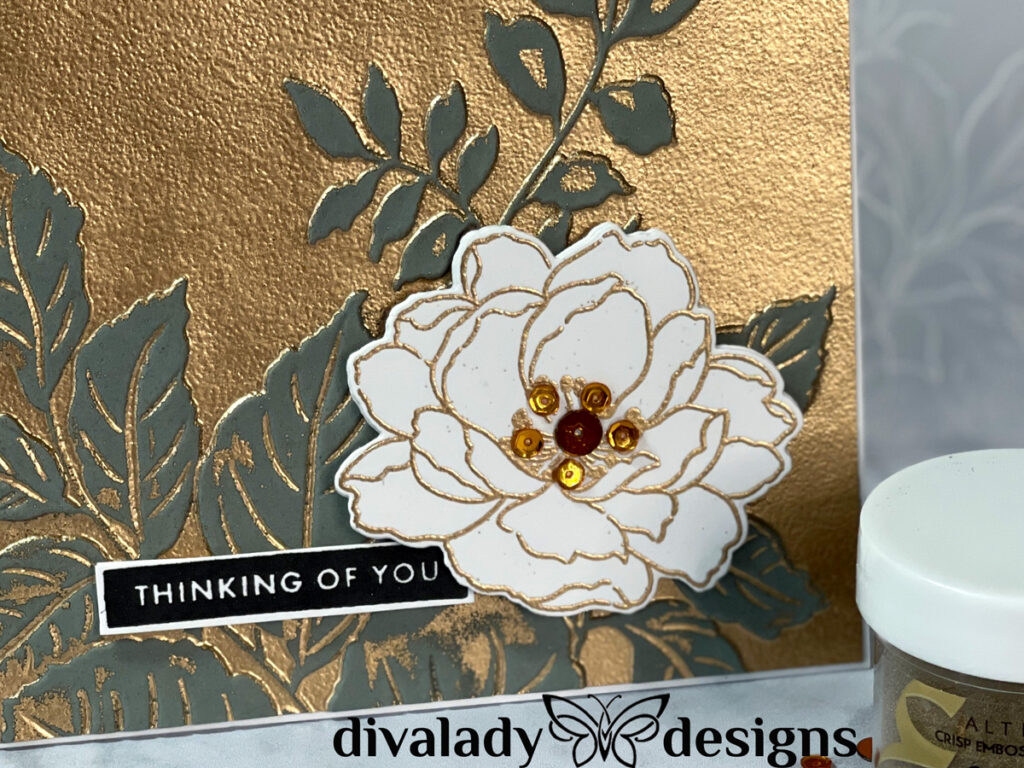
When it’s done, look at that gorgeous shine! I love how some of the powder got into the nooks and crannies of the image, and some is on the leaves themselves. It’s so full of texture!
I created a focal flower with Altenew Beautiful Day Stamp set and then cut it out with the coordinating die. For my sentiment, I used Altenew Be Bold Sentiments Stamp Set in Permanent Black Dye ink and cut it out, leaving a sliver of white around the edge. I also cut a few strips of white cardstock from the leftovers to glue behind the sentiment to give it dimension.
To assemble the card, I created a 4 ¼ x 5 ½ white card base, and trimmed my embossed panel to 4 x 5 ¼. After adhering the panel to the card base, I placed the white flower on the front using a few foam dots and tucked the sentiment behind one corner. A few coppery sequins finished off the card.
I was blown away by the incredible texture and faux metal feel of the embossing powder. I tried this technique with several other embossing folders using different color cardstocks and whatever embossing powders I had on hand. Let’s see a card using clear holographic powder!
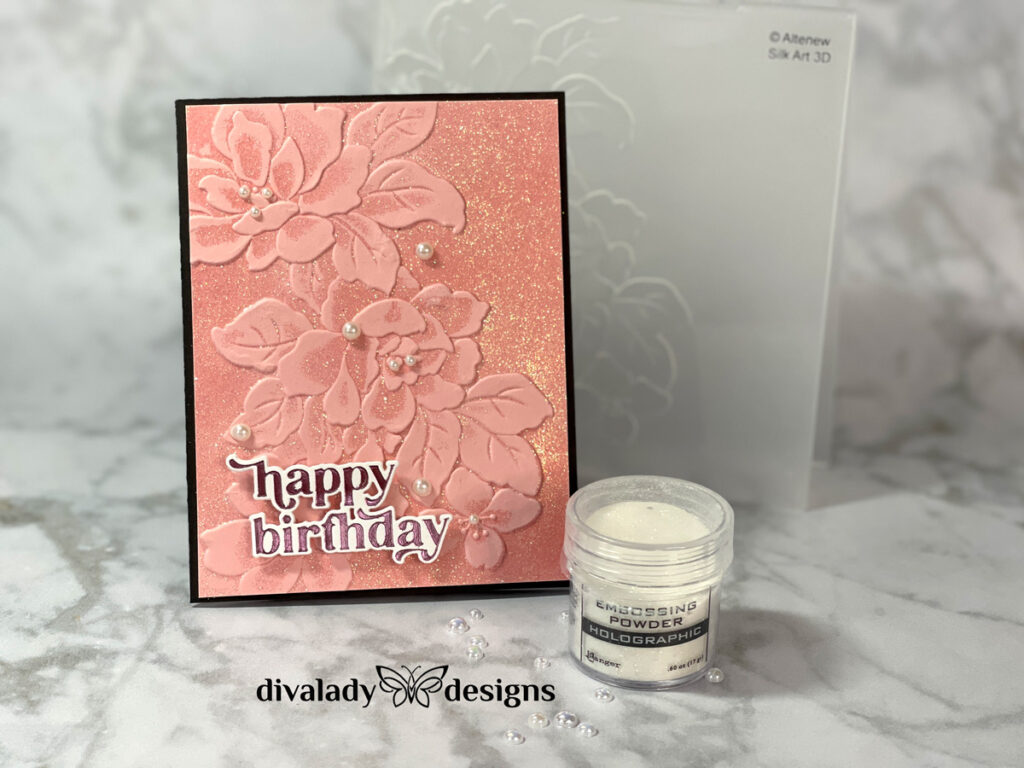
I loved the result of the holographic embossing powder on this card. Look at that shine!! The clear nature of the sparkly embossing powder darkened the background and let the raised image pop! I love how the raised pink image stands out against the slightly darker embossed background. It looks like you spent hours to create when it only took a few minutes.
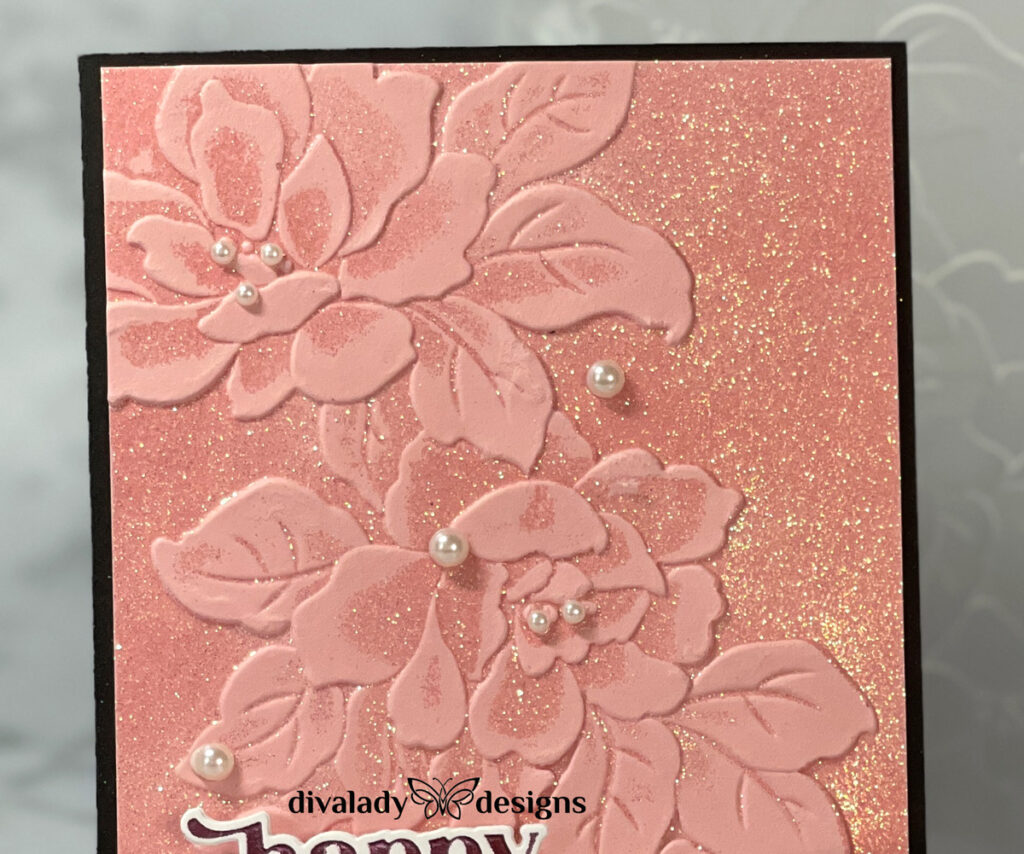
To finish, I just added a foiled sentiment from my stash and some pearls and the card was complete. I hope you’ll search through your stash of embossing folders and powders and give this technique a try! It’s super easy and you won’t believe the gorgeous results!
Thanks so much for stopping by! Happy Crafting!
 Irresistible Floral Layering
 Painting with Shimmer
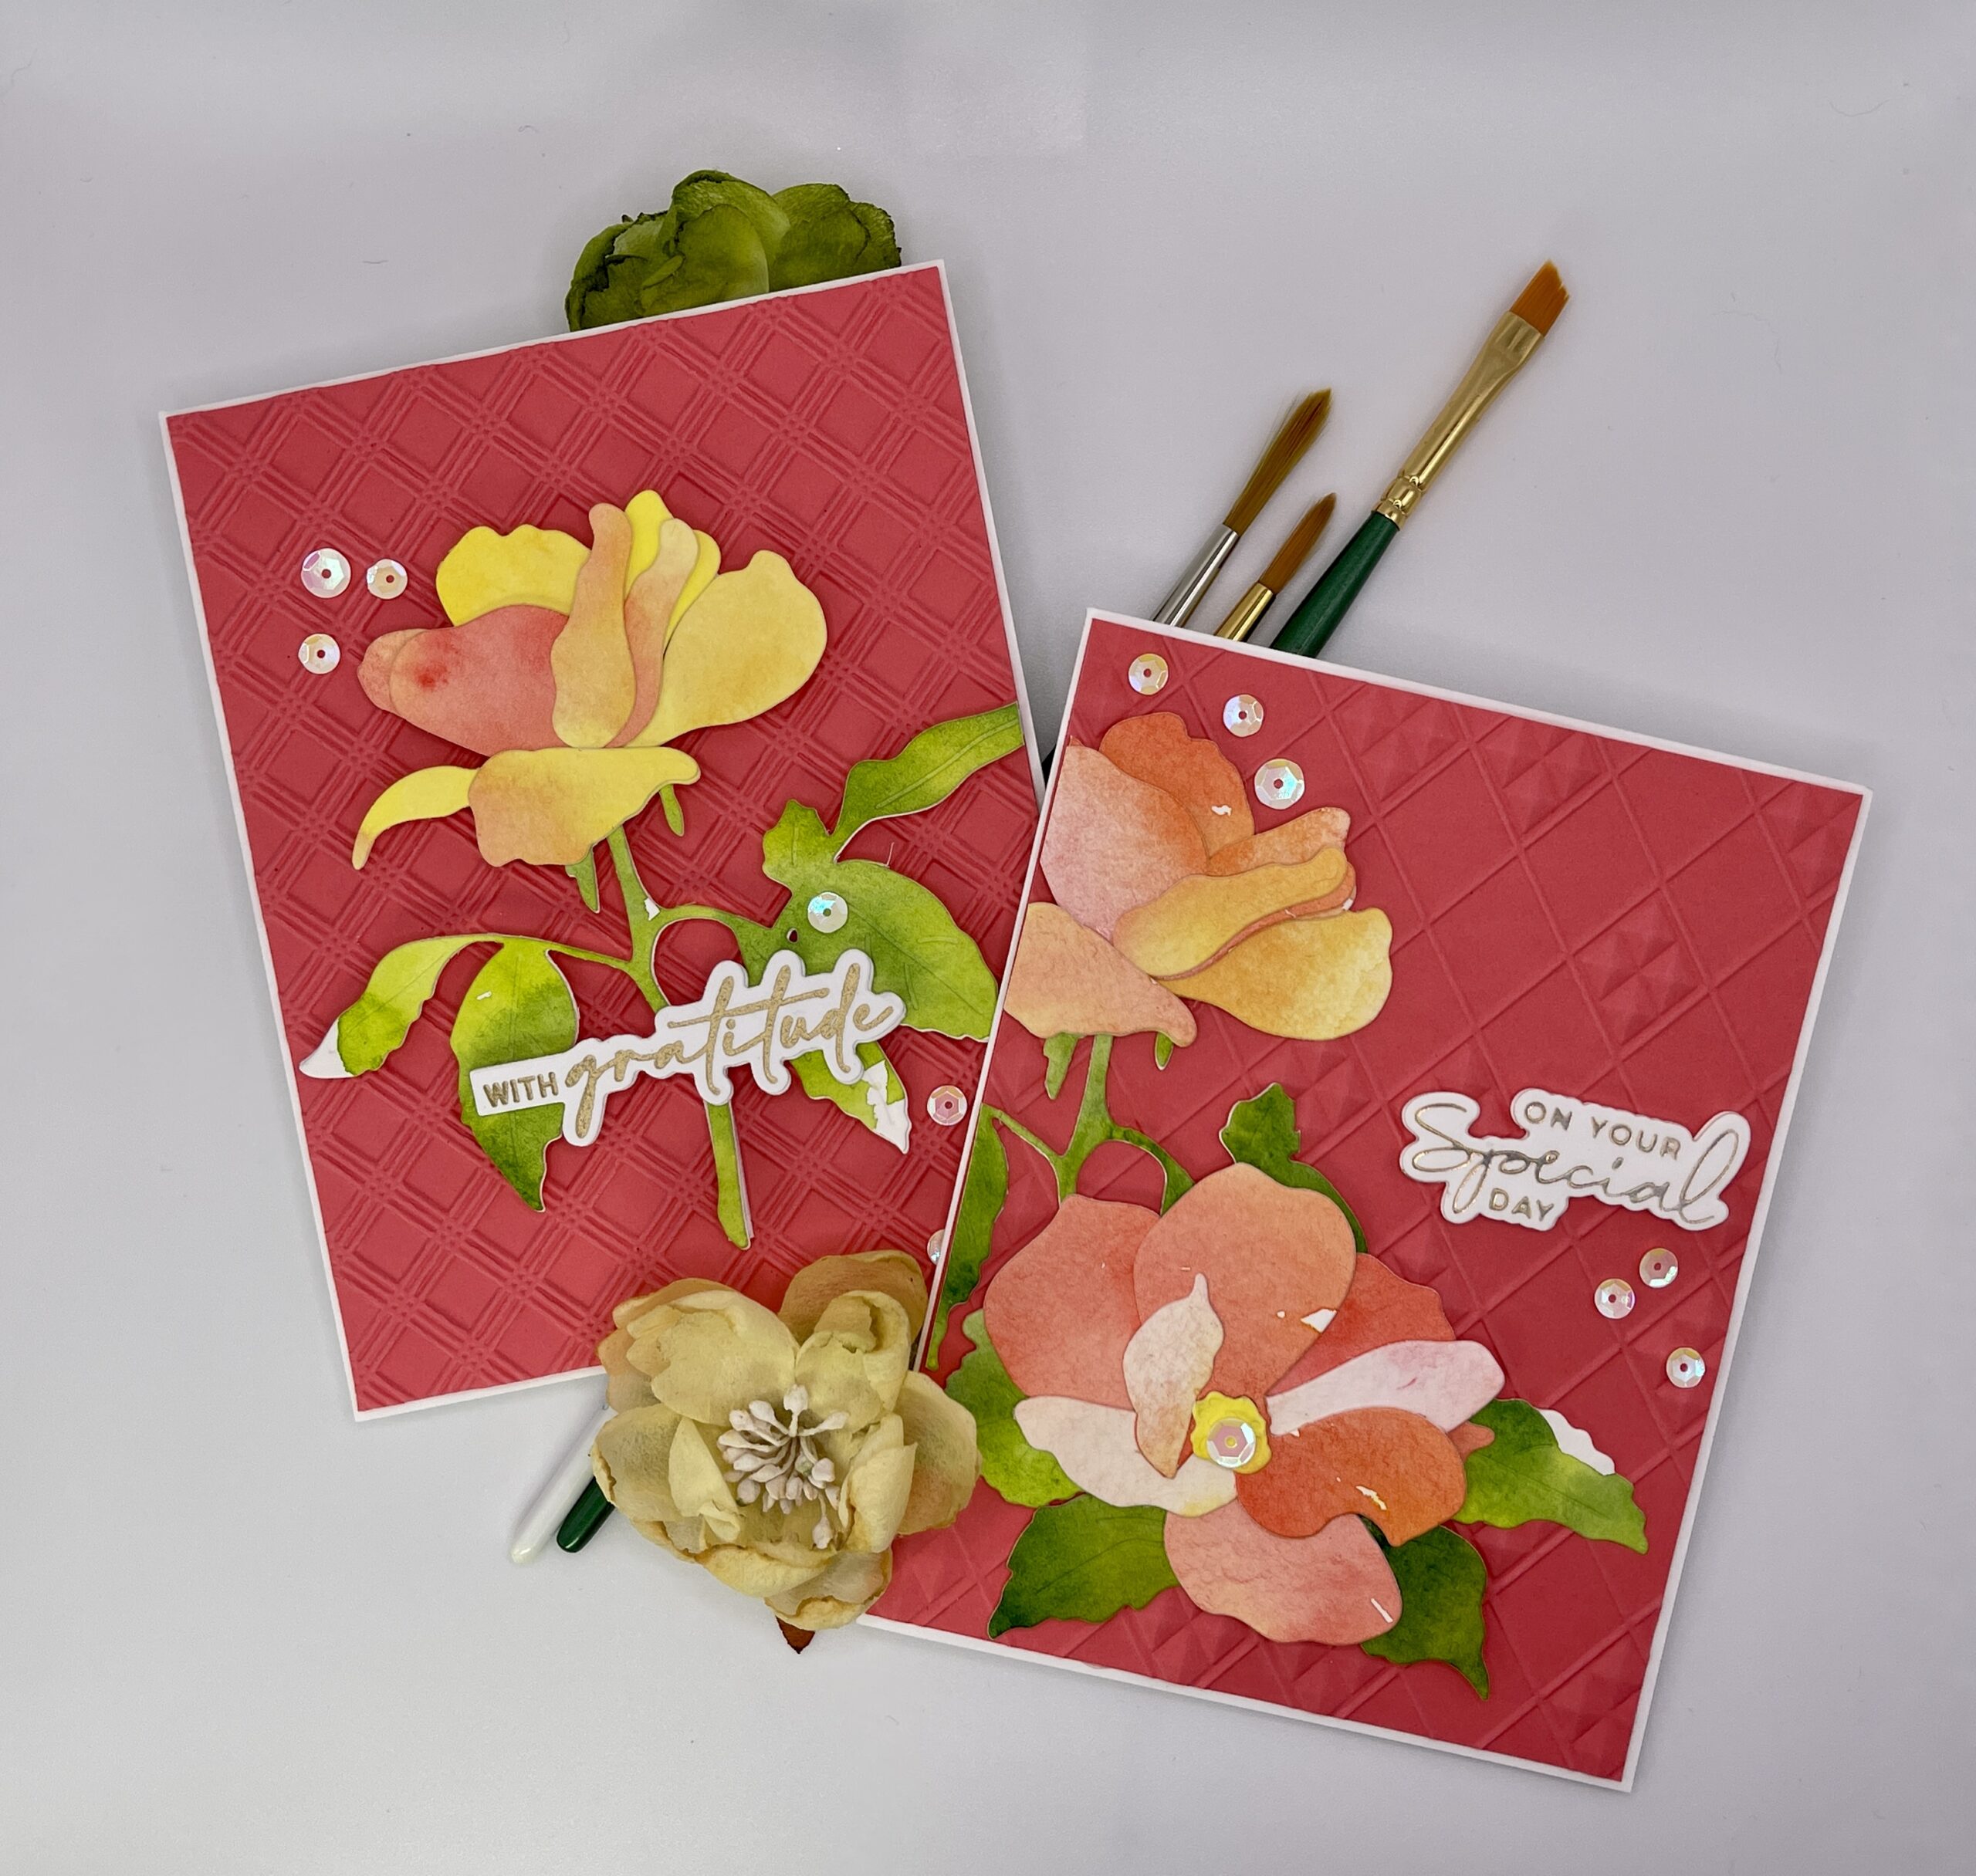 Watercolor and Die Cuts
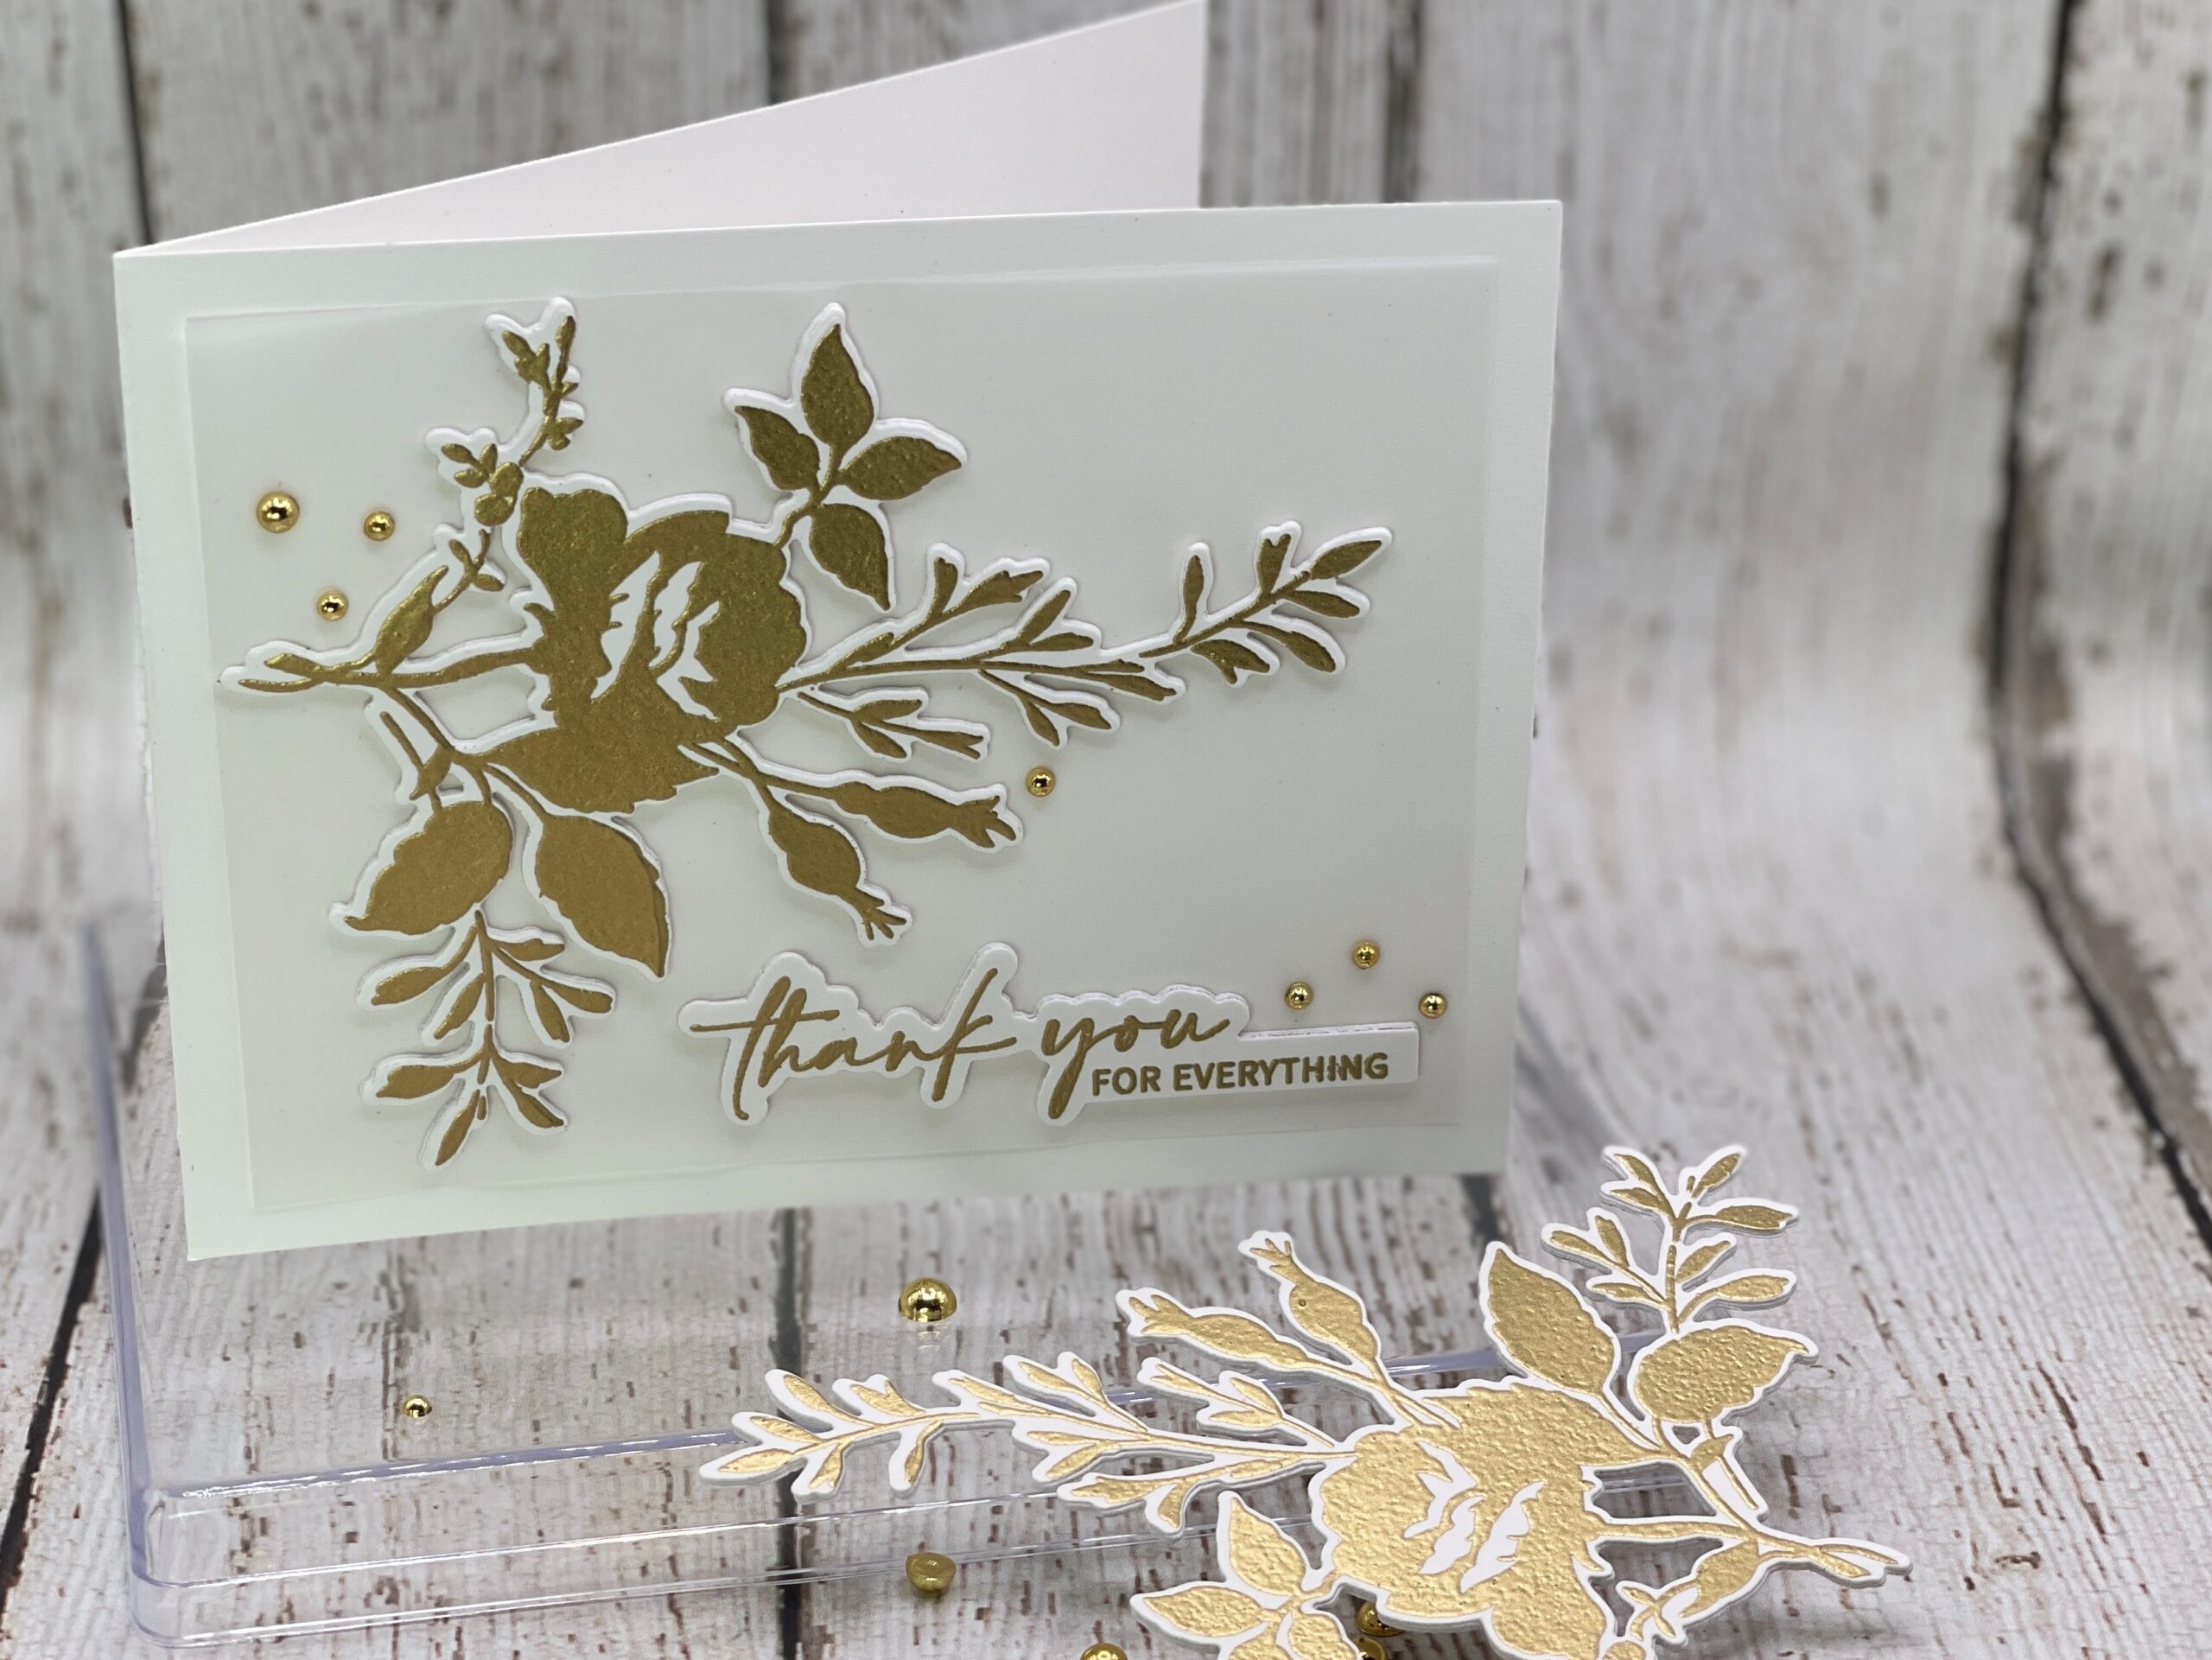 Simple and Elegant


Absolutely stunning cards, Deborrah! I love creating this look! Well done!
Such beautiful cards! I forget that embossing powder doesn’t always have to be the ‘front and center’ item on a card. These backgrounds prove that in spades!!! TY fur sharing this great technique! 🧑🏼🎨😀