Hello and welcome to my blog! One of my all time favorite die cut sets is Spellbinders Be Bold Blooms. I’m not the only one; it is perpetually “out of stock” on every website, and when it does come back in stock, you have about an hour to snatch it before it’s gone again. I was fortunate enough to obtain a set about a month ago and I’ve enjoyed playing with it ever since. I thought that today, I would share some of the cards I’ve made with this set and describe some fun techniques along the way.
It’s amazing the different looks one can achieve with this die-cut set. Let’s take a closer look at each of the cards.

My first card uses a combination of die cutting and dry embossing. I wanted to do a partial die cut at the bottom of the card so that you could see through to the layer underneath. I used Spellbinders Stacked Decorative Edges for the die cut at the bottom. It was the Die Cut of the Month for May 2020 at Spellbinders and contains a number of edge dies that are just gorgeous. I combined this with the Gina K Designs 5×7 Lattice Embossing Folder.
To achieve the look, I first die cut the bottom of the card, then lined up the rest of the card front with the edge of the embossing folder. I ran the card through just to the edge, and I couldn’t believe how gorgeous it turned out!
For the flowers, I decided on a light blue theme and cut lots of flowers, stems and leaves from Be Bold Blooms out of some Spellbinder’s Essentials Cardstock – Glacier, Silver Fox and Lunar Gray. I also used Simon Says Stamp Silver Glossy Cardstock and In the Navy from Gina K Designs. Then, I just played around mixing and matching the flowers and leaves until I was happy with the look. I put a 4×5-1/4″ panel of Glacier Cardstock on the inside so that the light blue shows through the lattice die cut at the bottom.
Finally, I chose a sentiment that I had made from Pinkfresh Studio – Hot Foil Plate – Celebrating You. This is another of my favorite sets. It is a one-piece hot foil plate containing several different sentiments. Whenever my mojo takes a vacation, I pull out my sentiment sets and create a ton of them and keep them in a box. Then, when I need a sentiment, I just look through the box for the perfect one. This particular set has a coordinating stamp set and die, and yes, I have all three (I’m a glutton). For this sentiment, I foiled it with my Spellbinders Glimmer Hot Foil Machine and Pewter Foil.

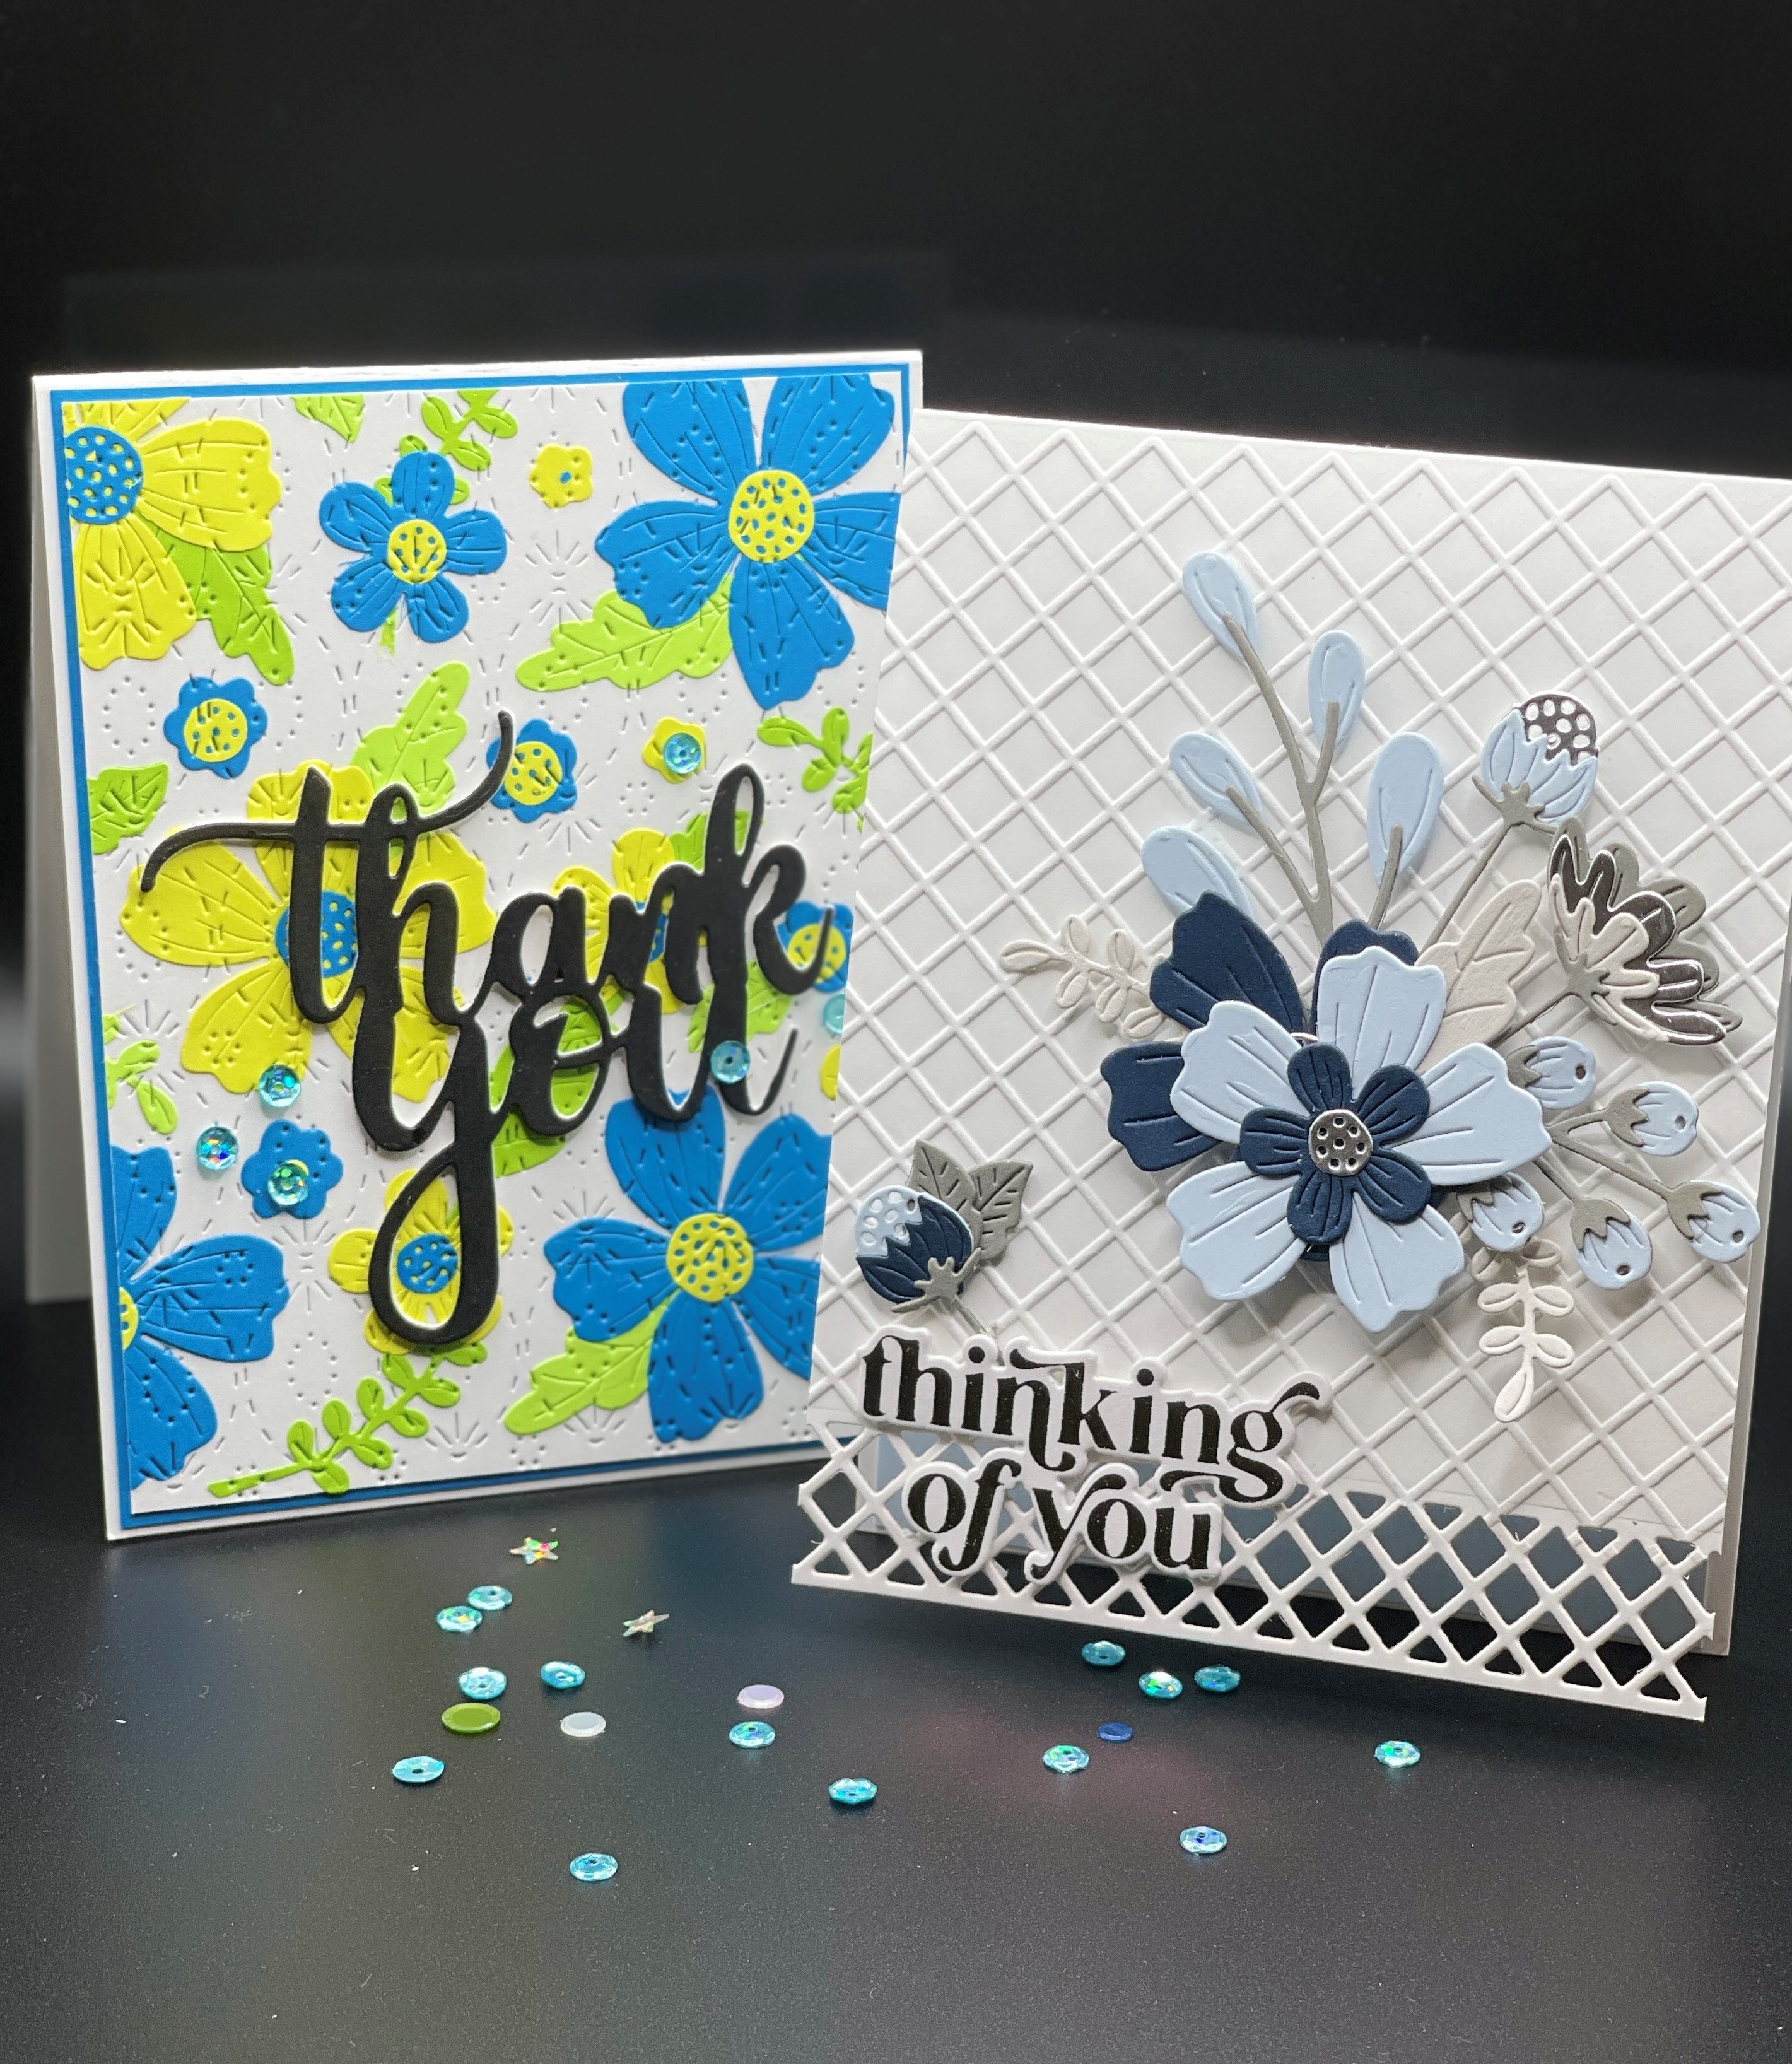
My next card has a totally different look! I used the same Spellbinders Be Bold Blooms die cut set and cut my blooms out of two colors, and the leaves out of a coordinating green. I created an arrangement on some Neenah 80lb Class Crest Solar White cardstock, then used the gorgeous Intricate Stitched Ovals Coverplate Die from PinkFresh Studios on top. I love the incredible texture this die gives to the card! It doesn’t actually CUT through the cardstock, but rather creates a pierced pattern that looks like quilting stitches over the front and totally changes the look of the blooms.

To finish my card, I used the Simply Thank You die from Altenew cut from Glossy Black cardstock and added some sequins for some bling. You’ll notice that I stacked several die cuts of the Simply Thank You to give it some dimension. I prefer stacking layers to using foam tape whenever I can. It holds up beautifully in the mail and looks beautiful, even from the side.
I hope that you are inspired to create your own fun cards and to try different techniques. Happy crafting!!
 Card Set Creation – For Him
 Dancing with Spellbinders
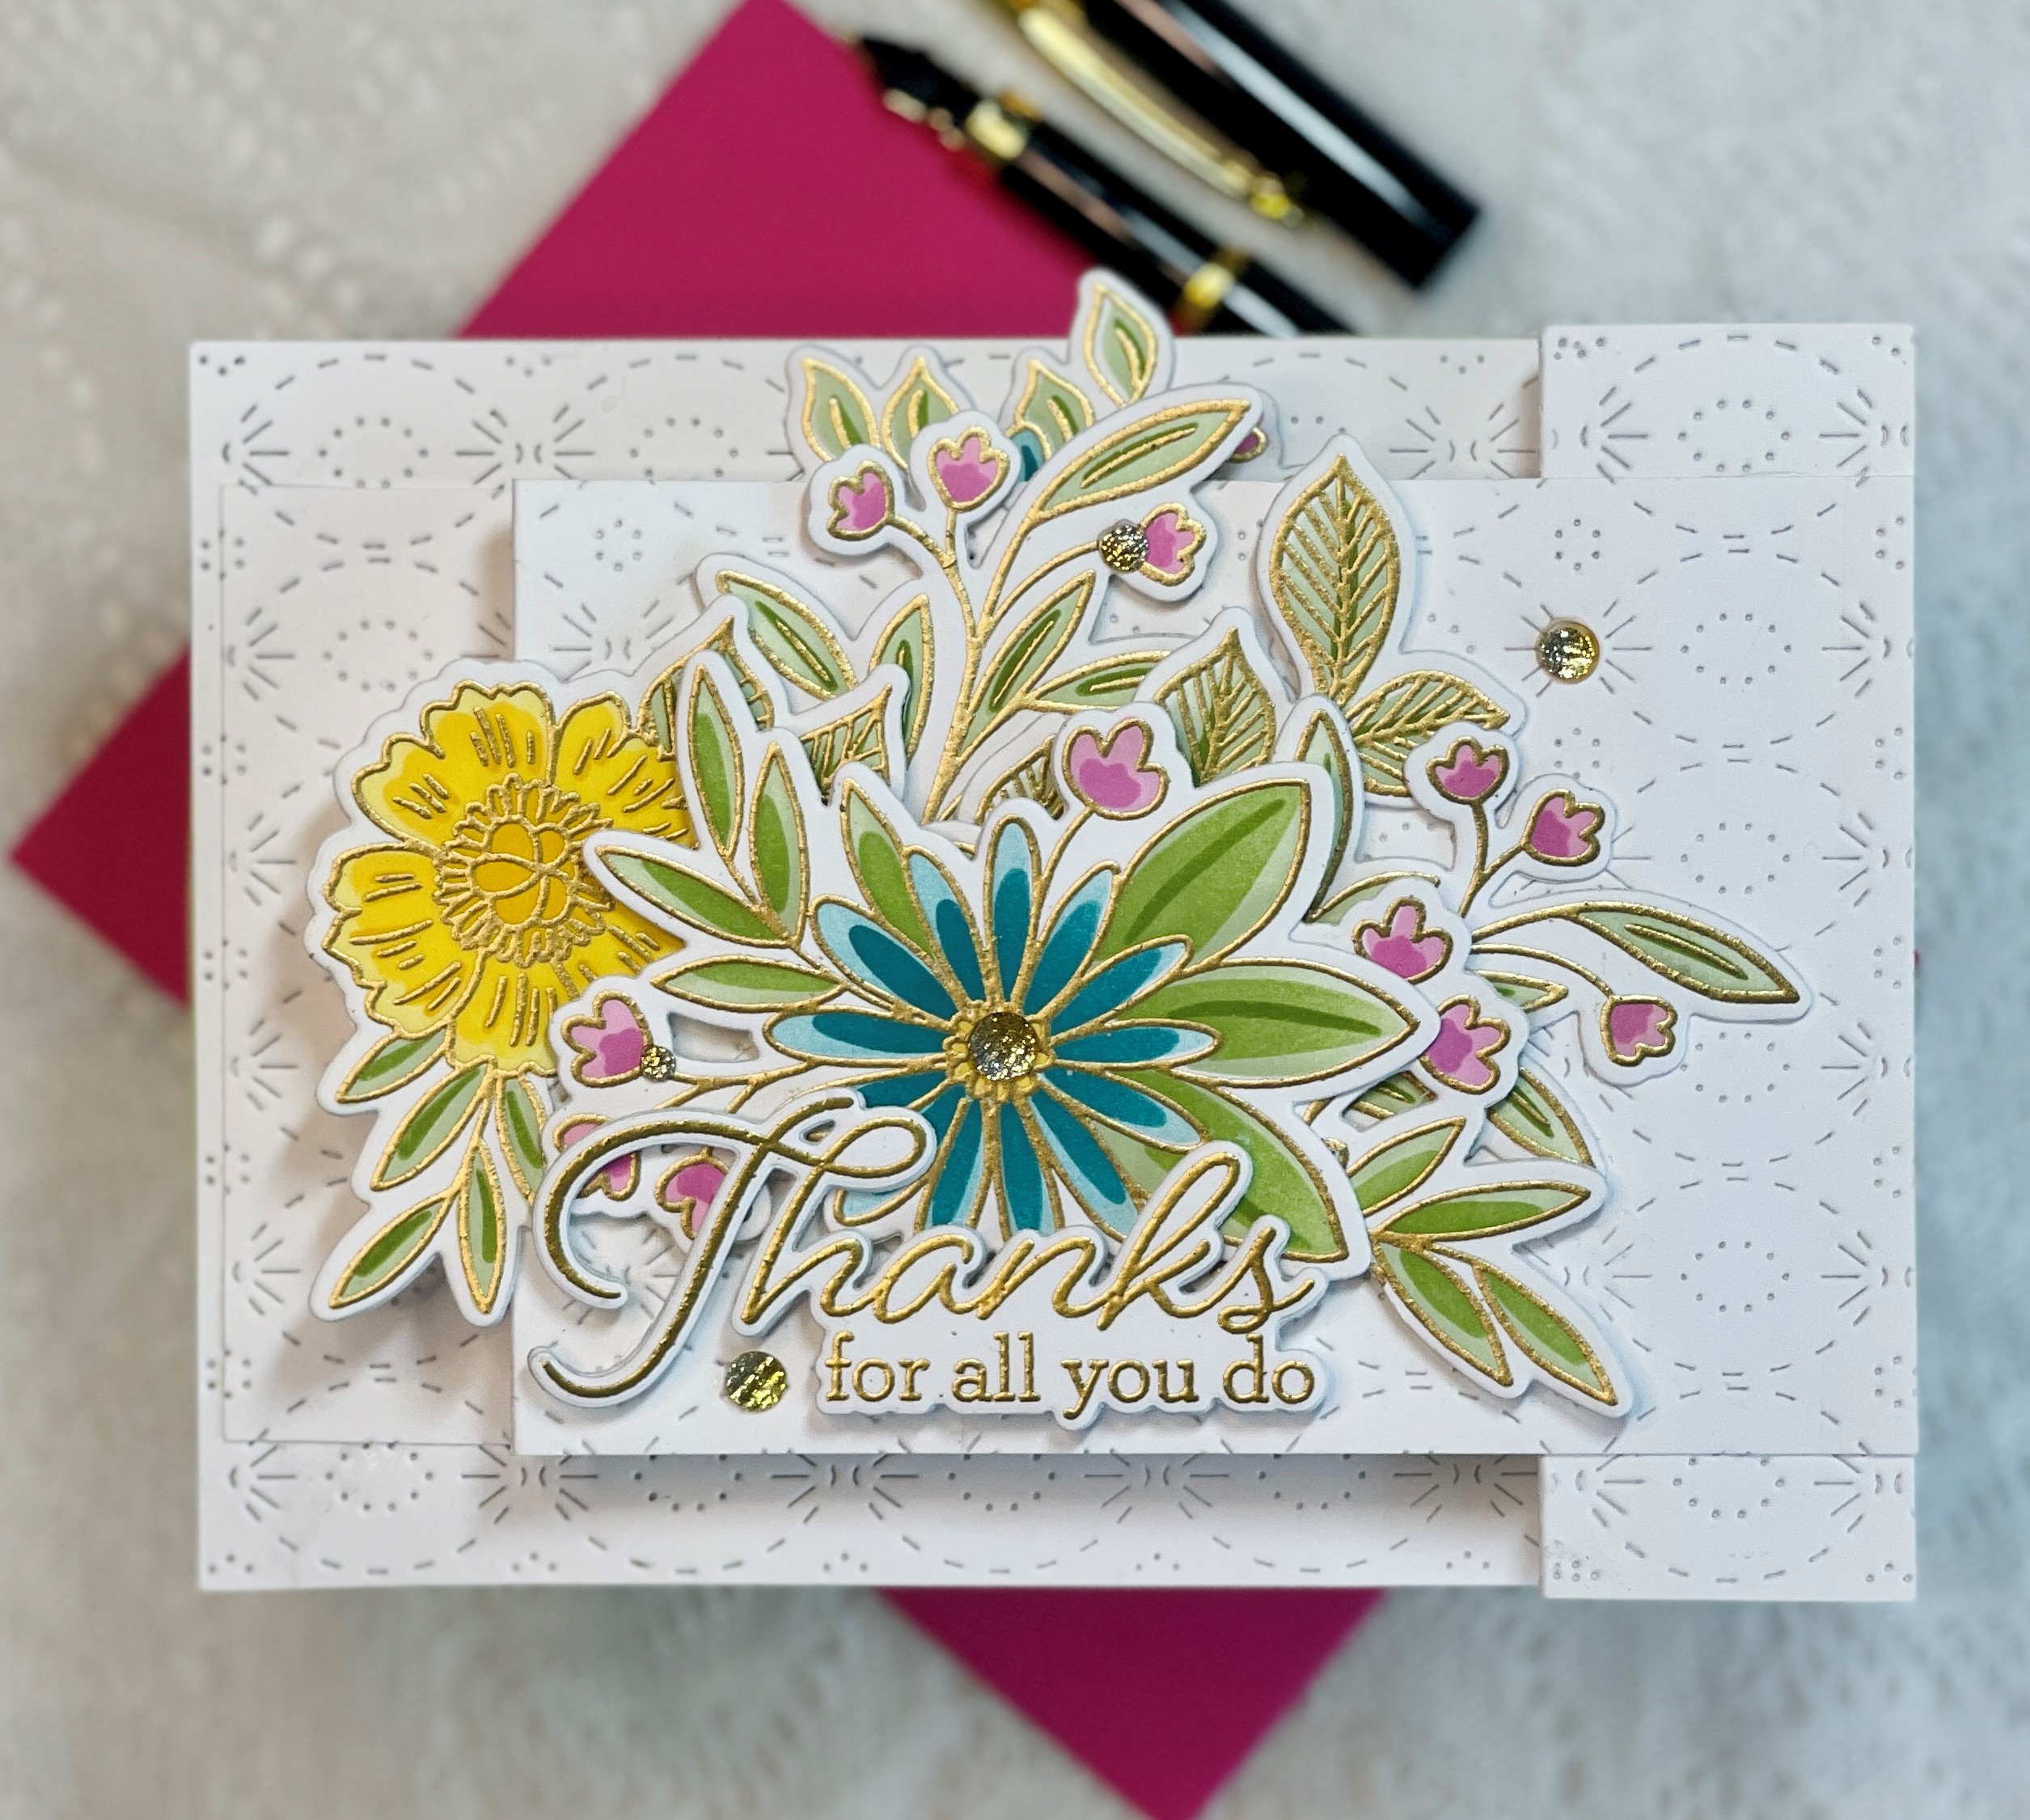 Pop-Up Surprises
 My Favorite Color Rule

LOVE LOVE LOVE IT!
— Dalis