Craft Your Life Project Kit: Silk Art
Hey everyone! I’m back today with a card project I created for the Altenew Educator Certification Program.
As I work my way through the lessons, I’m amazed to see so many familiar techniques used in creative ways. This class, Easy Ink Blending Techniques, was taught by Amy Lee. Amy is such a talented woman, full of creative ideas and tips and I learned a lot!
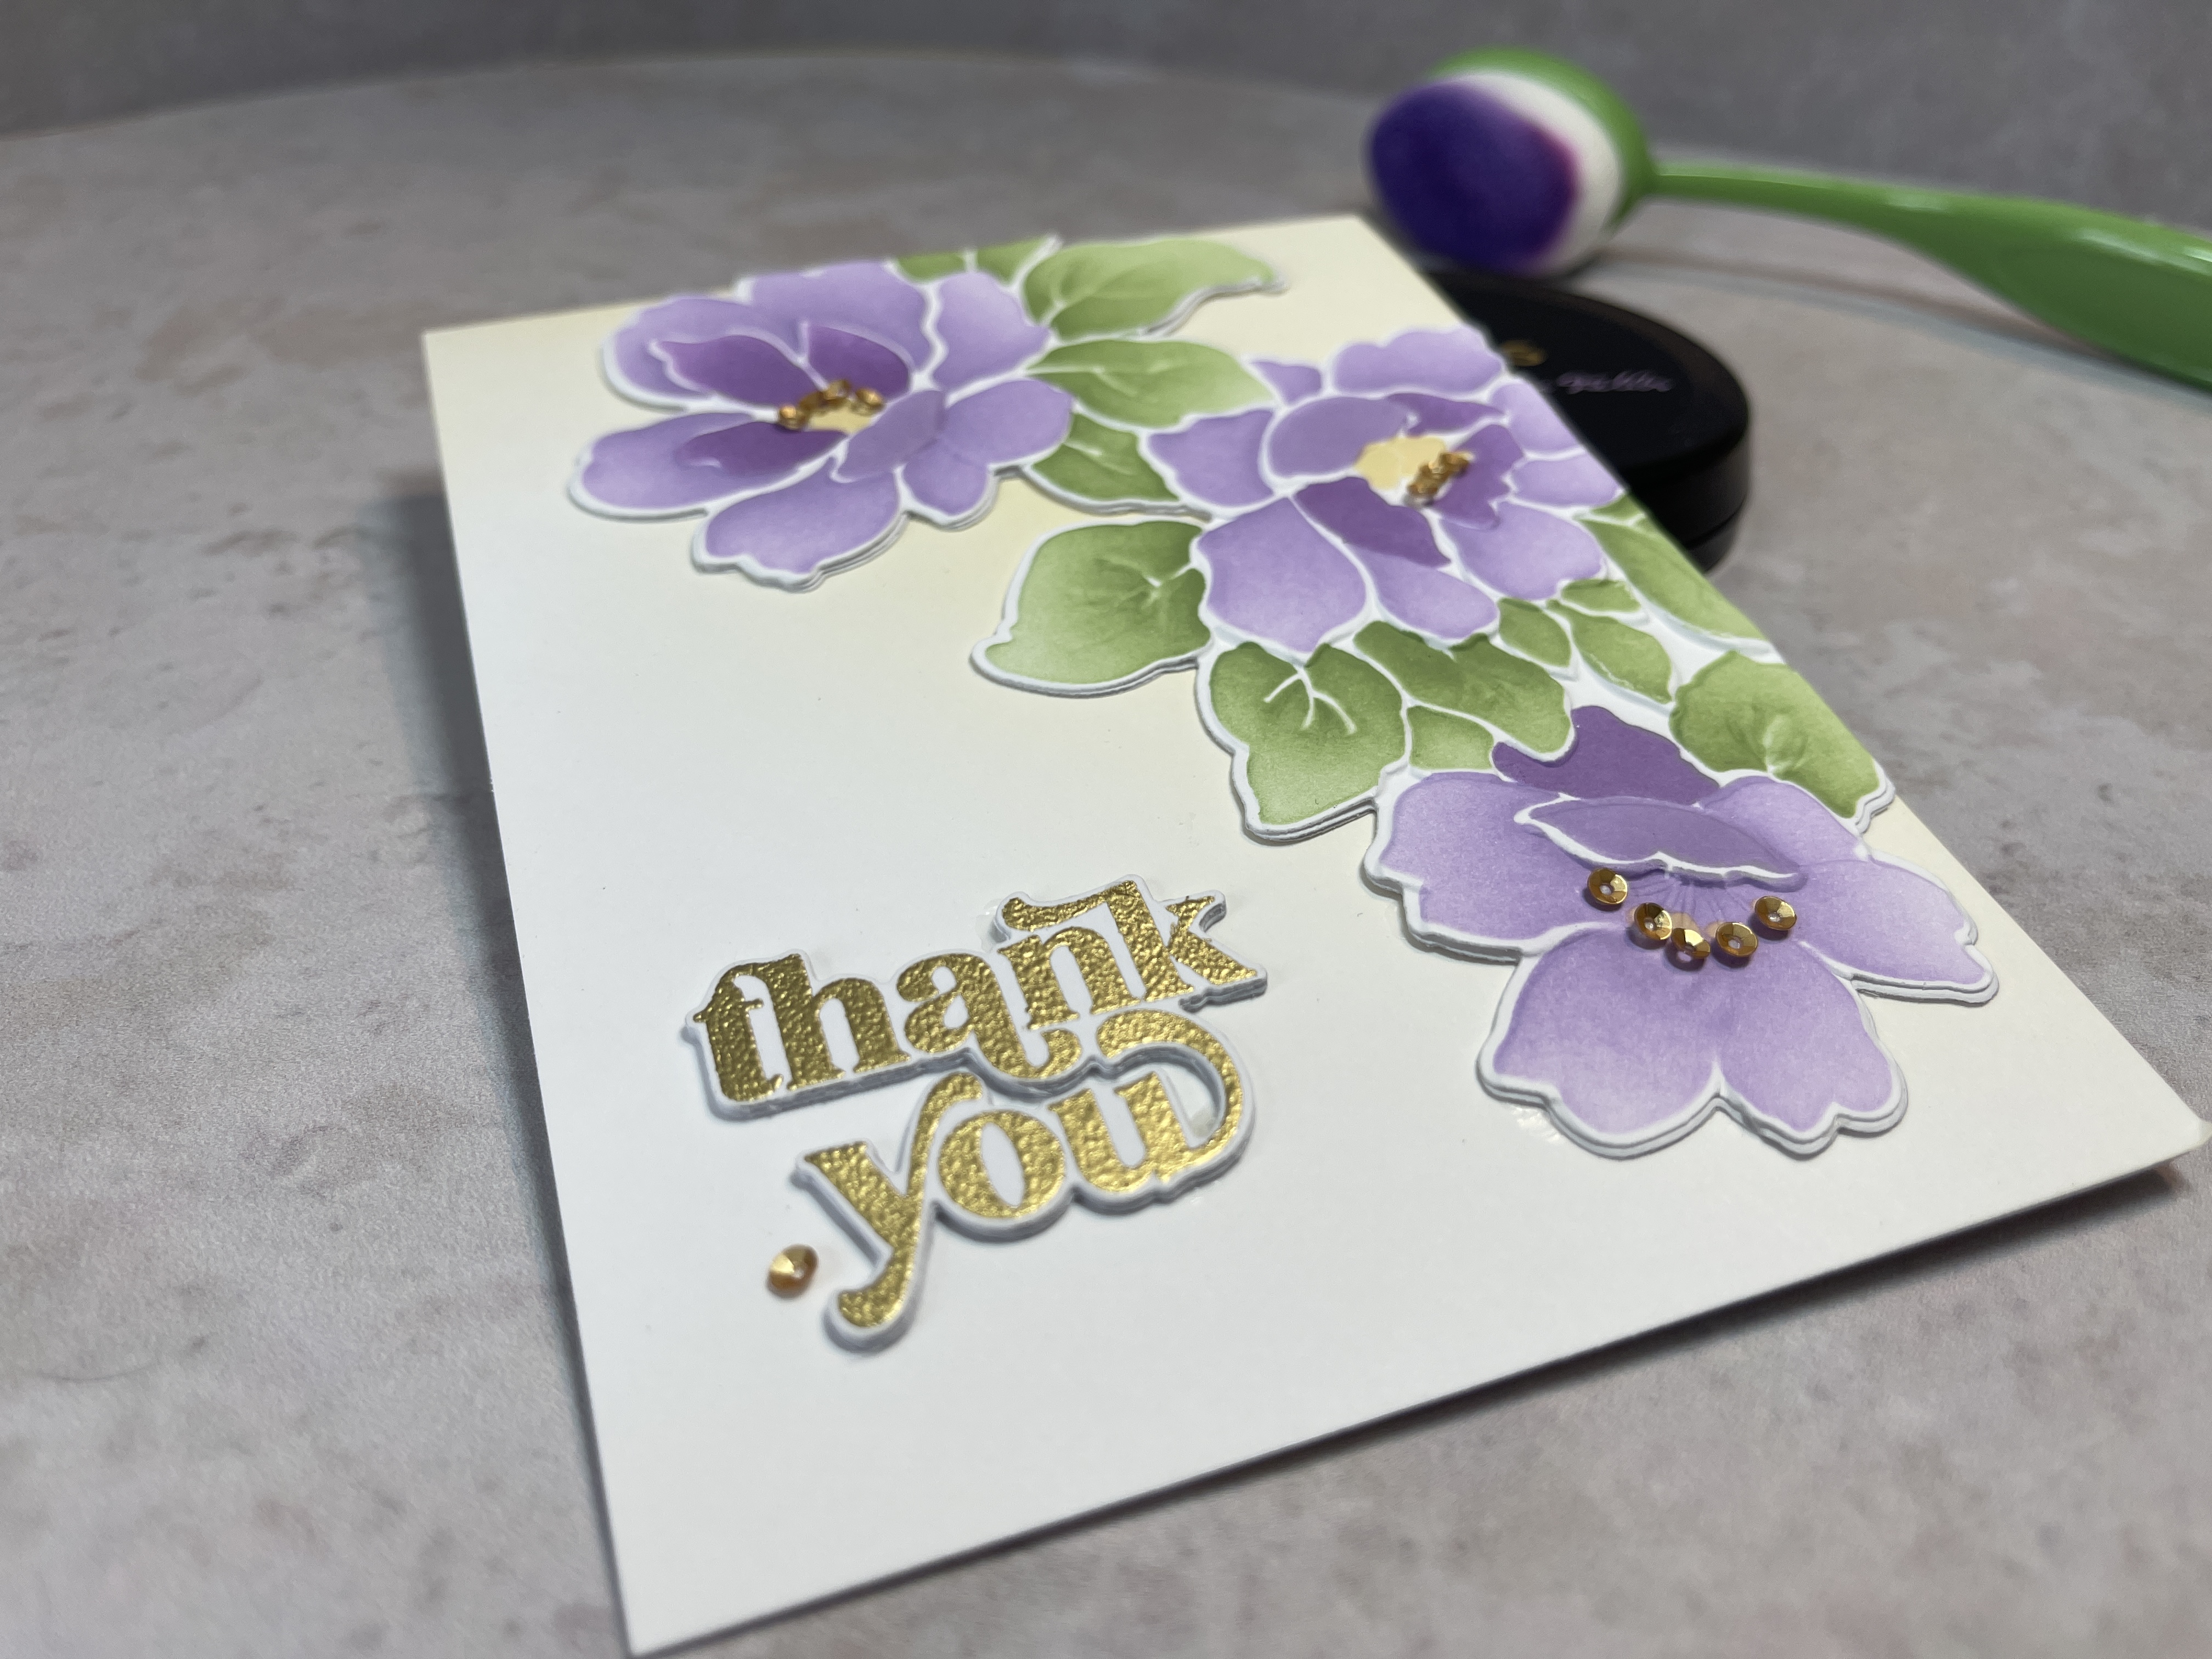
There were a total of six lessons in the course and each one was filled with tips and techniques for ink blending. I decided to stay simple with the ink blending and combine it with some stenciling. I chose to use Altenew’s June Craft Your Life Project Kit stamp set, Silk Art. The Craft Your Life Project Kit is one of Altenew’s subscription series. Each kit comes with a stamp set, coordinating die cuts, stencils and embossing folder – all four items for $49.99 when you subscribe. I always look for these types of coordinating kits and you really can’t beat the price.
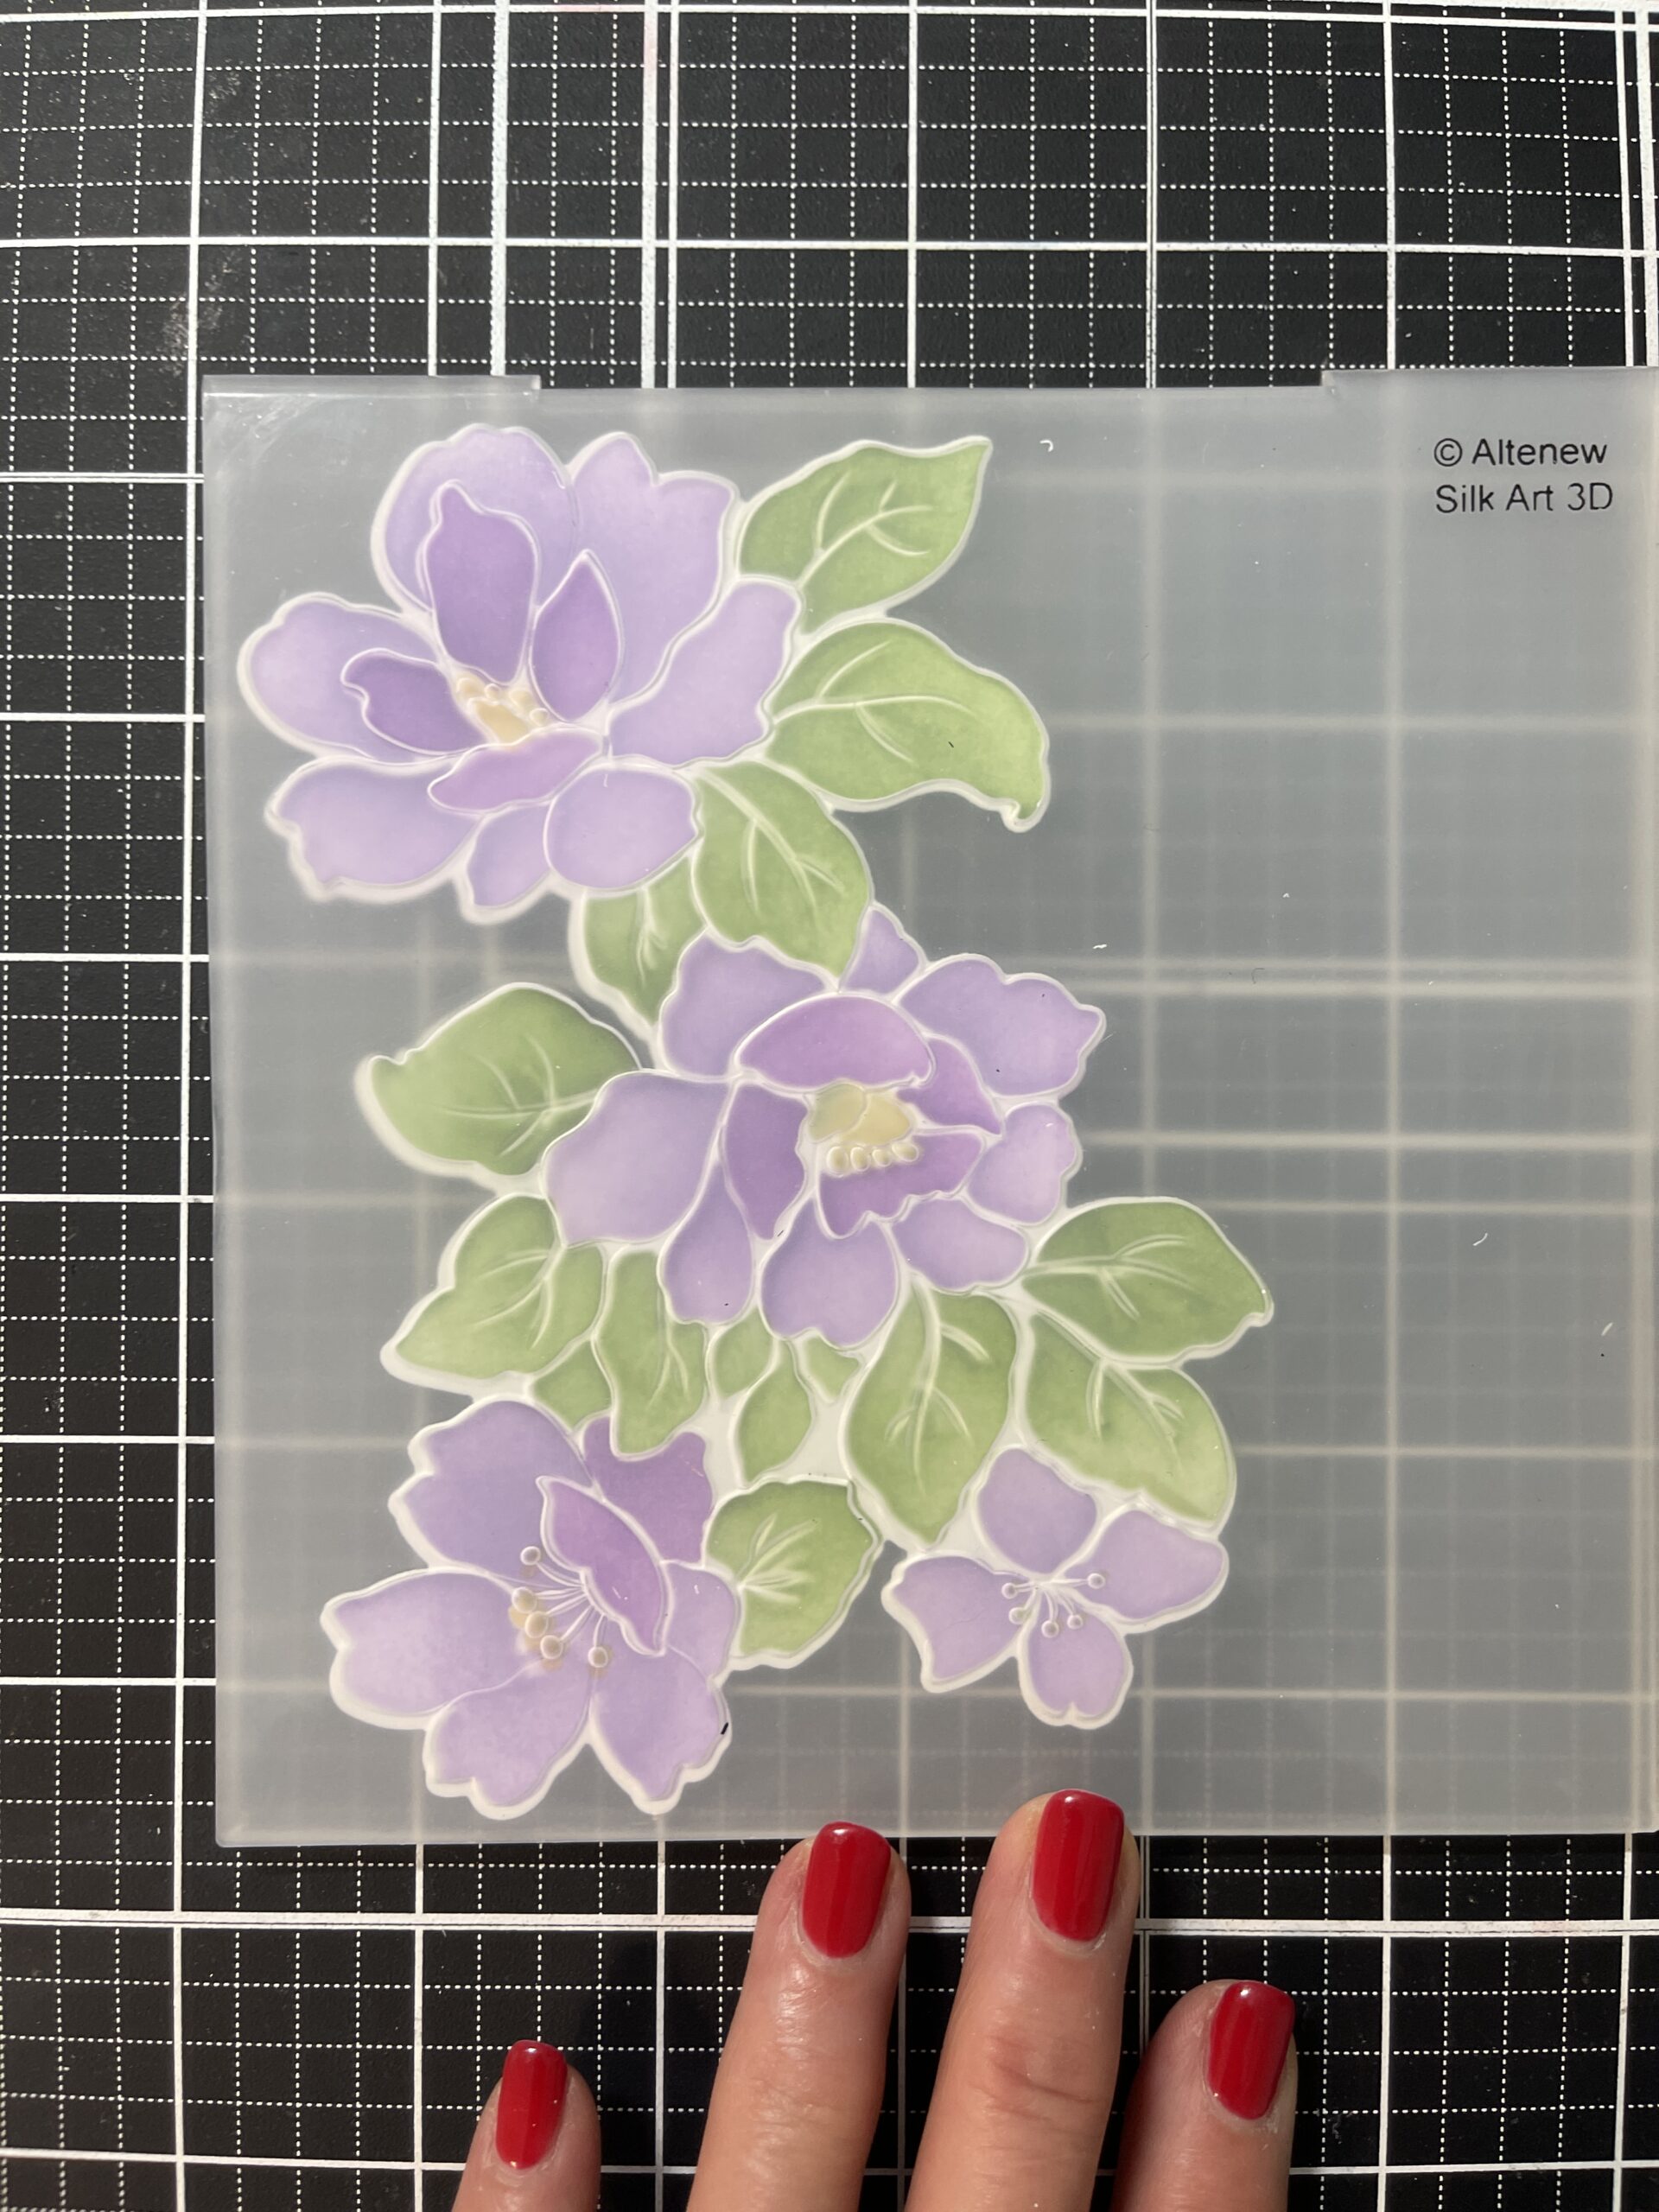
I’m in love with this month’s Project Kit! It comes with a stamp set, coordinating stencils, die and embossing folder. The main image is a gorgeous cascading flower which I chose for my focal point.

To begin my project, I die-cut the image, then placed it on my Brutus Monroe Sticky Mat. (I. LOVE. THIS. MAT.) By using the sticky mat to hold the die-cut, I can easily place my stencil and apply ink and it doesn’t shift or move!!! I used Altenew Crisp Dye Inks – Lavender Fields, Deep Iris, Forest Glades and Buttercream for my flower. I stenciled the flower on 80lb Neenah Classic Crest Solar White cardstock – the smoothness of this particular cardstock is perfect for stenciling and ink blending.
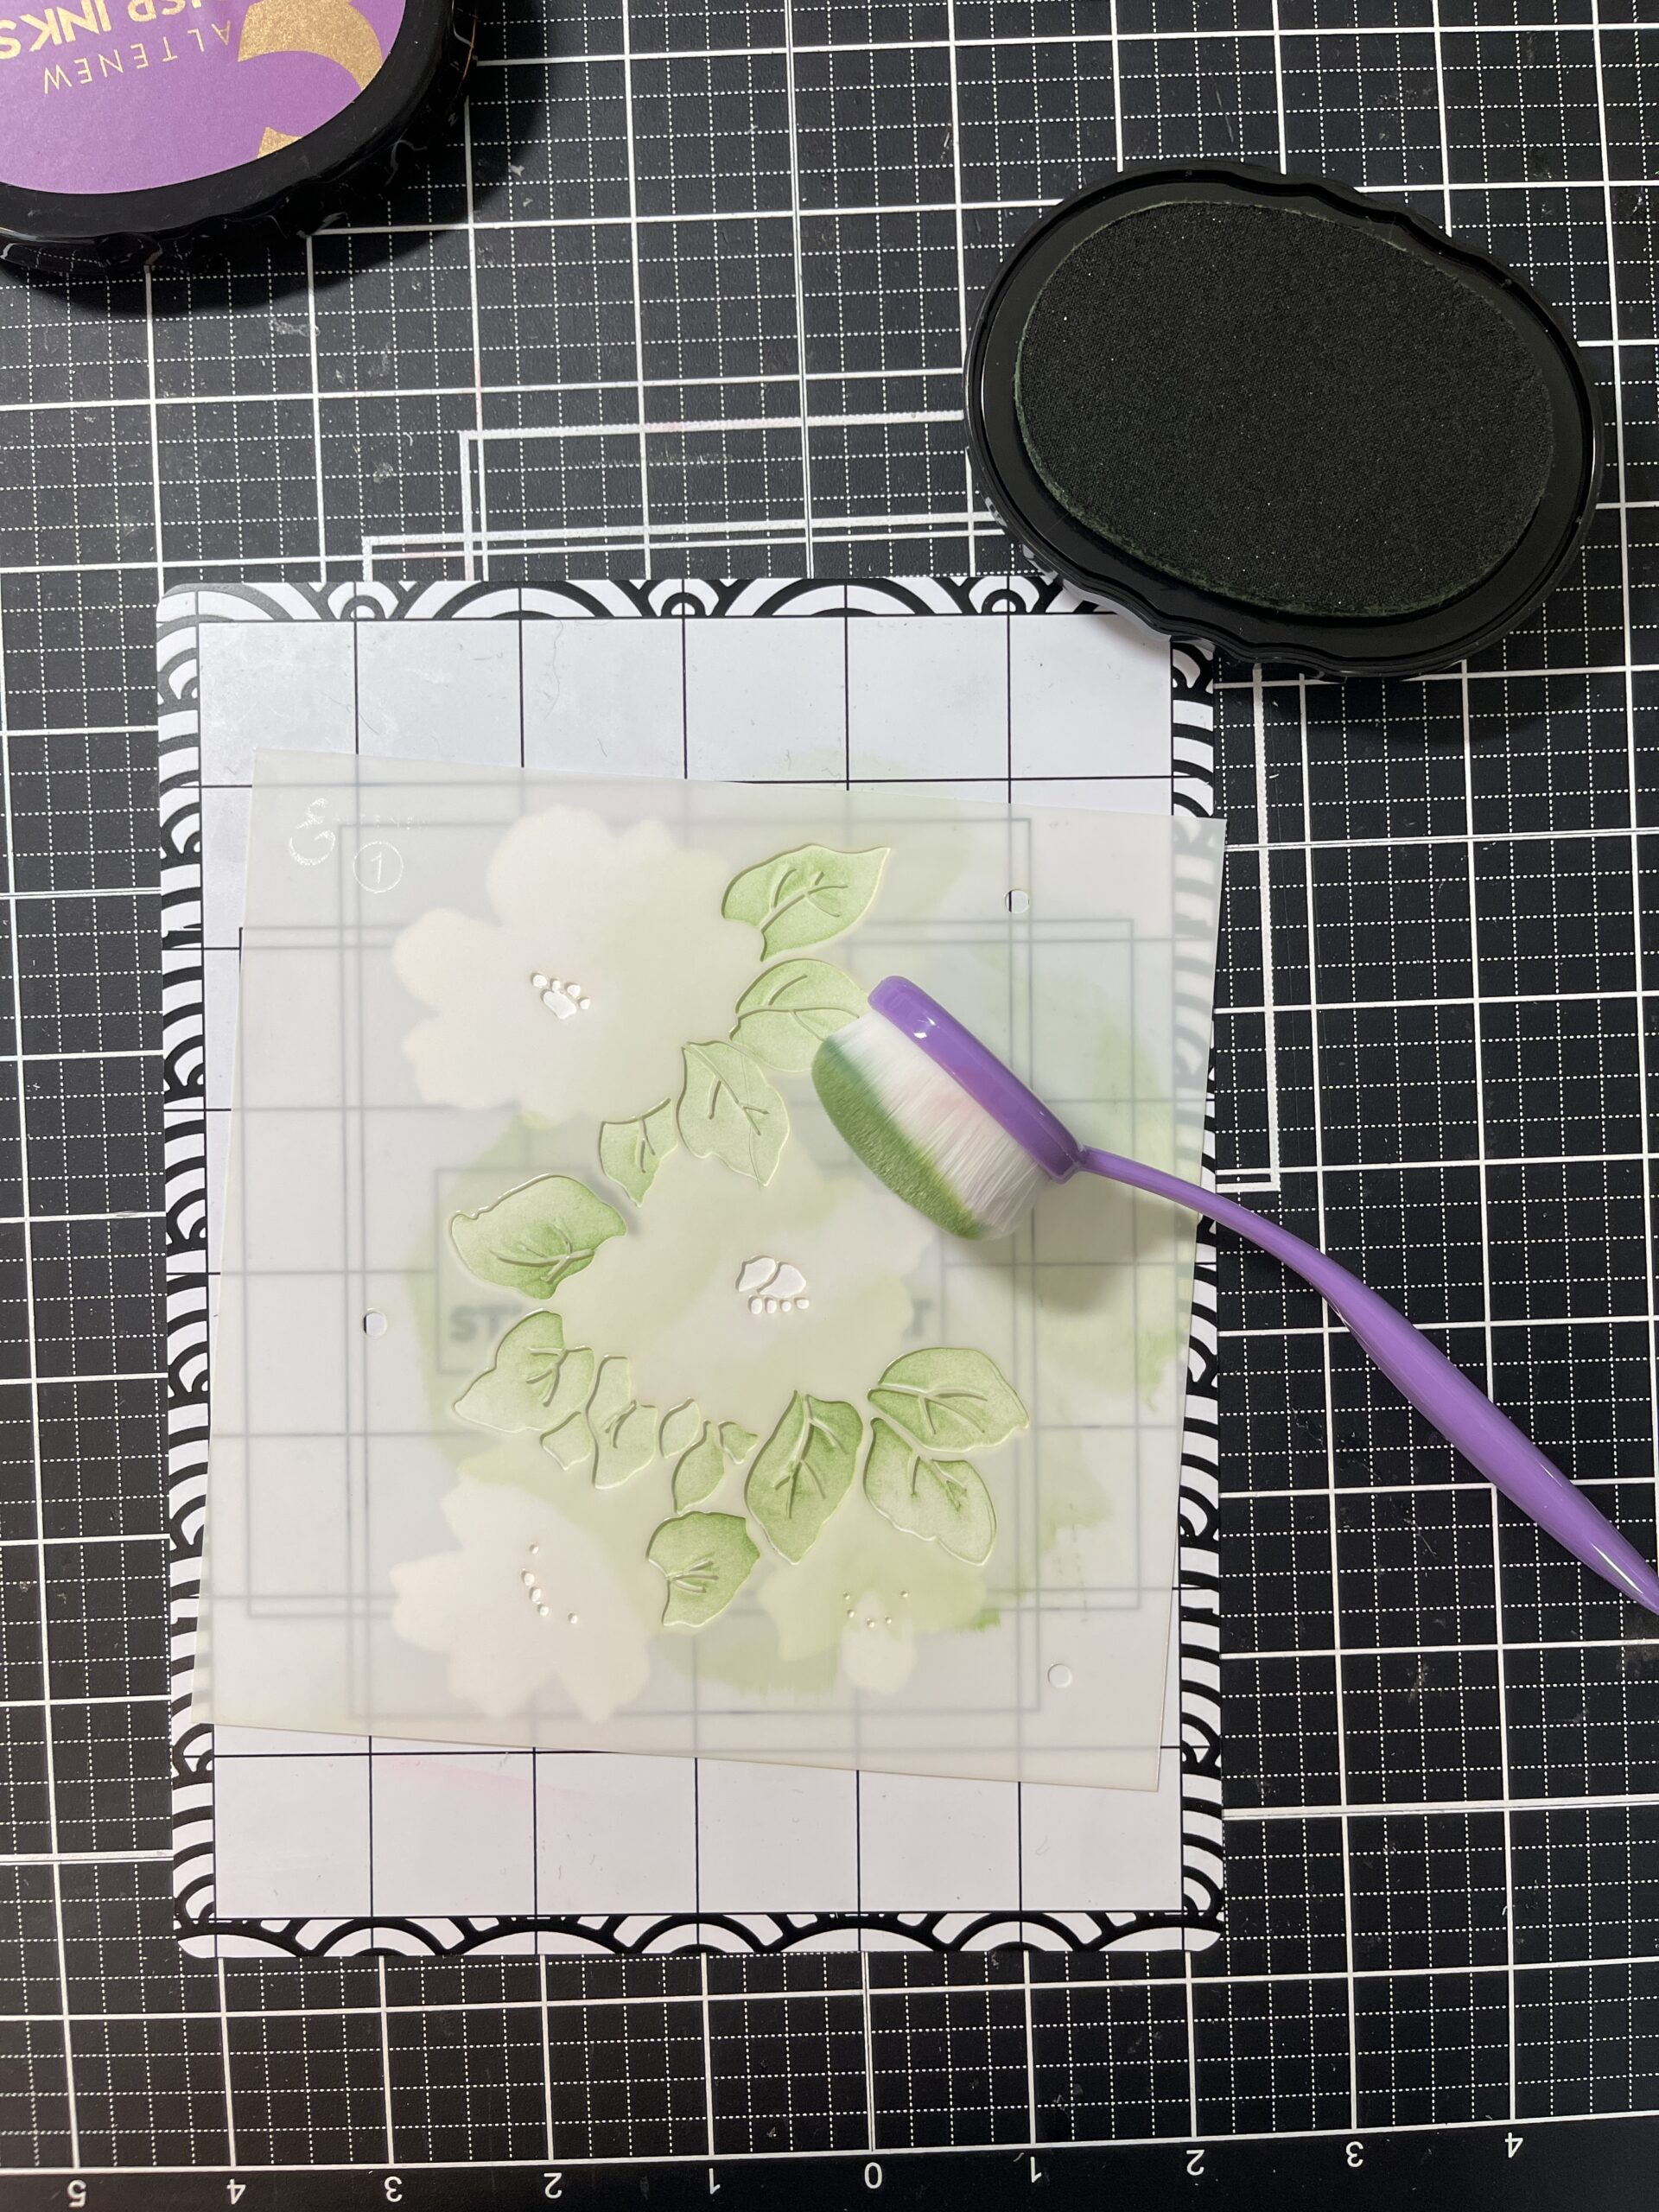
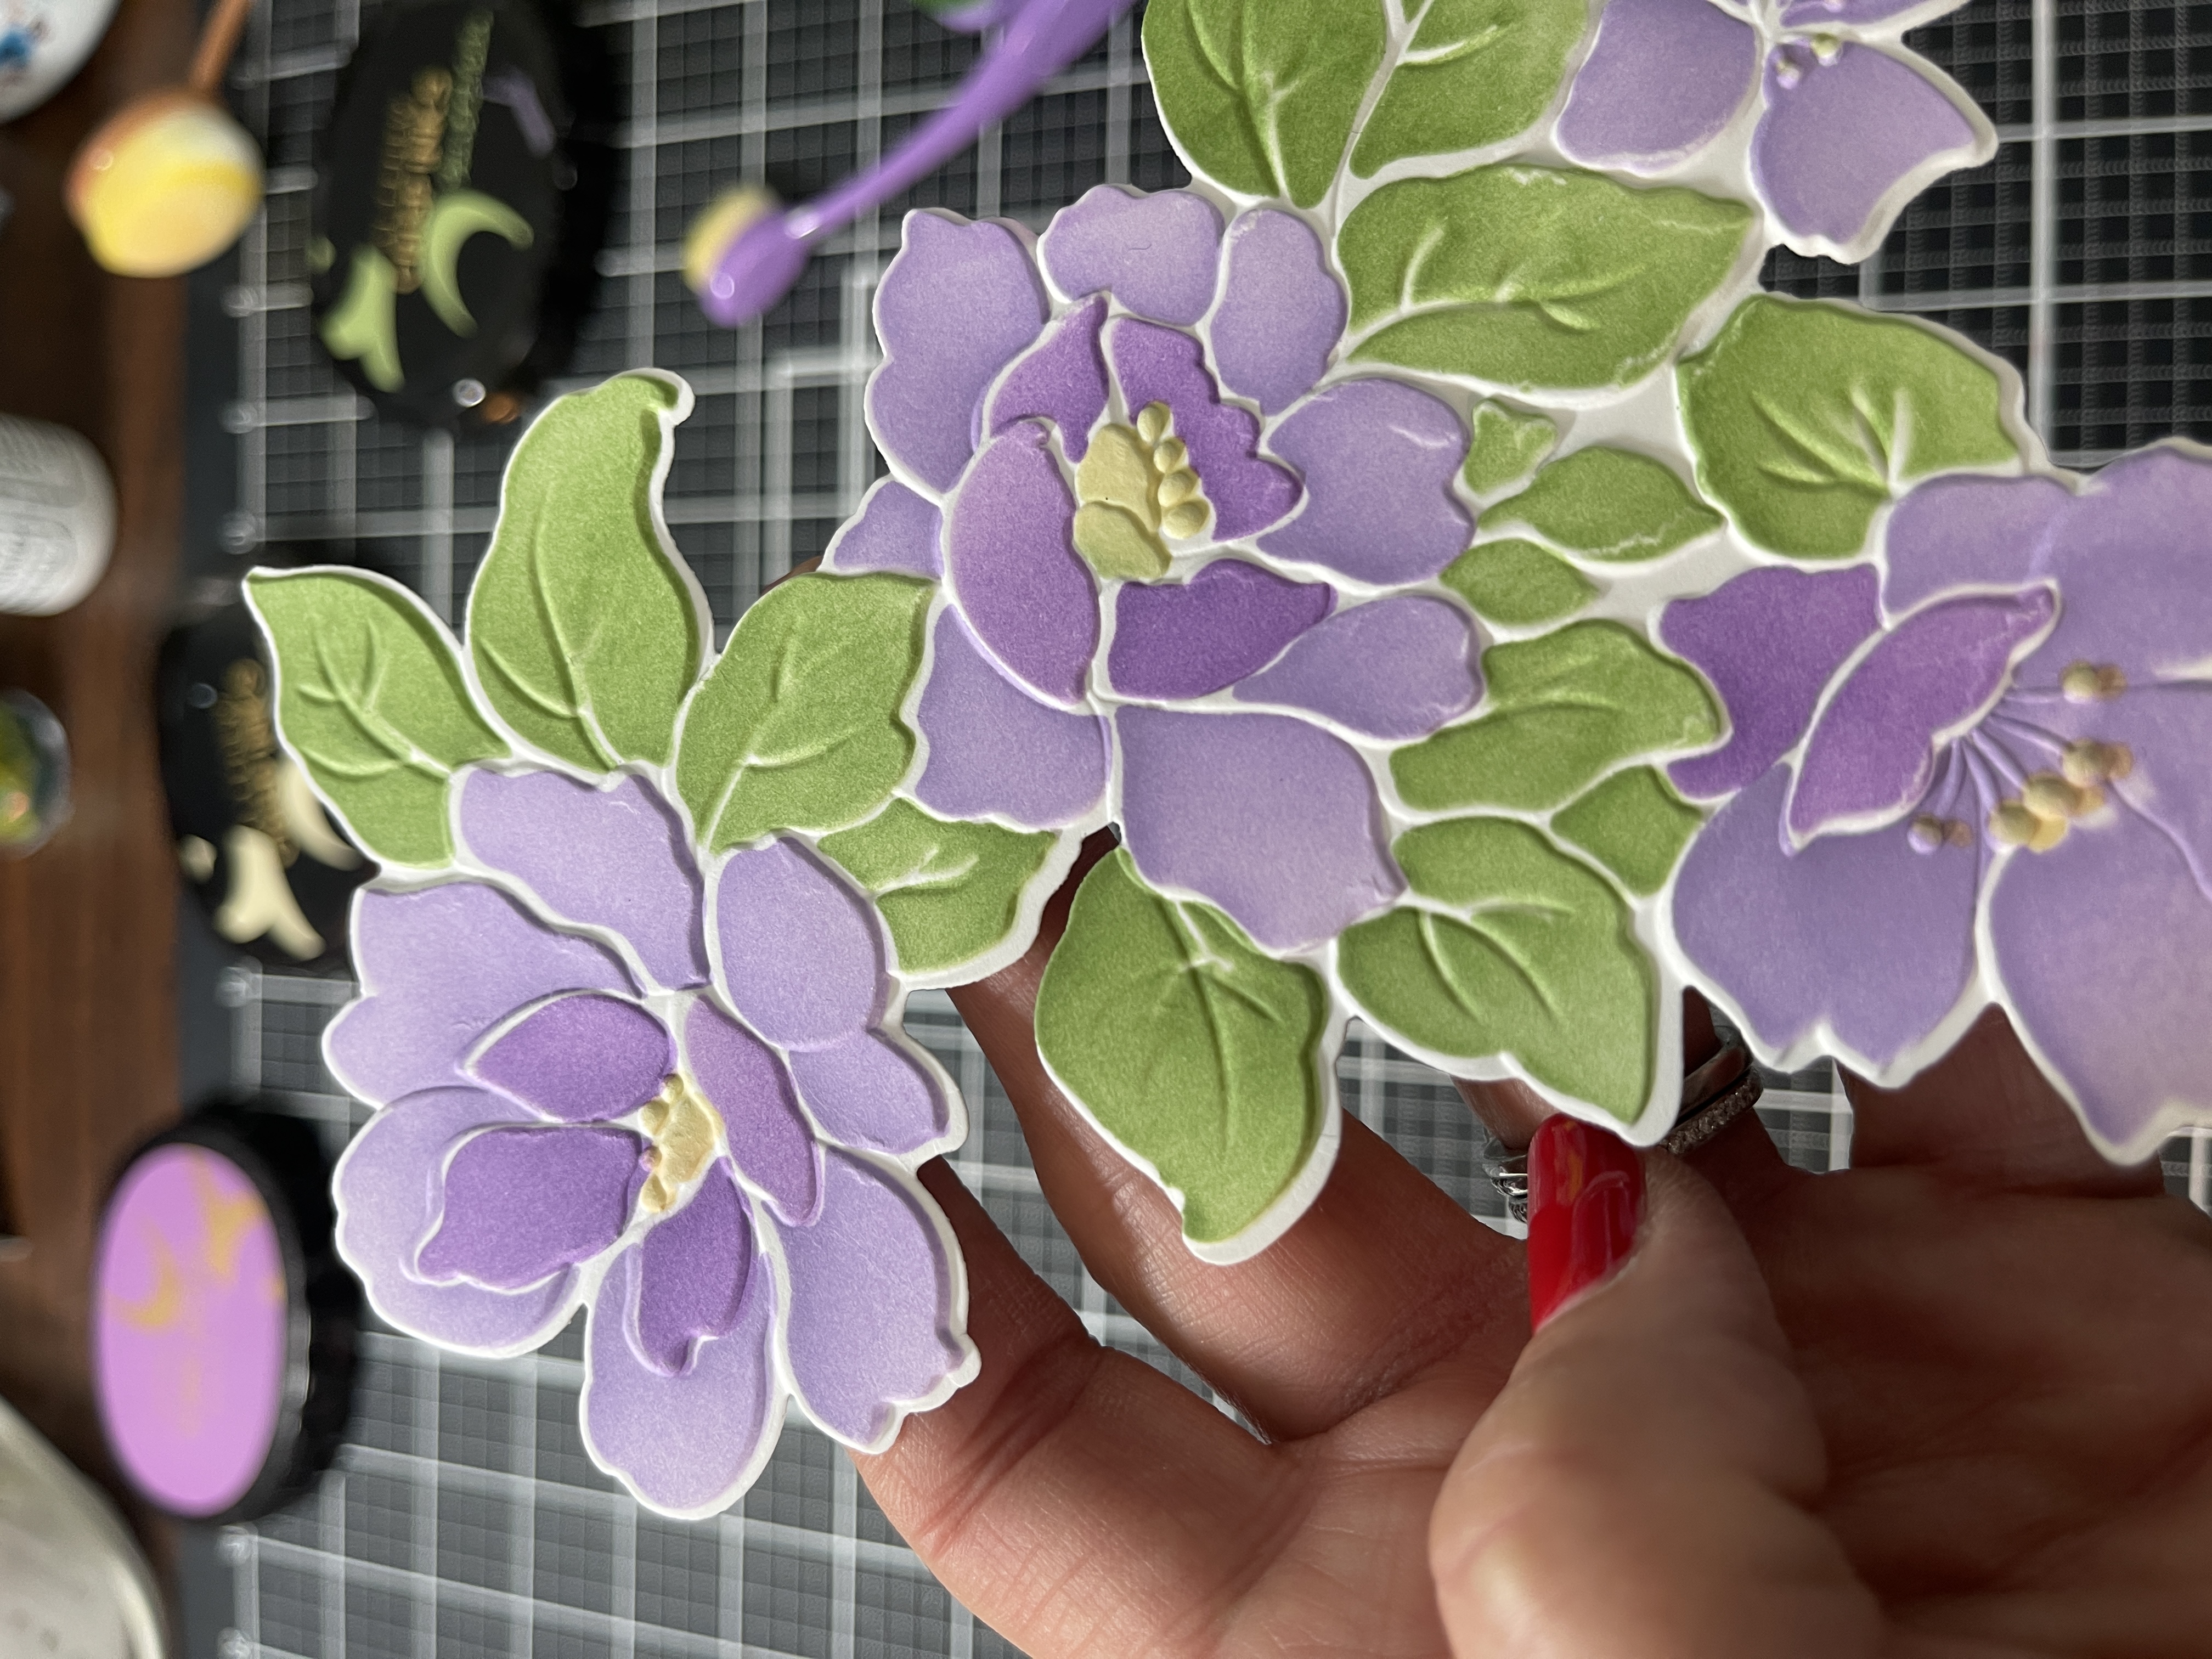
As I worked, I found that many of the ink blending tips that Amy gave me in the class helped me with my stenciling. For example, above I was having trouble with blending the ink for leaves, but using some of Amy’s tips helped me blend things out. I loved the result, but I decided to step it up a notch. I placed my stenciled flower into the coordinating embossing folder and ran it through my Big Shot machine.
WOW!! Look at that texture! The embossing folder makes the petals leap from the page. I wish you could see it in person – try it out yourself!
Now for the ink blending! For my card bases, I use 110lb Neenah Classic Crest Solar White cardstock. It has the same smoothness as the 80lb, but is heavier and perfect for holding all the elements I might use on the card front. Using Buttercream Crisp Dye Ink to add some color underneath my flower, I began by inking up my blending brush, and using circular motions, applied ink at the top right corner of the card front. Amy advised us to apply the ink slowly and be patient, so I continued this process, moving slowly toward the center where I wanted a heavier color. I also inked up the top and right edges of the card front so that color creates a gentle gradient toward the middle.
I adhered the flower to the card front, trimming off anything that extended beyond the edge. I decided to use a sentiment from Perfect Sentiments by PinkFresh Studio. I LOVE this set – it’s one huge stamp with numerous sentiments that you can stamp and then cut out using the coordinating die. I have a whole shoebox full of these sentiments that I created using using gold embossing powder. Whenever I need a sentiment, I just look through and choose the one I need. Some Antique Gold Sequins from Altenew finished off the card.
Thanks for reading everyone – happy stamping!!
 Embossing with Vellum – A Spellbinders Adventure
 Easy Die Cutting Techniques
 Pop-Up Surprises
 Spring Online Card Camp 2022
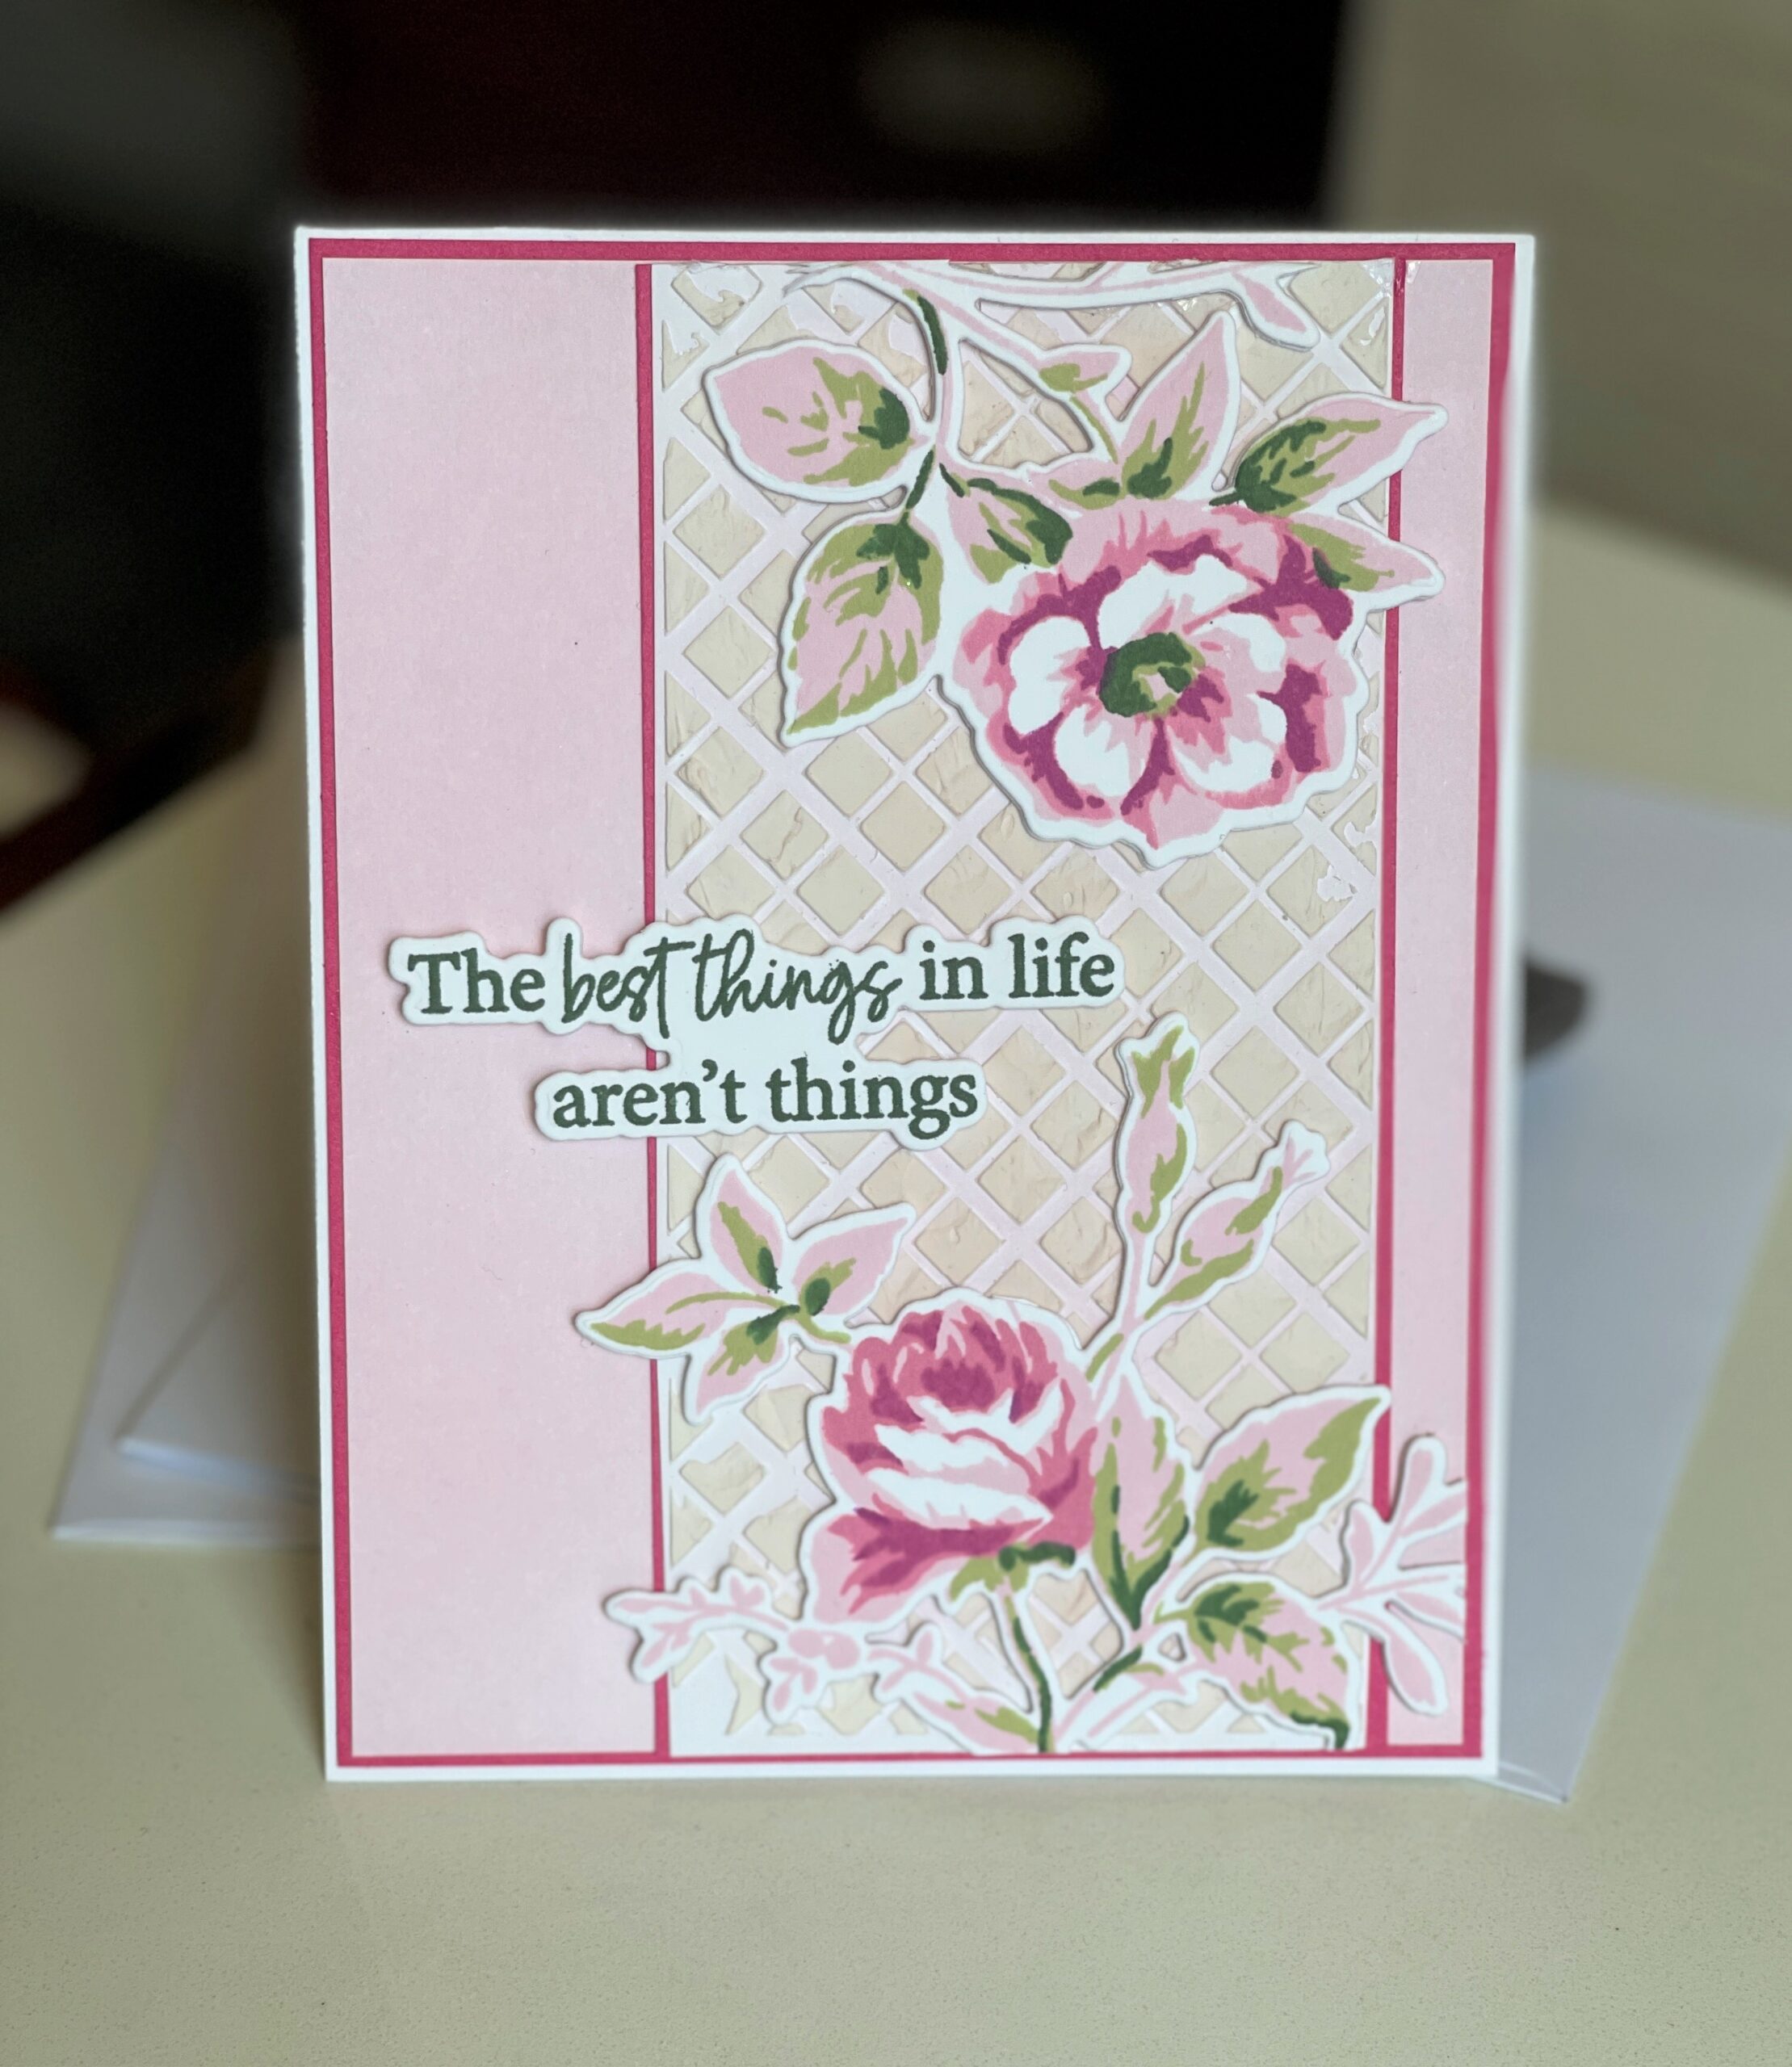

Hi Deborrah
Your blog post is fantastic. Love the explanation as well as the pictures. You are definitely going to ace the AECP. Enjoy the process. I just finished my AECP Level 2…awaiting instructions on final challenge for Level 2. I have enjoyed the process and always end up making many cards as it’s just so much fun. Looking forward to seeing more of your posts. Happy crafting, Angela
Thanks, Angela! I truly appreciate your comment!!
Absolutely gorgeous card! And I love how descriptive you are about your card design. Well done!
It’s a beautiful card, and I love the texture you have achieved with the embossing folder. Your explanation is clear and not too wordy, and I think you’ll be great as an Educator. Enjoy the rest of the process – I’ve just started my Level 3 and it’s been a blast the whole way! xx
Thank you Peri and Kathryn – I truly appreciate your comments!!!
This is so beautifully done, Deborrah!!! Looks so soft and beautiful!! Well done!! Thank you for submitting your gorgeous work to the AECP assignment gallery.