
Hello, and welcome to my latest post for the Altenew Educator Certification Program! Today, I created cards for the Level 1 Easy Die Cutting Techniques class, taught by the amazing Yana Smakula.
I love die cutting! It’s probably one of my favorite card making techniques and Yana’s class did not disappoint! I was particularly interested in her techniques for negative die cutting, embossing and die-cut inlay, so it’s no surprise that my cards reflect these techniques.
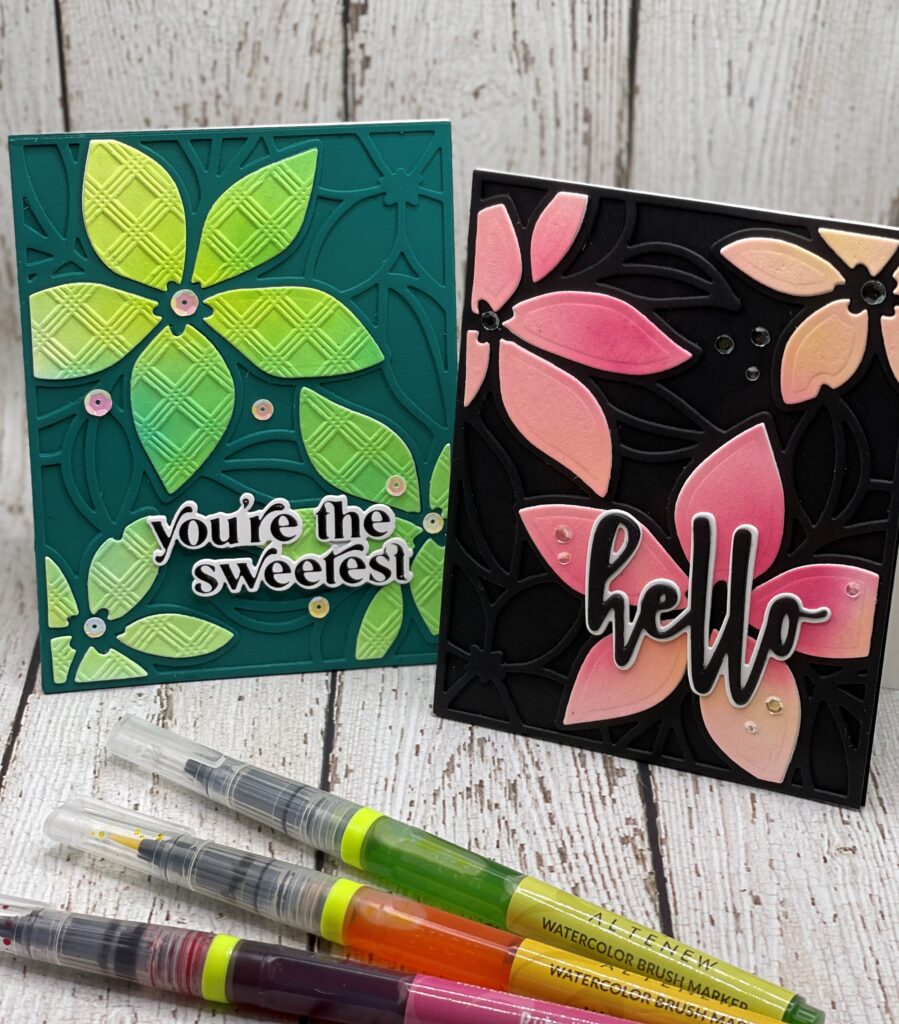
Here are the two cards I created for the class.
Both use a watercolor technique that I learned at the Altenew Color Pop Craft Your Life retreat back in May. This technique is fabulous for creating a gorgeous watercolor background from which to die cut! Let me explain the technique before getting into the cards.
For this technique, you will need watercolor paper (I used Altenew Watercolor paper) cut to 4-1/4 by 5-1/2″; watercolor paint (I used Watercolor Brush Markers – Tropical Fiesta Set); spritzer bottle of water; background embossing folder (optional).
Each panel will use two colors of watercolor – you’ll want to use colors that when blended together won’t create mud, i.e., purple/yellow, red/green, blue/orange. For my panels, I chose Limeade and Warm Sunshine, and Rubellite and Warm Sunshine, all from the Altenew Watercolor Brush Markers – Tropical Fiesta Set.
Step #1: Spray water on your watercolor paper.
Step #2: Drop some color onto the paper randomly. Spray a little more water and let it swirl around the paper, tilting the panel as you wish to allow the color to spread.
Step #3: Drop your other color onto the panel, again spraying and tilting the panel, allowing the colors to mix. When you’re happy with the result, allow the panel to completely dry. (It’s OK to use a heat gun, to hurry the process.)
That’s it! Gorgeous watercolor paper in three easy steps. Now, let’s make the cards!
Card #1
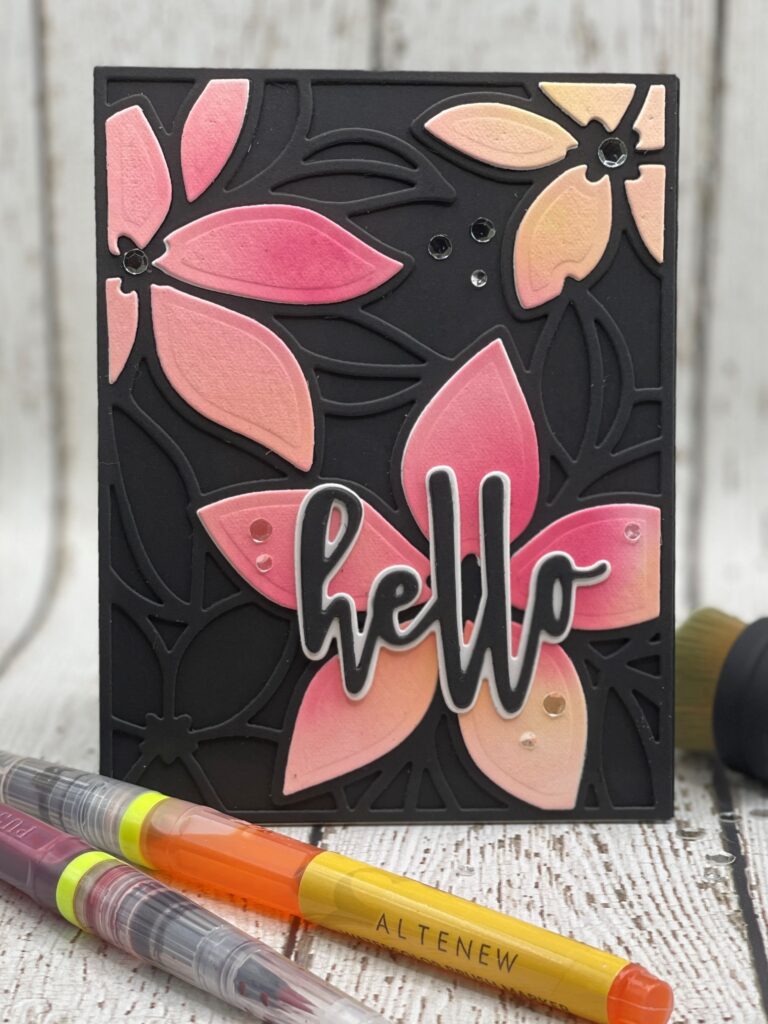
I used the beautiful Ornate Floral Die from PinkFresh Studio for my cards. I cut three panels of black cardstock to 4-1/4″ x 5-1/2″. Cut two of the panels with the Ornate Floral Die, push out all the flower pieces and put them aside. Adhere the remaining two outline pieces together using liquid glue, then glue the resulting piece onto the third panel of black cardstock. Stacking the two pieces together results in a gorgeous tone-on-tone depth.
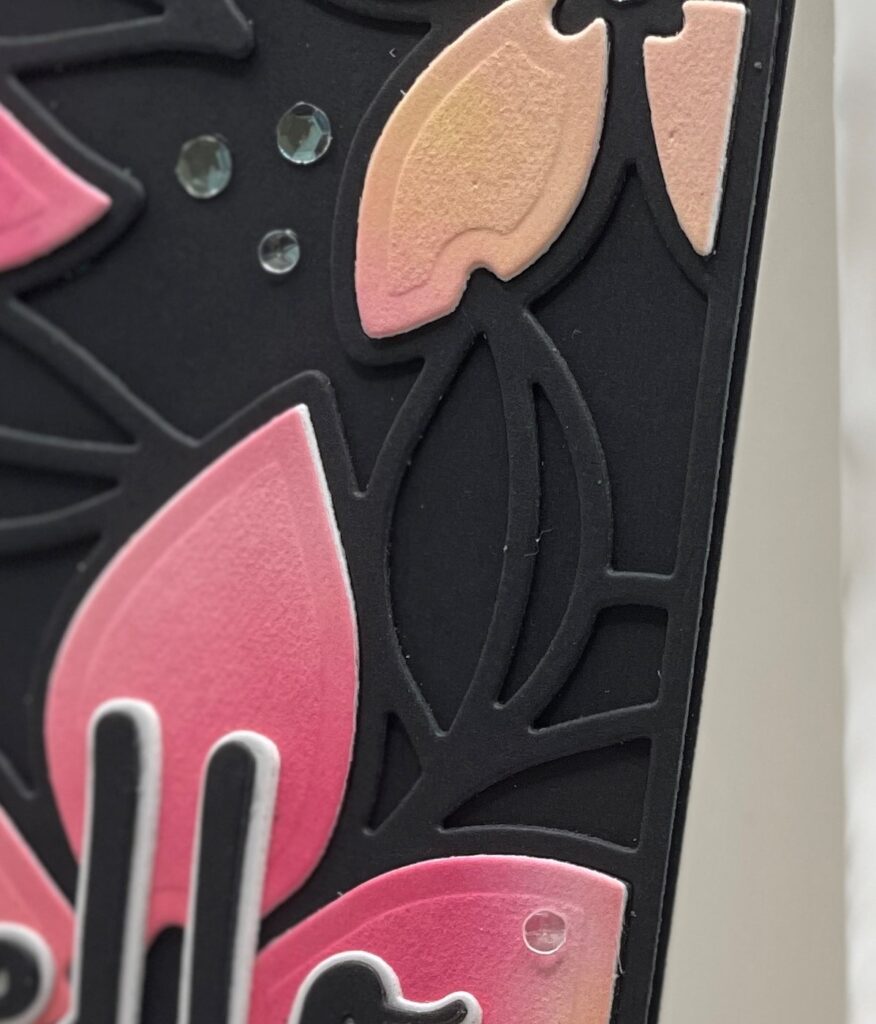
Now, I selected one of my watercolor panels and placed my die over it. I played around with the positioning until I was happy with how the petals looked, then I ran it through my die cutting machine. Before I removed the pieces, I decided which flowers I wanted to spotlight on the card. I chose the top right, top left and bottom right flowers. Then, I removed all the pieces, setting the petals of my three flowers to one side. Then, I die cut one more panel from white cardstock (I used Neenah 80lb Classic Crest Solar White). This now gave me four sets of die-cut petals – one watercolor, two black and one white. I matched the watercolor petals to the black and white die-cut petals and glued them together. Then, I matched each petal to its outline and glued it onto the card, creating a gorgeous raised die inlay, which you can see in the above photo.
I decided to use a simple sentiment in the middle of the big flower. I chose one from Altenew Hello & Hugs Die Set. It has a letter and shadow die for each word and I thought that would be a good match for the rest of my die cutting. I finished off the card with some clear, sparkly sequins.
Card #2
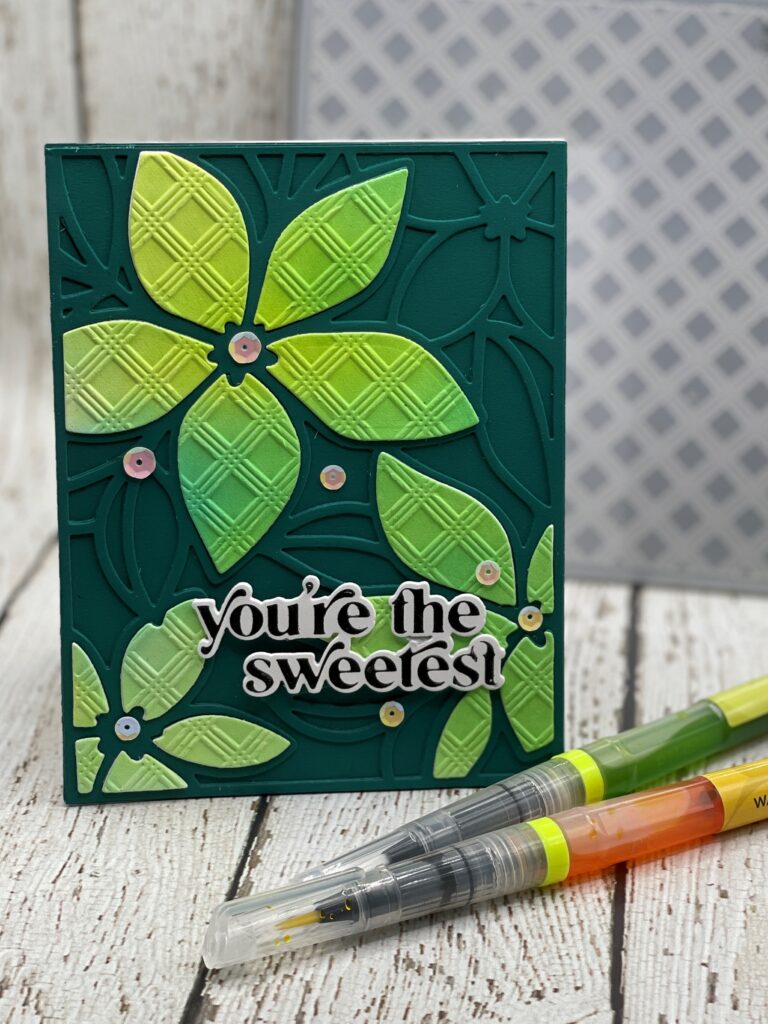
I had so much fun creating this card, that I made another one. This time, I stepped it up a bit by embossing the watercolor panel with Altenew’s Basic Plaid 3D Embossing Folder before die cutting it. To prevent the watercolor paper from cracking, I sprayed the back of the panel with some water before embossing. You can also use a baby wipe to add moisture. Then, I place the panel into the embossing folder and ran it through my die cutting machine. (I used the special embossing plates for my machine. Each machine has a special plate/sandwich for dry embossing, so check your machine’s instructions to learn what works.)
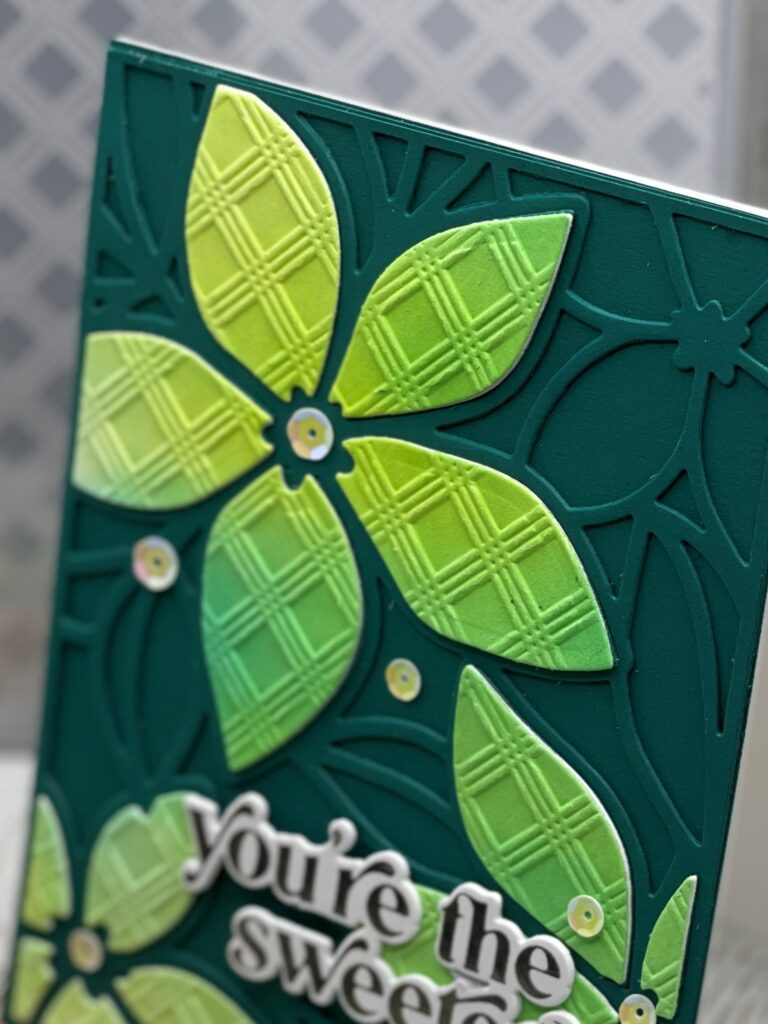
The result was a panel with gorgeous texture. For this, I then completed my card exactly as described above (using different colors for the background). Now, what sentiment to use?
CRAFTING TIP: I have a shoebox full of sentiments that I’ve created whenever my mojo takes a vacation. It’s has stamped and foiled sentiments, all die cut and ready to go. So, it was easy to select one from PinkFresh Studio – Celebrating You Hot Foil Plate. It’s a great set and there’s a coordinating die for it so you can foil the whole thing, cut them out with the die and you’re set for a while. I used the Spellbinders Glimmer Hot Foil Machine and Spellbinders Pewter Hot Foil. I finished off the card with some White Satin Sequins from Altenew.
I am very happy with how these cards turned out. Die cutting is so much fun! I hope you’ll give it a try. Happy crafting!
 Embossing with Vellum – A Spellbinders Adventure
 All About Layering 4: The Best Things In Life Aren’t Things
 Creative Use of Stencils
 Dancing with Spellbinders
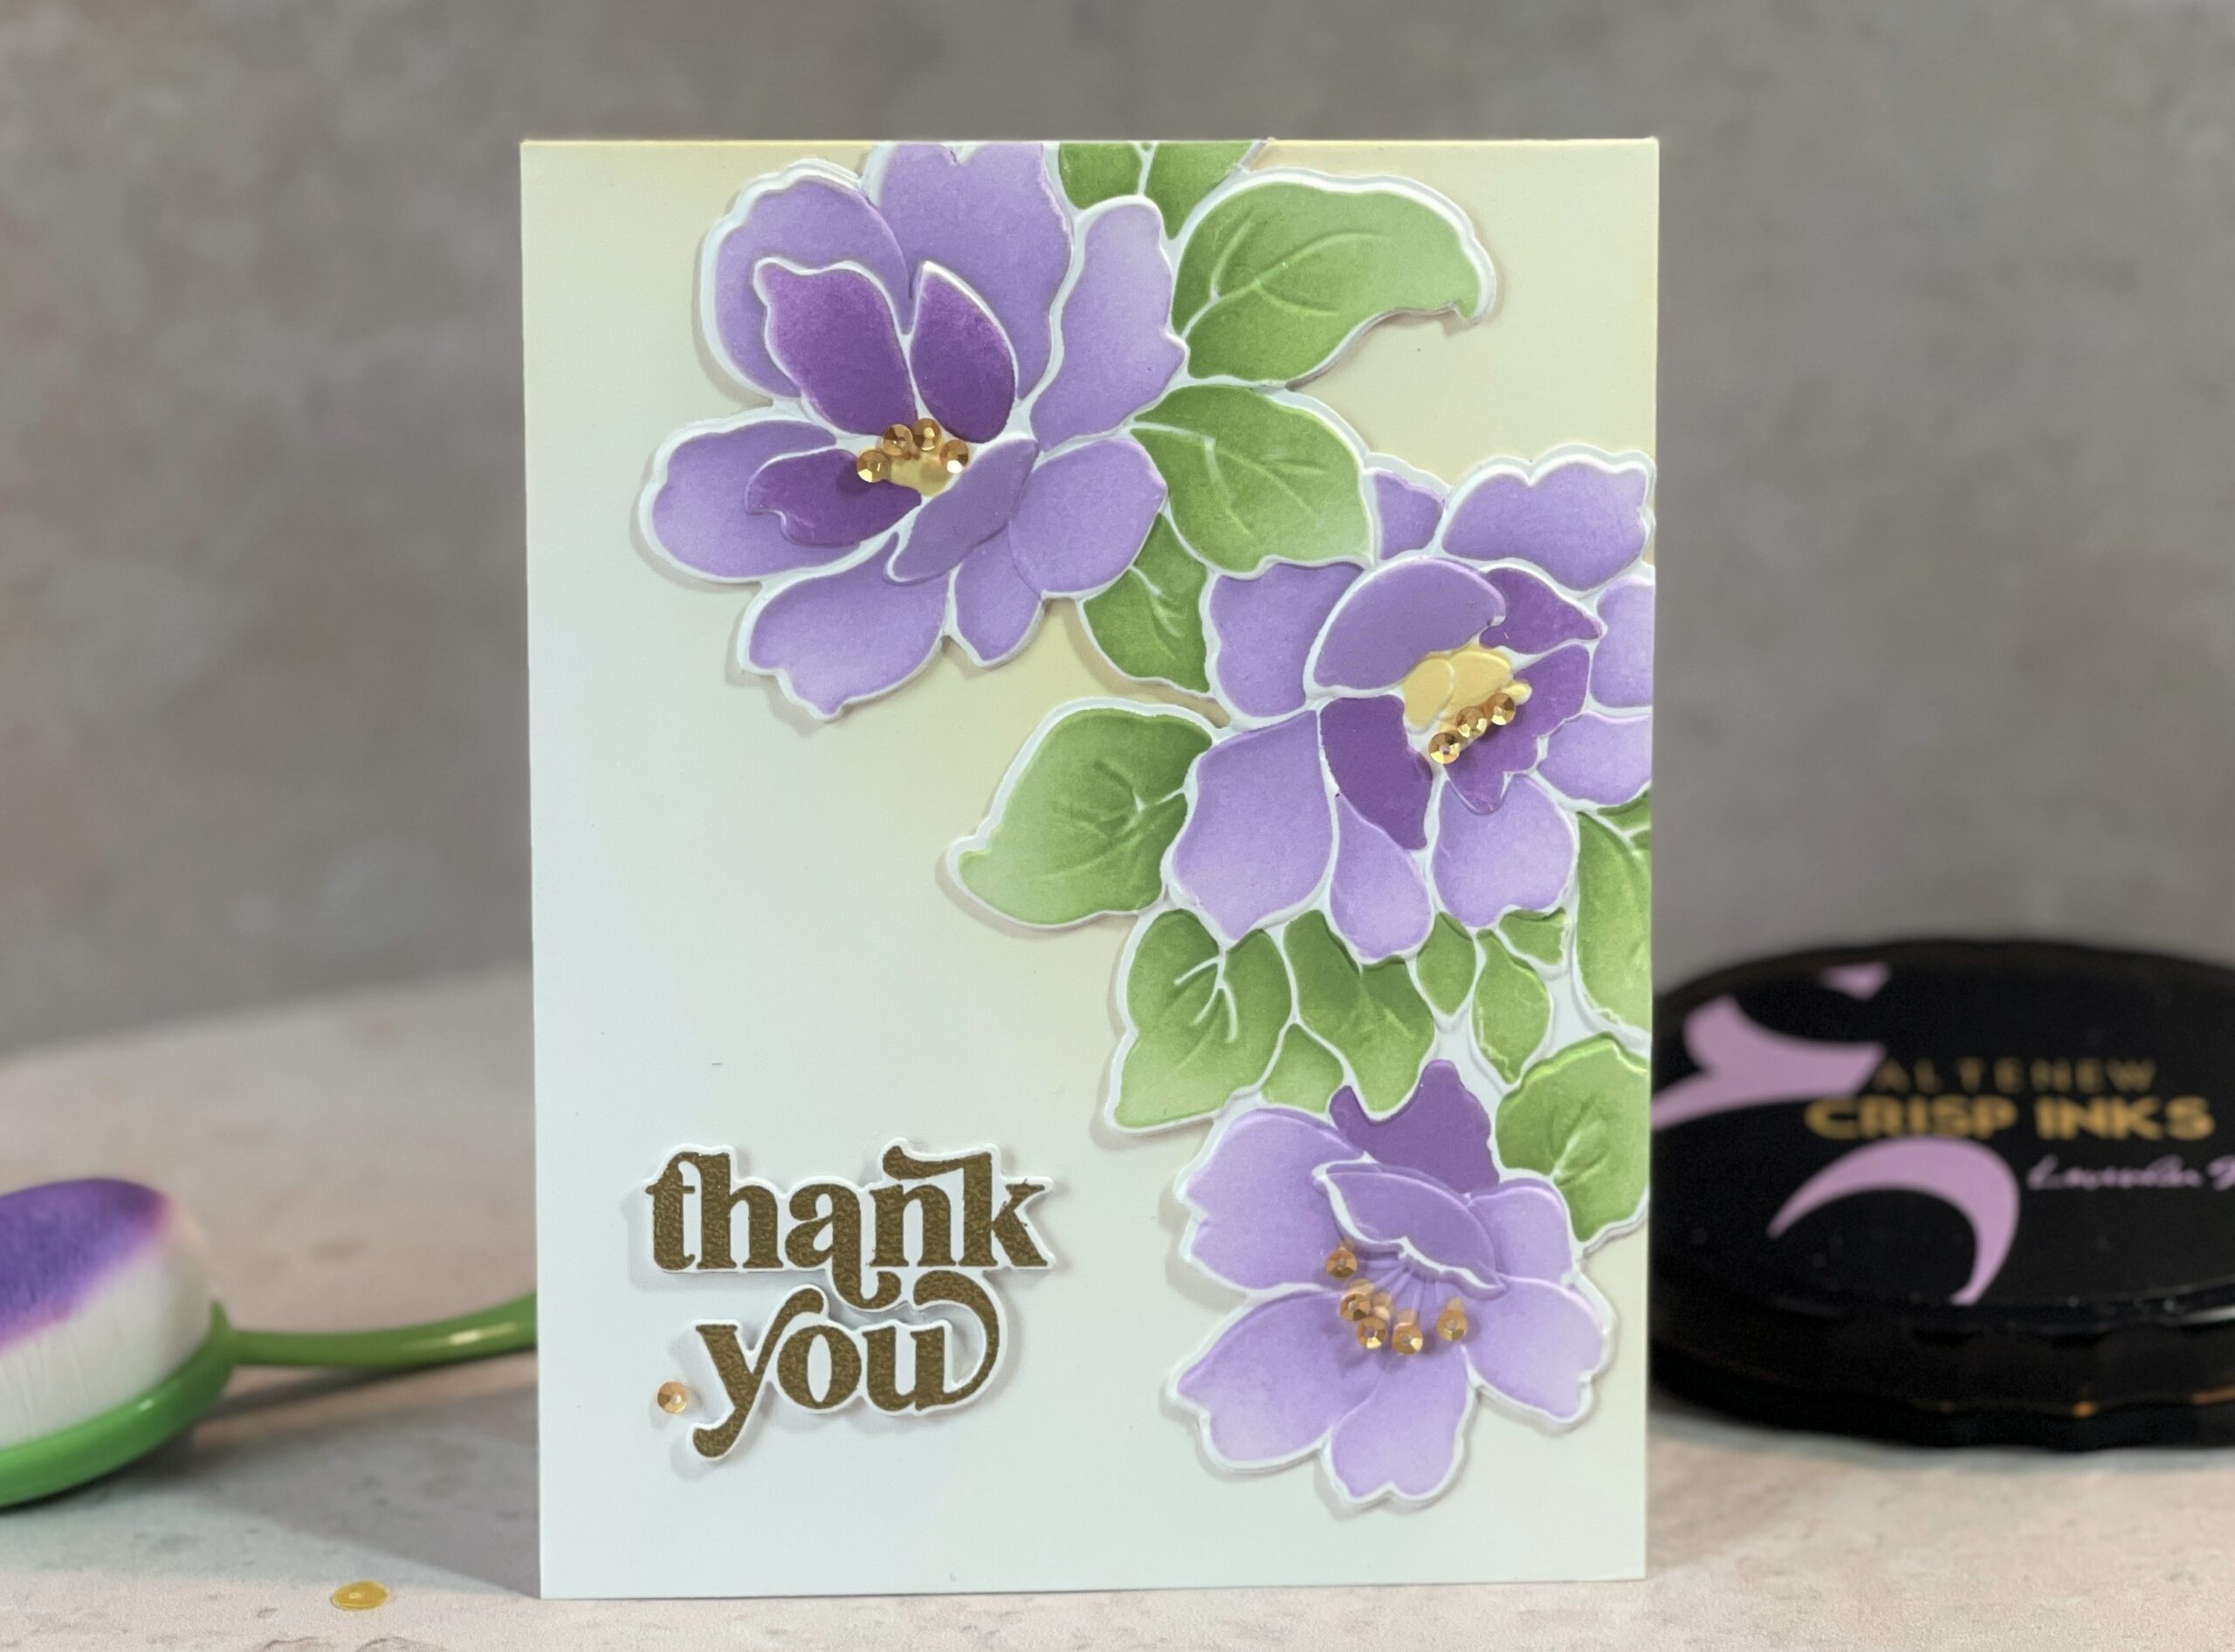

Love the combo of die cutting and embossing folders together.
oh my, oh my! Deborrah! These look Super duper fantastic, girl! WOW! Well done!
Thank you so much for submitting your gorgeous work to the AECP assignment gallery.