
Hey everyone! Thanks so much for visiting my blog!
Today, I want to take you on a magical masking journey. The idea of masking has been around as long as stamping and today I want to explore three different ways of using masks to create backgrounds and designs. This post is a little longer than usual, but that’s because it’s chock full of tips for masking combined with ink blending, heat embossing and foiling – all techniques you can use on your own cards with your own supplies.
I was inspired to write this post by the Altenew Academy class Masking Unleashed, taught by Svitlana Shayevich. The class was all about masking and had some really great ideas. I love masking but am not a real fan of fussy cutting. Now, I don’t mind cutting, but sometimes with the smaller bits, it gets a little overwhelming. So I challenged myself to create three cards with masking techniques that did not involve fussy cutting. I hope you enjoy my ideas – let’s get started!
I also made a video of these cards and you can find it here, on YouTube.

Featured Products
Altenew Poinsettia and Berries Stamp Set
Altenew Poinsettia and Berries Die Set
Altenew Pointsettia and Berries Stamp & Die Bundle
Altenew Holiday Greetings Die Set
Altenew Holiday Greetings Hot Foil Plates
Altenew Holiday Greetings Bundle
Hero Arts White Unicorn Pigment Ink
Hero Arts White Satin Pearl Embossing Powder
For all of my cards today, I’ll be using the Altenew Pointsettia and Berries Stamp & Die Bundle. This set has been around for a while. I love the layering poinsettia stamps included with the set, but for my cards today I’ll be using the leaves and berries.
Using the two leaf dies, I cut lots of leaves out of Altenew Masking Paper. Then, I arranged the leaved onto a dark green panel of cardstock measuring 4″ x 5-1/4″. After the panel was covered, using a brayer, I covered it with Hero Arts White Unicorn Pigment Ink. I wanted to create a muted white background for the leaves, while allowing some of the green to show through. So I applied Hero Arts White Satin Pearl Embossing Powder and heat set it. After the surface is totally embossed, begin to lift up the masking paper. You’ll see that it leaves a fabulous green impression. It’s ok if the masking paper tears; it’s been through inking, embossing and heating!
Now, I could leave this background as is, but I’m going to step it up a bit with some stamping. I’m going to stamp the leaf images inside the areas that were masked using the stamps from the Poinsettia and Berries stamp set. I’ll use Altenew Mountain Pine Crisp Dye Ink, and it will give a nice dark, crisp image. I also stamped the accompanying berries with Ruby Red Crisp Dye Ink.
While I have my stamps and ink out, I also stamped each leaf image onto a piece of white cardstock and cut them out with the coordinating die. I’ll put those aside for later.
For the sentiments on all my cards today, I’m using the new Altenew Holiday Greetings Hot Foil and Die Set. I invested in this because I love the size and font of these greetings! You can foil the greeting then use the coordinating die set to cut it out. I explain exactly how to foil these greetings on my YouTube video, so check it out if you want a walk-through!
To assemble my card, I cut a circle out of Gina K Designs Red Hot Cardstock with a large circle die. Then, I cut out a slightly smaller circle from my background. My plan is to layer the two circles to create a focal point in the center of the card.
Now you know I love dimension, so I cut four additional green circles to eventually layer behind the smaller circle. You don’t have to do this, but it gives a beautiful look to the finished card. I’ll glue my small circles together, then center the red circle on the card, then place the green stack in the middle, lining up the images. This will give me a framed focal point for the card which will draw the eye and add a lot of interest.
Using one of the foiled greetings I created earlier, I placed it at the bottom of the frame, and then using the leaves I had stamped and die cut, I arranged them around the greeting. Then I applied some Spellbinders Scarlet flat sequins as holly berries over the red stamped berries. I layered the panel onto a top folding A2 cardstock base cut from Gina K Designs Red Hot Cardstock.
Featured Products
Altenew Layered Snowflakes 2 Die Set
Altenew Holiday Greetings Die Set
Altenew Holiday Greetings Hot Foil Plates
Altenew Holiday Greetings Bundle
Altenew Happy Holidays Embossing Folder
Hero Arts Sparkle Embossing Powder
Let’s take this masking resist technique and switch it up a bit. This time, we’ll create a background using masked images and ink blending.
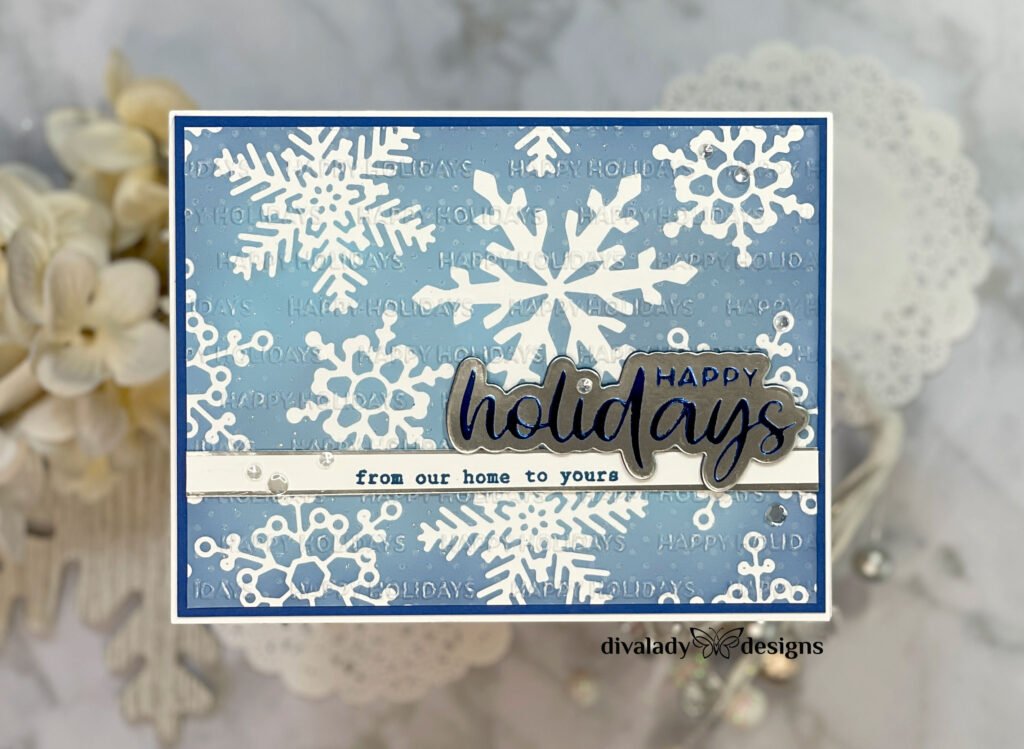
For this card, I’m using the Altenew Layered Snowflakes 2 die set. There are five separate snowflake dies which you can use stacked together to create intricate snowflakes, or individually as I’m going to do here. I’ll die cut a lot of these snowflakes again using Altenew masking paper. Using a panel of white cardstock cut 4 x 5-1/4”, I’ll begin arranging my snowflakes. Arrange them as you wish; I usually start in one corner and work out from there.
Now for some ink blending. I’m using Tim Holtz Distress Oxide inks – Stormy Sky, Tumbled Glass and Chipped Sapphire. Then I stepped up the background with some stamping. I use the Dainty Swiss Dot stamp from Altenew and stamped it using Hero Arts White Unicorn Pigment Ink. After allowing the panel to dry completely, I applied Hero Arts Sparkle Embossing Powder. To finish the background, I embossed the panel using Altenew Happy Holidays Embossing Folder.
I stamped “from our home to yours” from the Poinsettia and Berries stamp set on a strip of white cardstock and matted it with silver. Then I place my foiled sentiment and added a few sparkly sequins for a finishing touch. I also matted the panel with Spellbinders Cosmic Blue cardstock and adhered it to landscape top folding A2 cardbase.
Featured Products
Altenew Poinsettia and Berries Stamp Set
Altenew Poinsettia and Berries Die Set
Altenew Pointsettia and Berries Stamp & Die Bundle
Altenew Holiday Greetings Die Set
Altenew Holiday Greetings Hot Foil Plates
Altenew Holiday Greetings Bundle
Altenew Masking Paper
Gina K Designs Masking Magic
For my last card, let’s take the idea of masking in a different direction and use it to create a fun grid design on which we will do some inking and stamping. Gina K Designs has fabulous masking paper! It has a coating on it that allows you stamp over it again and again without bleeding through. She also has a new product, a set of masking strips. These strips are precut to 1/8, ¼ and ½ inch widths. I wanted to try to see if I could create a grid with these for my card.
If you want a visual explanation of the following instructions, check out my YouTube video.
Cut a panel of good white cardstock to 4 x 5 ¼ . Using a ruler, measure down ½ from the top and make small mark. Then, from there, go down 2 inches and make another small mark. Move down 1/8 of an inch and make another mark. Then go down 2 more inches and make your final mark. Repeat on the other side. Take a 1/8” strip of masking paper and place it along the top of the card, aligning it with the top marks. Then, take another strip and place it in the center of the card, right where you’ve created your marks. Now, take a ½” strip and place it on the top of the card, and along the bottom, matching up your marks.
Now take your ruler and measure in 1 3/16” from one side, and then 1 3/16” from the other side. Do this at the top and the bottom of the card. Now take 1/8” strip of masking paper and place it along the lines on the left, then another strip and place it along the lines at the right. You have created your grid!
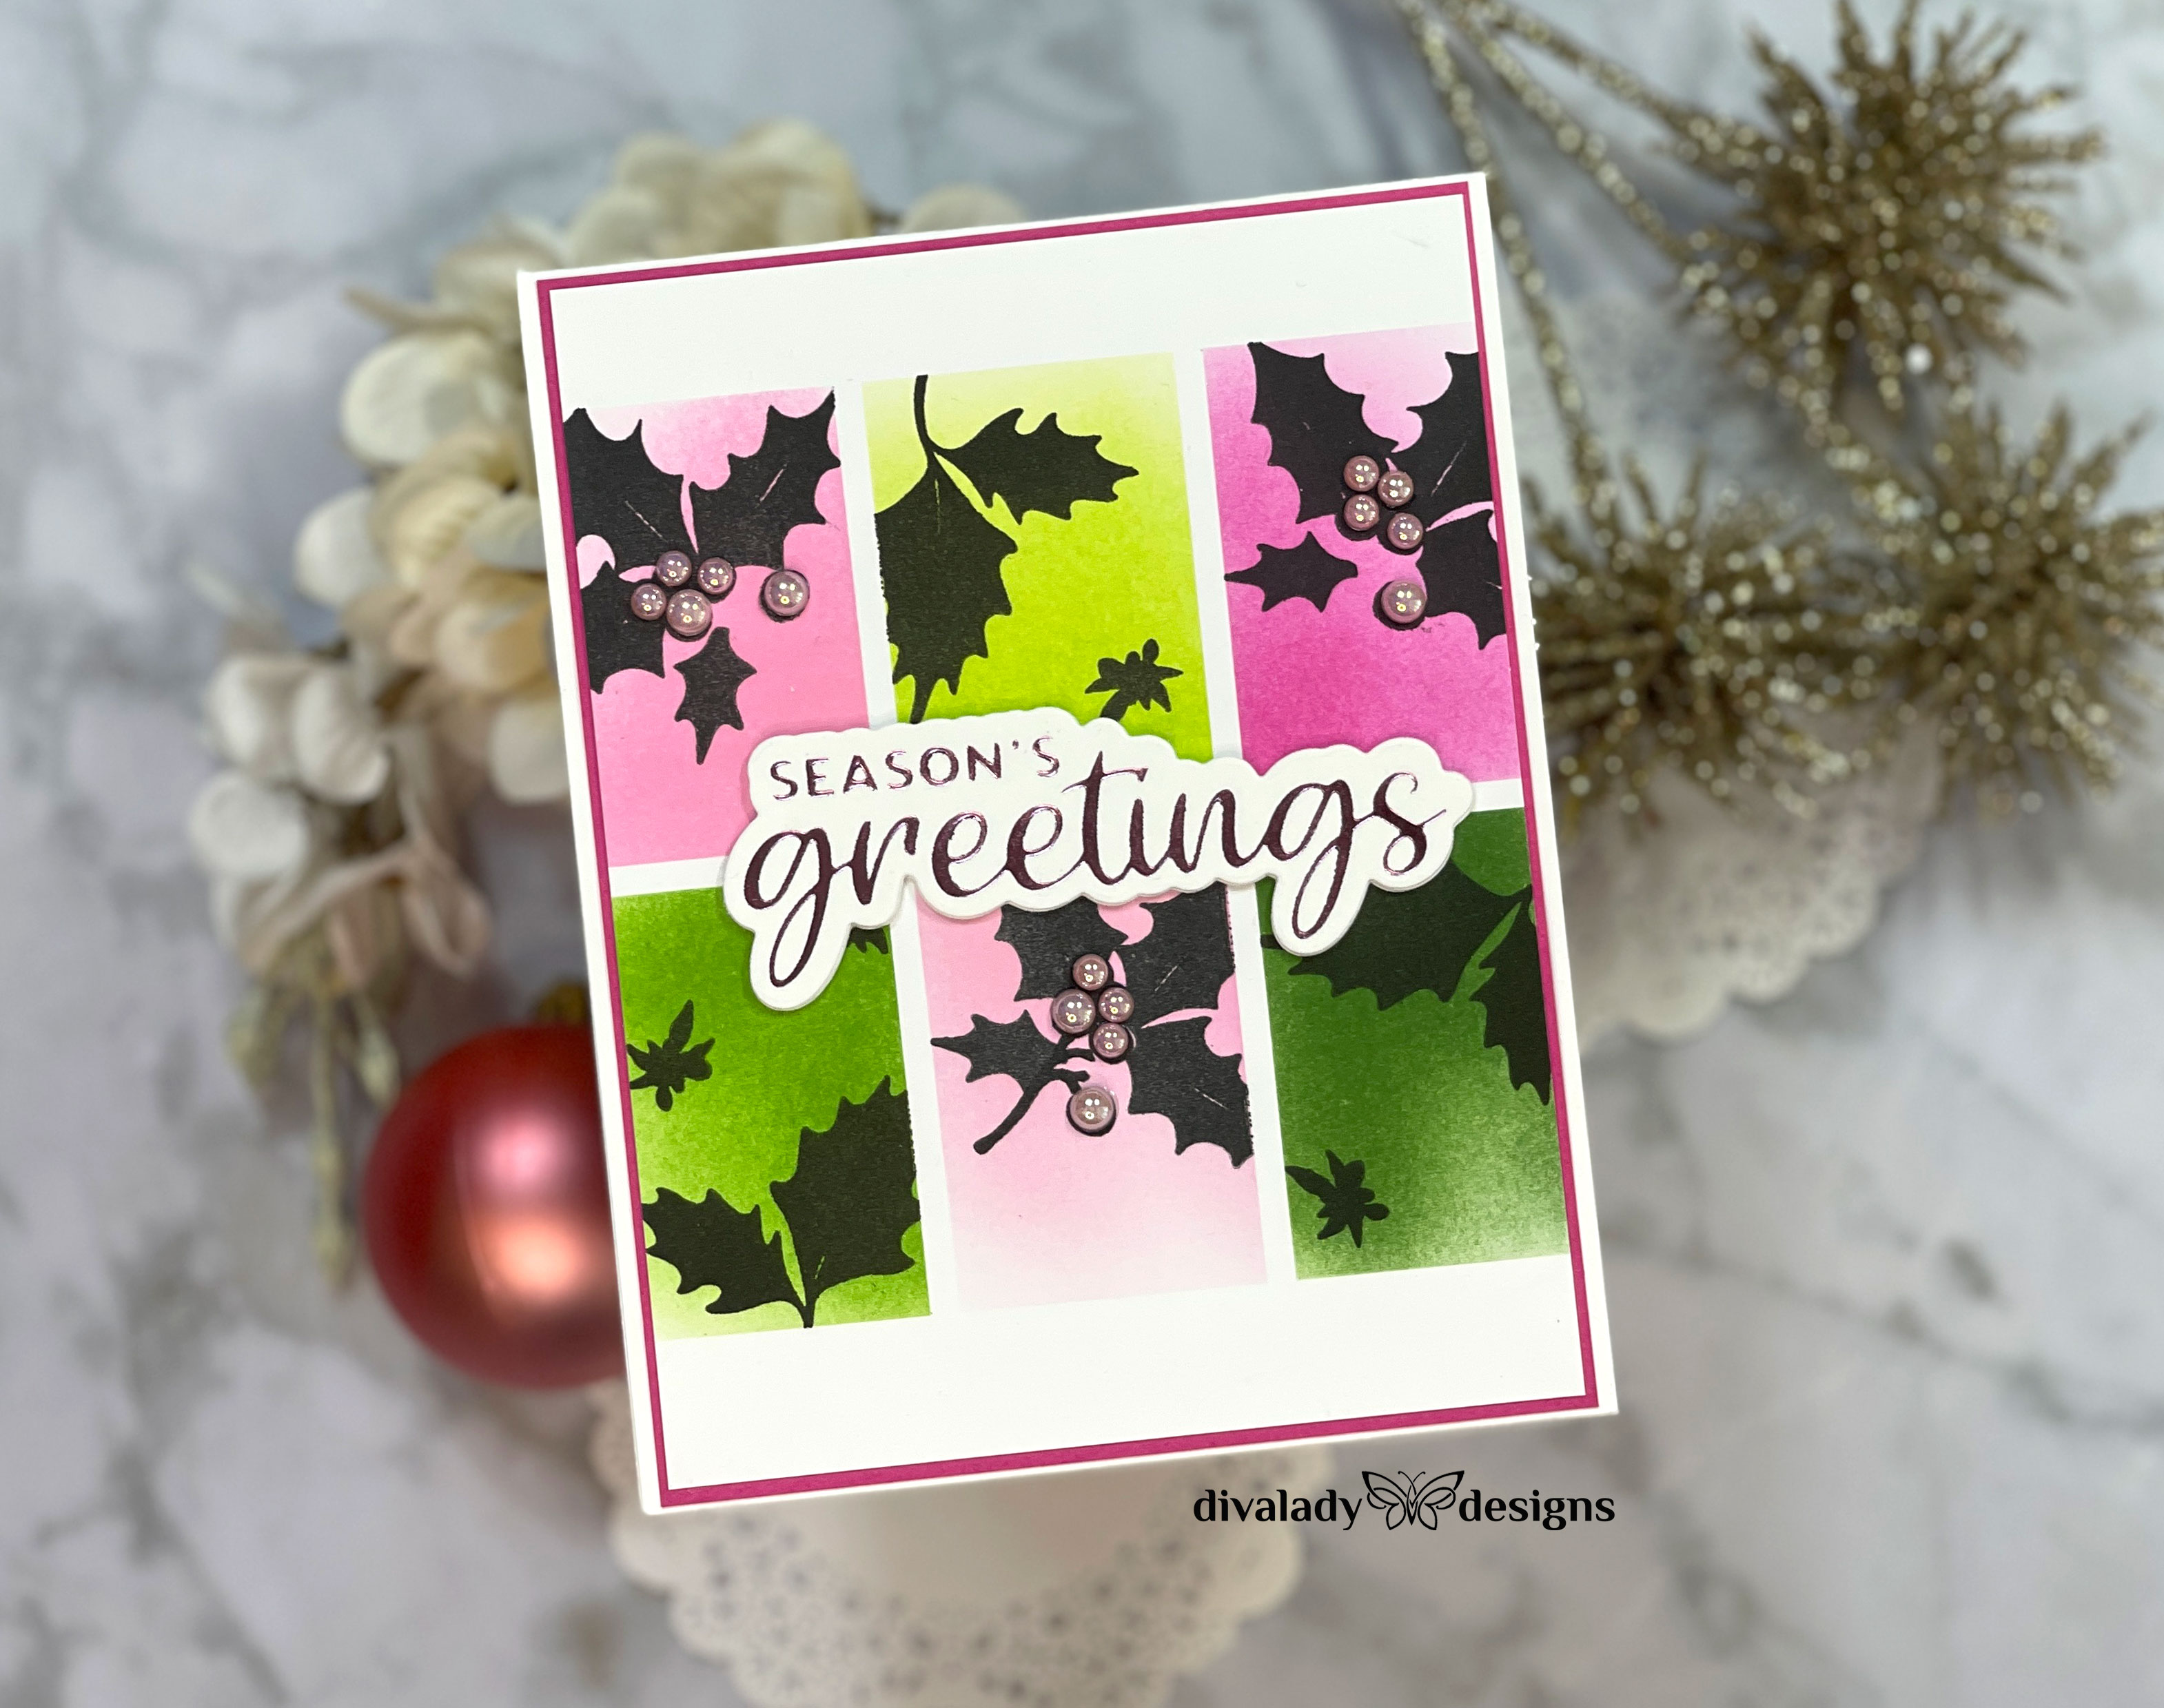
To create my panel, I’m going to apply different shades of pink and green to each rectangle of the grid. I’ll be using Tim Holtz Distress Ink. I’ll start with Kitsch Flamingo and apply the ink from the bottom corner and working up. When you’re done, remove the masking paper along the side and move it to the side of the next rectangle. Be careful when changing colors! You’ll want to make sure you don’t take any of the pink color from the strip into the rectangle where you’ll apply green!
I used Twisted Citron, Picked Raspberry, Mowed Lawn, Rustic Wilderness and Spun Sugar to the other rectangles, masking as needed. Then, I used the leaf stamps from
Now it’s time to add our stamped images. I’m going to use the leaves from the Altenew Poinsettia and Berries Stamp Set. Since I want each image to be a solid black, I’m going to use my MISTI stamping tool so I can stamp multiple times. I’ll be using Altenew Permanent Black Ink for this. It dries quickly without having to heat set it.
To finish my card, I matted the panel on dark pink cardstock and layered it onto a white top folding A2 card base. I added some Studio Katia pink pearls over the berry stamps, then placed my foiled greeting in the middle of the card. The result is a colorful, gorgeous card that will have your recipient wondering how you did it!
I hope you’ve enjoyed our time together today.
Interested in the products I used? I have listed them below. (Compensated affiliate links used at no cost to you. Thank you for your support! Affiliate and product disclosure can be found on my disclosure page. All products were personally purchased. As always, I was not paid to do this post, nor am I on any design team. I only use products I love!) Click on the links below each product picture to go to a favorite store.
 Whimsical Easel Card
 Pop-Up Surprises
 Background Bonanza


I am so glad that you put your own spin on this and shared it with others too! Thank you for submitting your wonderful work to the AECP assignment gallery.