Do you use stencils for your cards? When I first began making cards, the stencils were all in shapes like circles, hearts, squares, etc., and never really appealed to me. Then came background stencils, floral stencils and lately, layering stencils. I love how many companies are now creating stencils as a companion product to stamp and die sets. It takes the idea of stenciling to a whole new level.
This is my 9th post for Level 1 of the Altenew Educator Certification Program and I’m excited to share what I learned with you. The course was Celebration Stencil techniques and was full of ideas for using stencils creatively. I loved how our teacher, Laurel Beard, showed us different ways to use stencils other than the traditional fill in the space with ink. As I watched the last class of the series, I became intrigued with the idea of using watercolor with the stencil. Laurel used it to show us how to create a stencil overlay, but I began to wonder, what if I used the stencil as a guide for creating my image with watercolor? I played around with many, many different ways of doing this over the next few days. Let’s take a look at two cards I created.
Watercolor Stencil Technique 1
Featured Products
Altenew Craft Your Life Project Kit – Magnolia & Blooms (coming in August)
Altenew Dainty Swiss Dots Stamp Set
Altenew Simple Greetings Die Set
Altenew Artists’ Watercolor 24 Pan Set
Altenew Arctic Pigment Ink
Altenew Pure White Crisp Embossing Powder
Gina K Designs In The Navy Cardstock
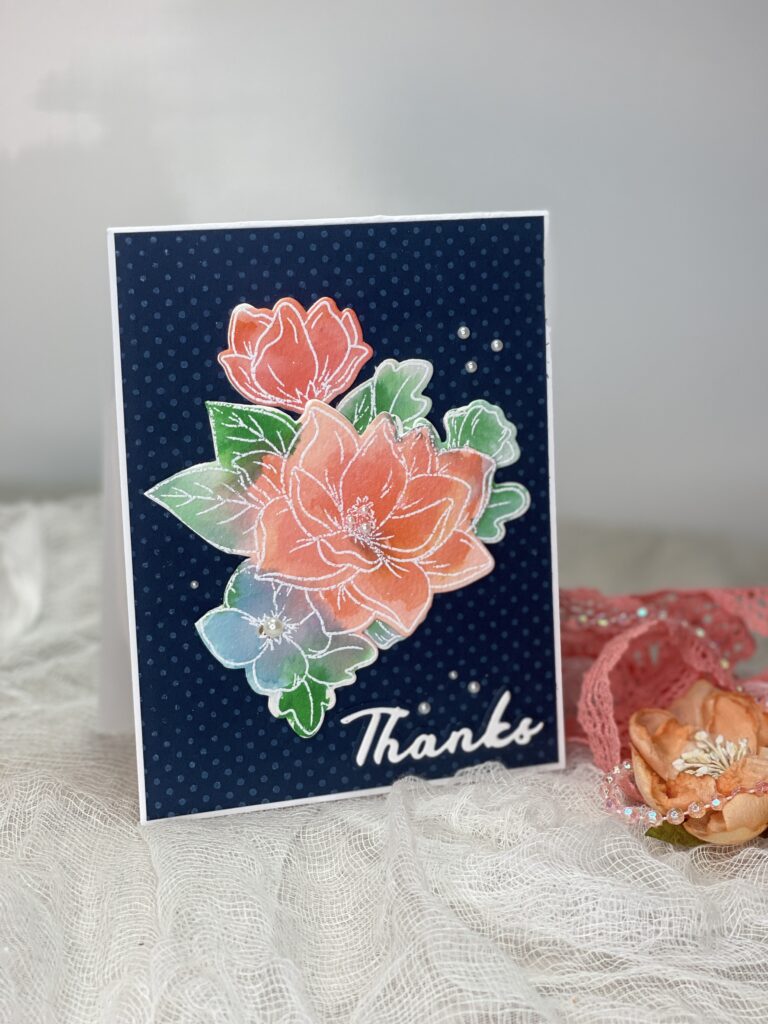
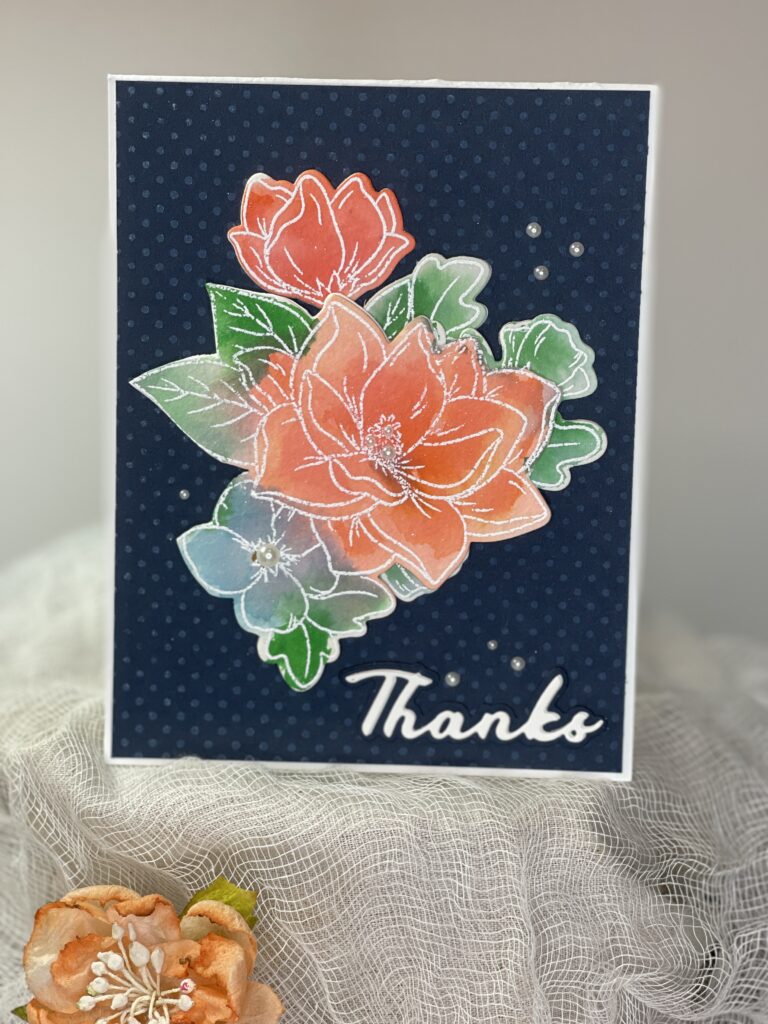
I had such fun creating this card!! It uses the August Craft Your Life Project Kit – Magnolia & Blooms. I love these kits, and have been a subscriber for several months. This particular kit comes with a stamp set, dies, layering stencils and embossing folder! You can’t beat it for the price. AND, subscribers receive the kit early! When I received mine, I knew I wanted to use it for this technique.
First, I die cut the image from high quality watercolor paper. Then I used each stencil to apply my color. Instead of using a blending brush and ink, I used Altenew Artists’ Watercolor 24 Pan Set to create a watercolor wash. I made sure to use plenty of water to give each color a looser look. I applied the color to the stencils in order – Altenew stencils have a number in the top left corner of each stencil, as well as a stenciling guide, that helps to apply the colors in order. I allowed the watercolor to spread and do its thing, then let each “layer” dry a bit before going to the next stencil/color.
TIP: When watercoloring, apply a bit of water to color in the pan first and let it “soften.” This will make it easy to pick up the color when you begin to mix or paint.
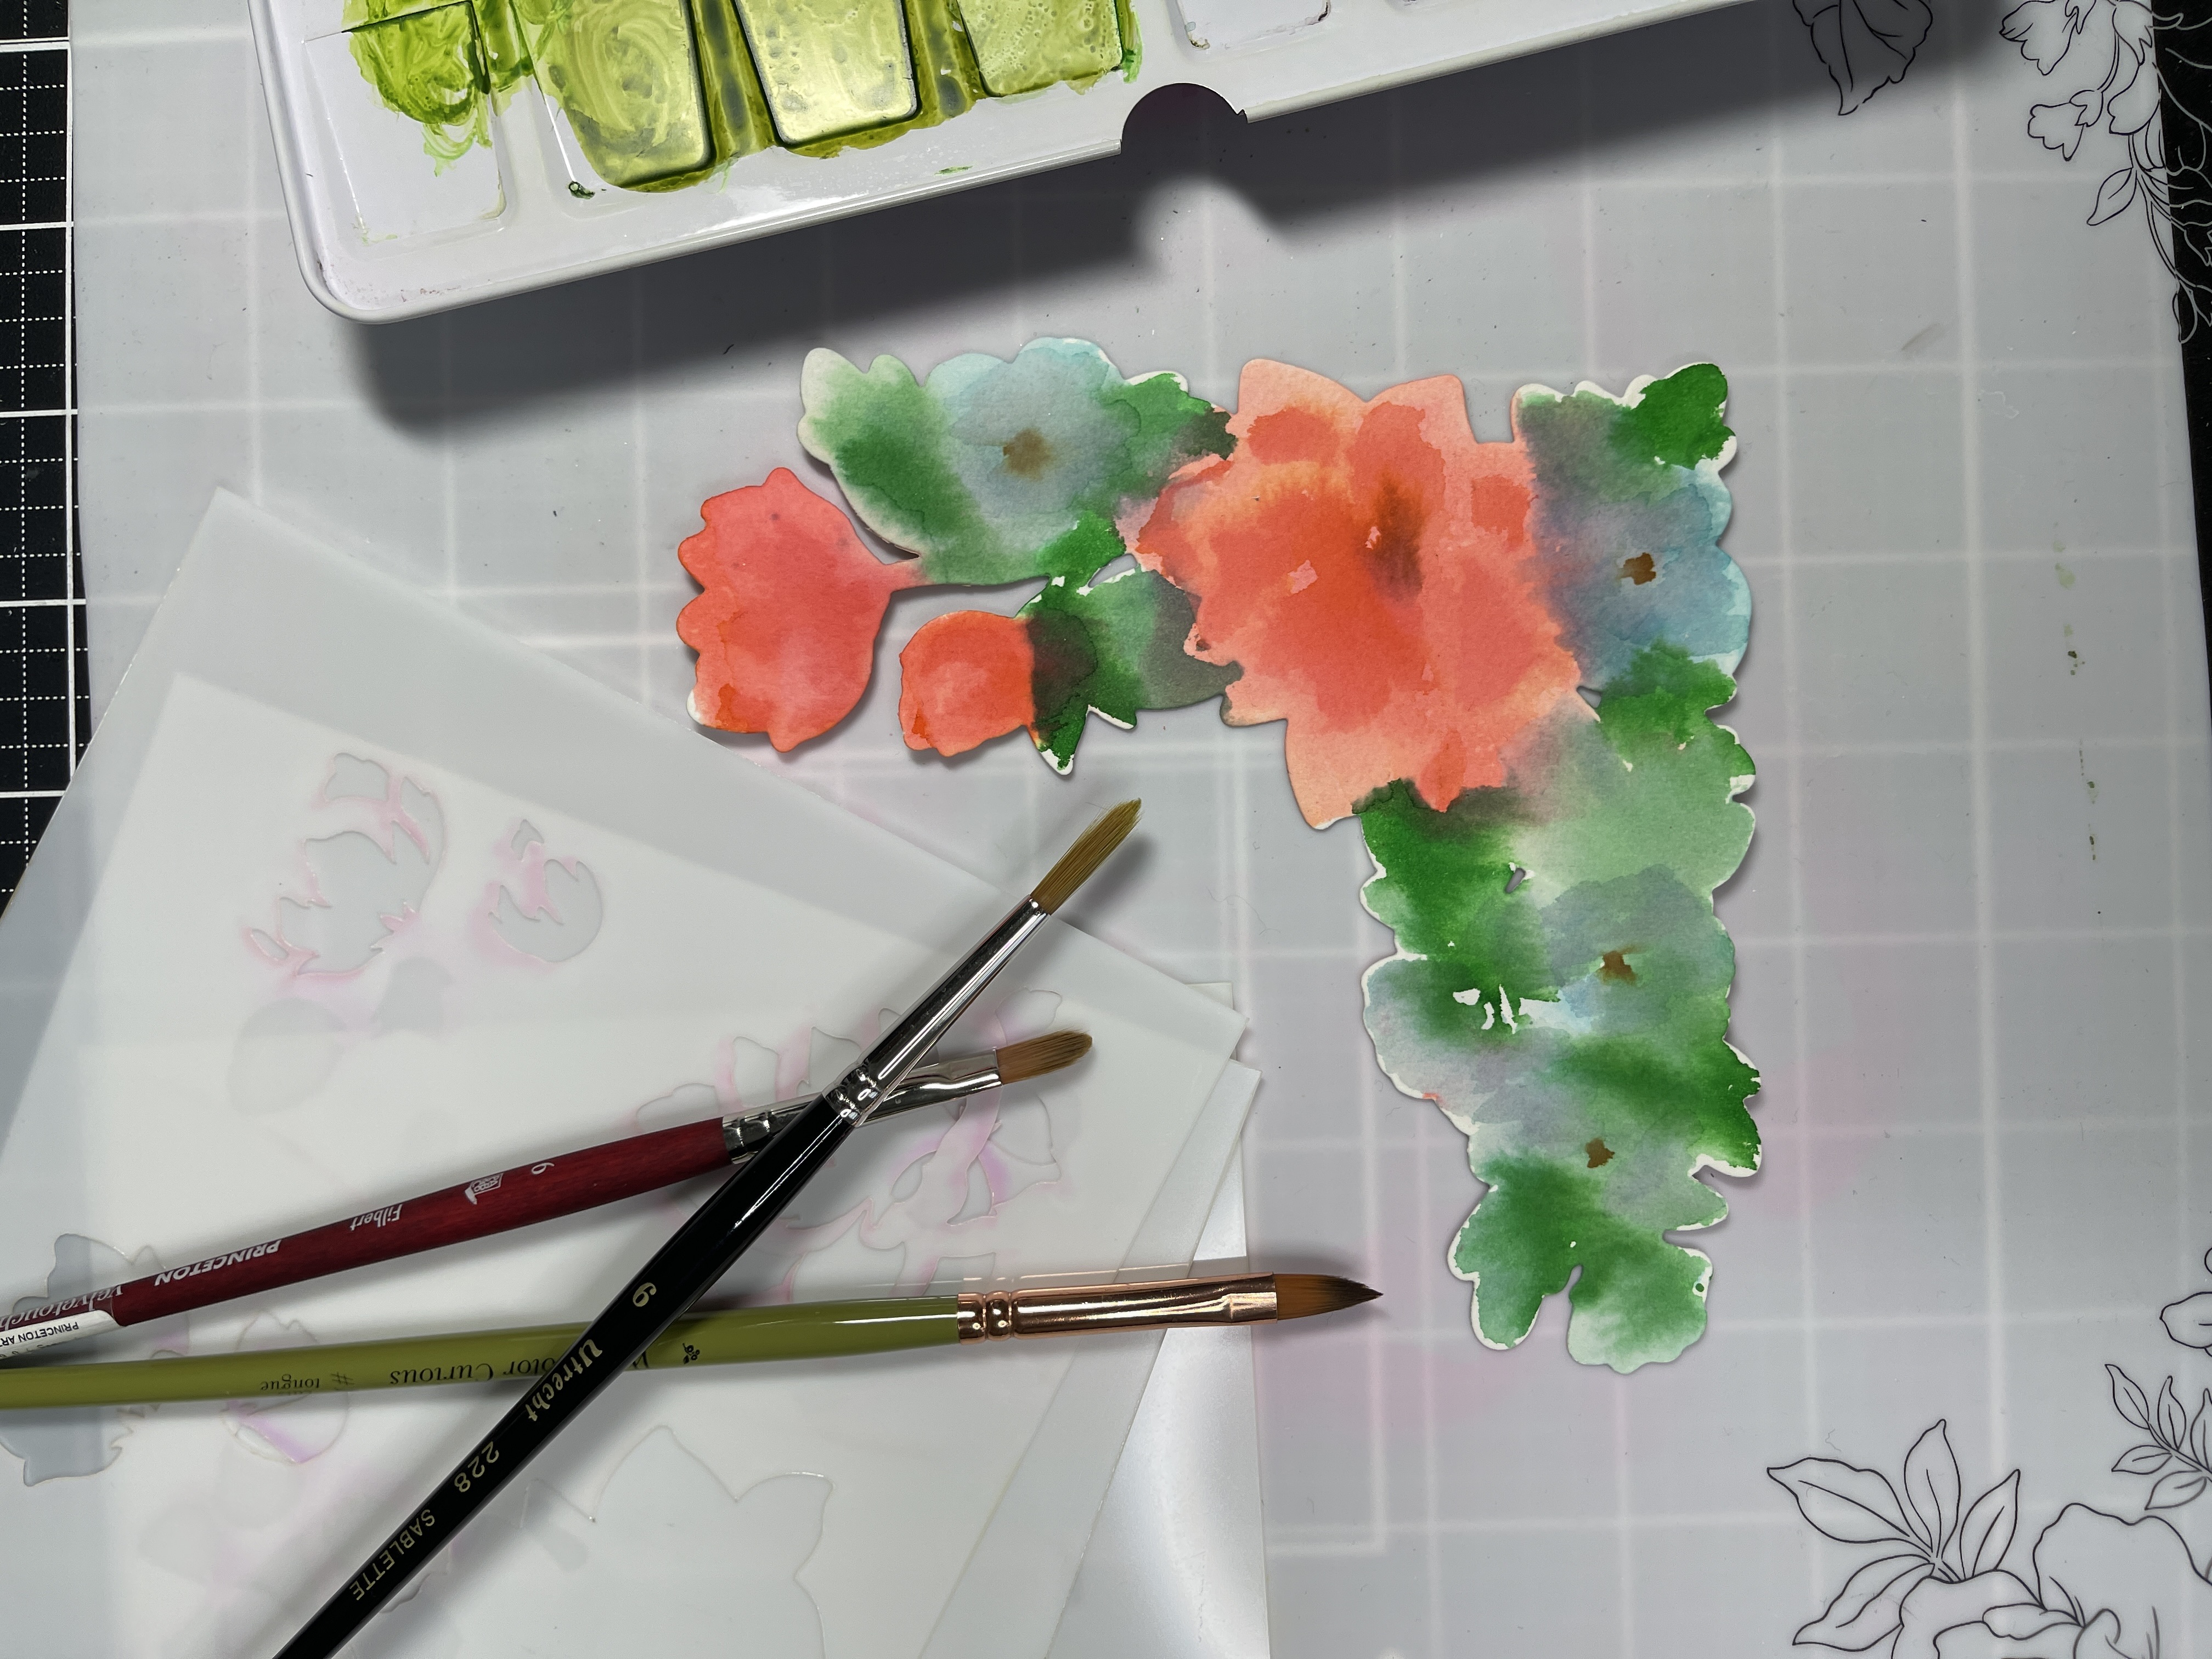
I loved how the watercolor turned out!!! But it needed something to give more definition, so I used the stamp included in the kit to stamp the image onto the watercolor paper and embossed it with Crisp White embossing powder. It not only gave me the definition I wanted, but softened the colors.
TIP: Make sure to treat the watercolor paper with anti-static powder before stamping, especially when using watercolor paper. It helps to prevent the embossing powder from sticking to unwanted areas.

To create my card, I stamped the Altenew Dainty Swiss Dots stamp onto a panel of In the Navy cardstock using Altenew Arctic Pigment Ink. I wanted a dark background to make my image pop; the stamped dots give a lot of texture and interest without drawing attention away from the watercolor.
I strategically cut the image into three pieces to create a central focal point and adhered it to the center of the Navy panel.
TIP: After making sure your die cut pieces are placed just right, take a photo of your image with your phone, then use some Glad Press & Seal paper to hold your layers together as you lift them. Then, you can put glue on the back and between the necessary layers without messing up your hard work!
All I needed to finish was a greeting (I used Altenew Simple Greetings Die Set) and some pearls from my stash.
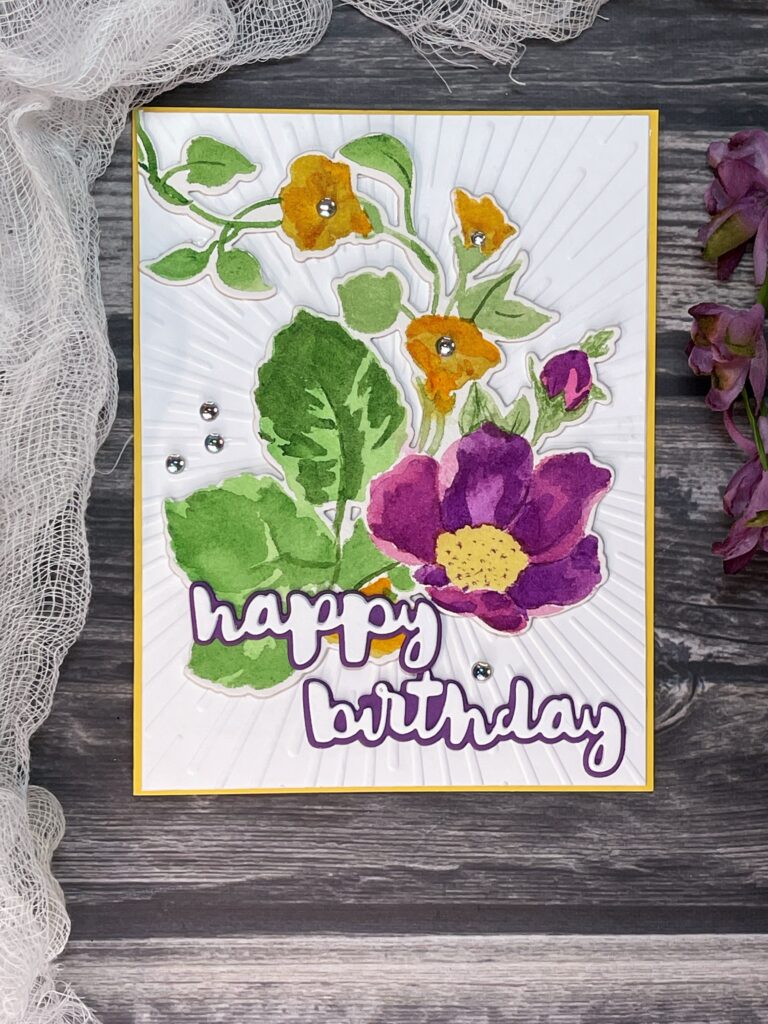
Watercolor Stencil Technique 2
For my second exploration, I decided to do something similar, but this time, use the watercolor as paint to paint in the color using the stencil as a guide.
Featured Products
Altenew Craft Your Life Project Kit: Always Sunshine
Altenew Artists’ Watercolor 24 Pan Set
Altenew Just a Number Die Set
Spellbinders Radiant Burst – Embossing Folder of the Month
This card began much as my previous card did, only this time I didn’t use as much water with my color. This allowed me to paint in the stencil, but the water still did its thing and the result was a wonderful watery look. After the watercolor was dry, I went back and painted in some details (dots in the middle of the large flower, some stem lines, etc.,) using a detail watercolor brush. Those little details add so much!
This time, I used an embossing folder to create my background. The colors I chose were so vivid, I didn’t want to take away from them, and the Spellbinders Radiant Burst – Embossing Folder of the Month was perfect.
My partner is always asking me for birthday cards for him to send, so I used Altenew Just a Number Die Set. I imagine this one will go to his mom. The little jewels are from Studio Katia.
Lesson Takeaways
Layering stencils are much more than guides for ink! I loved how the watercolor escaped the confines of the edges and created new patterns. There are many other stencil techniques I can’t wait to try – I hope this has inspired you to try new things, experiment and have fun!
Thanks for spending time with me today, and happy crafting!
 All About Layering 4: The Best Things In Life Aren’t Things
 Layers and Butterflies
 Magical Masking Techniques
 Dies, Dies, Dies!
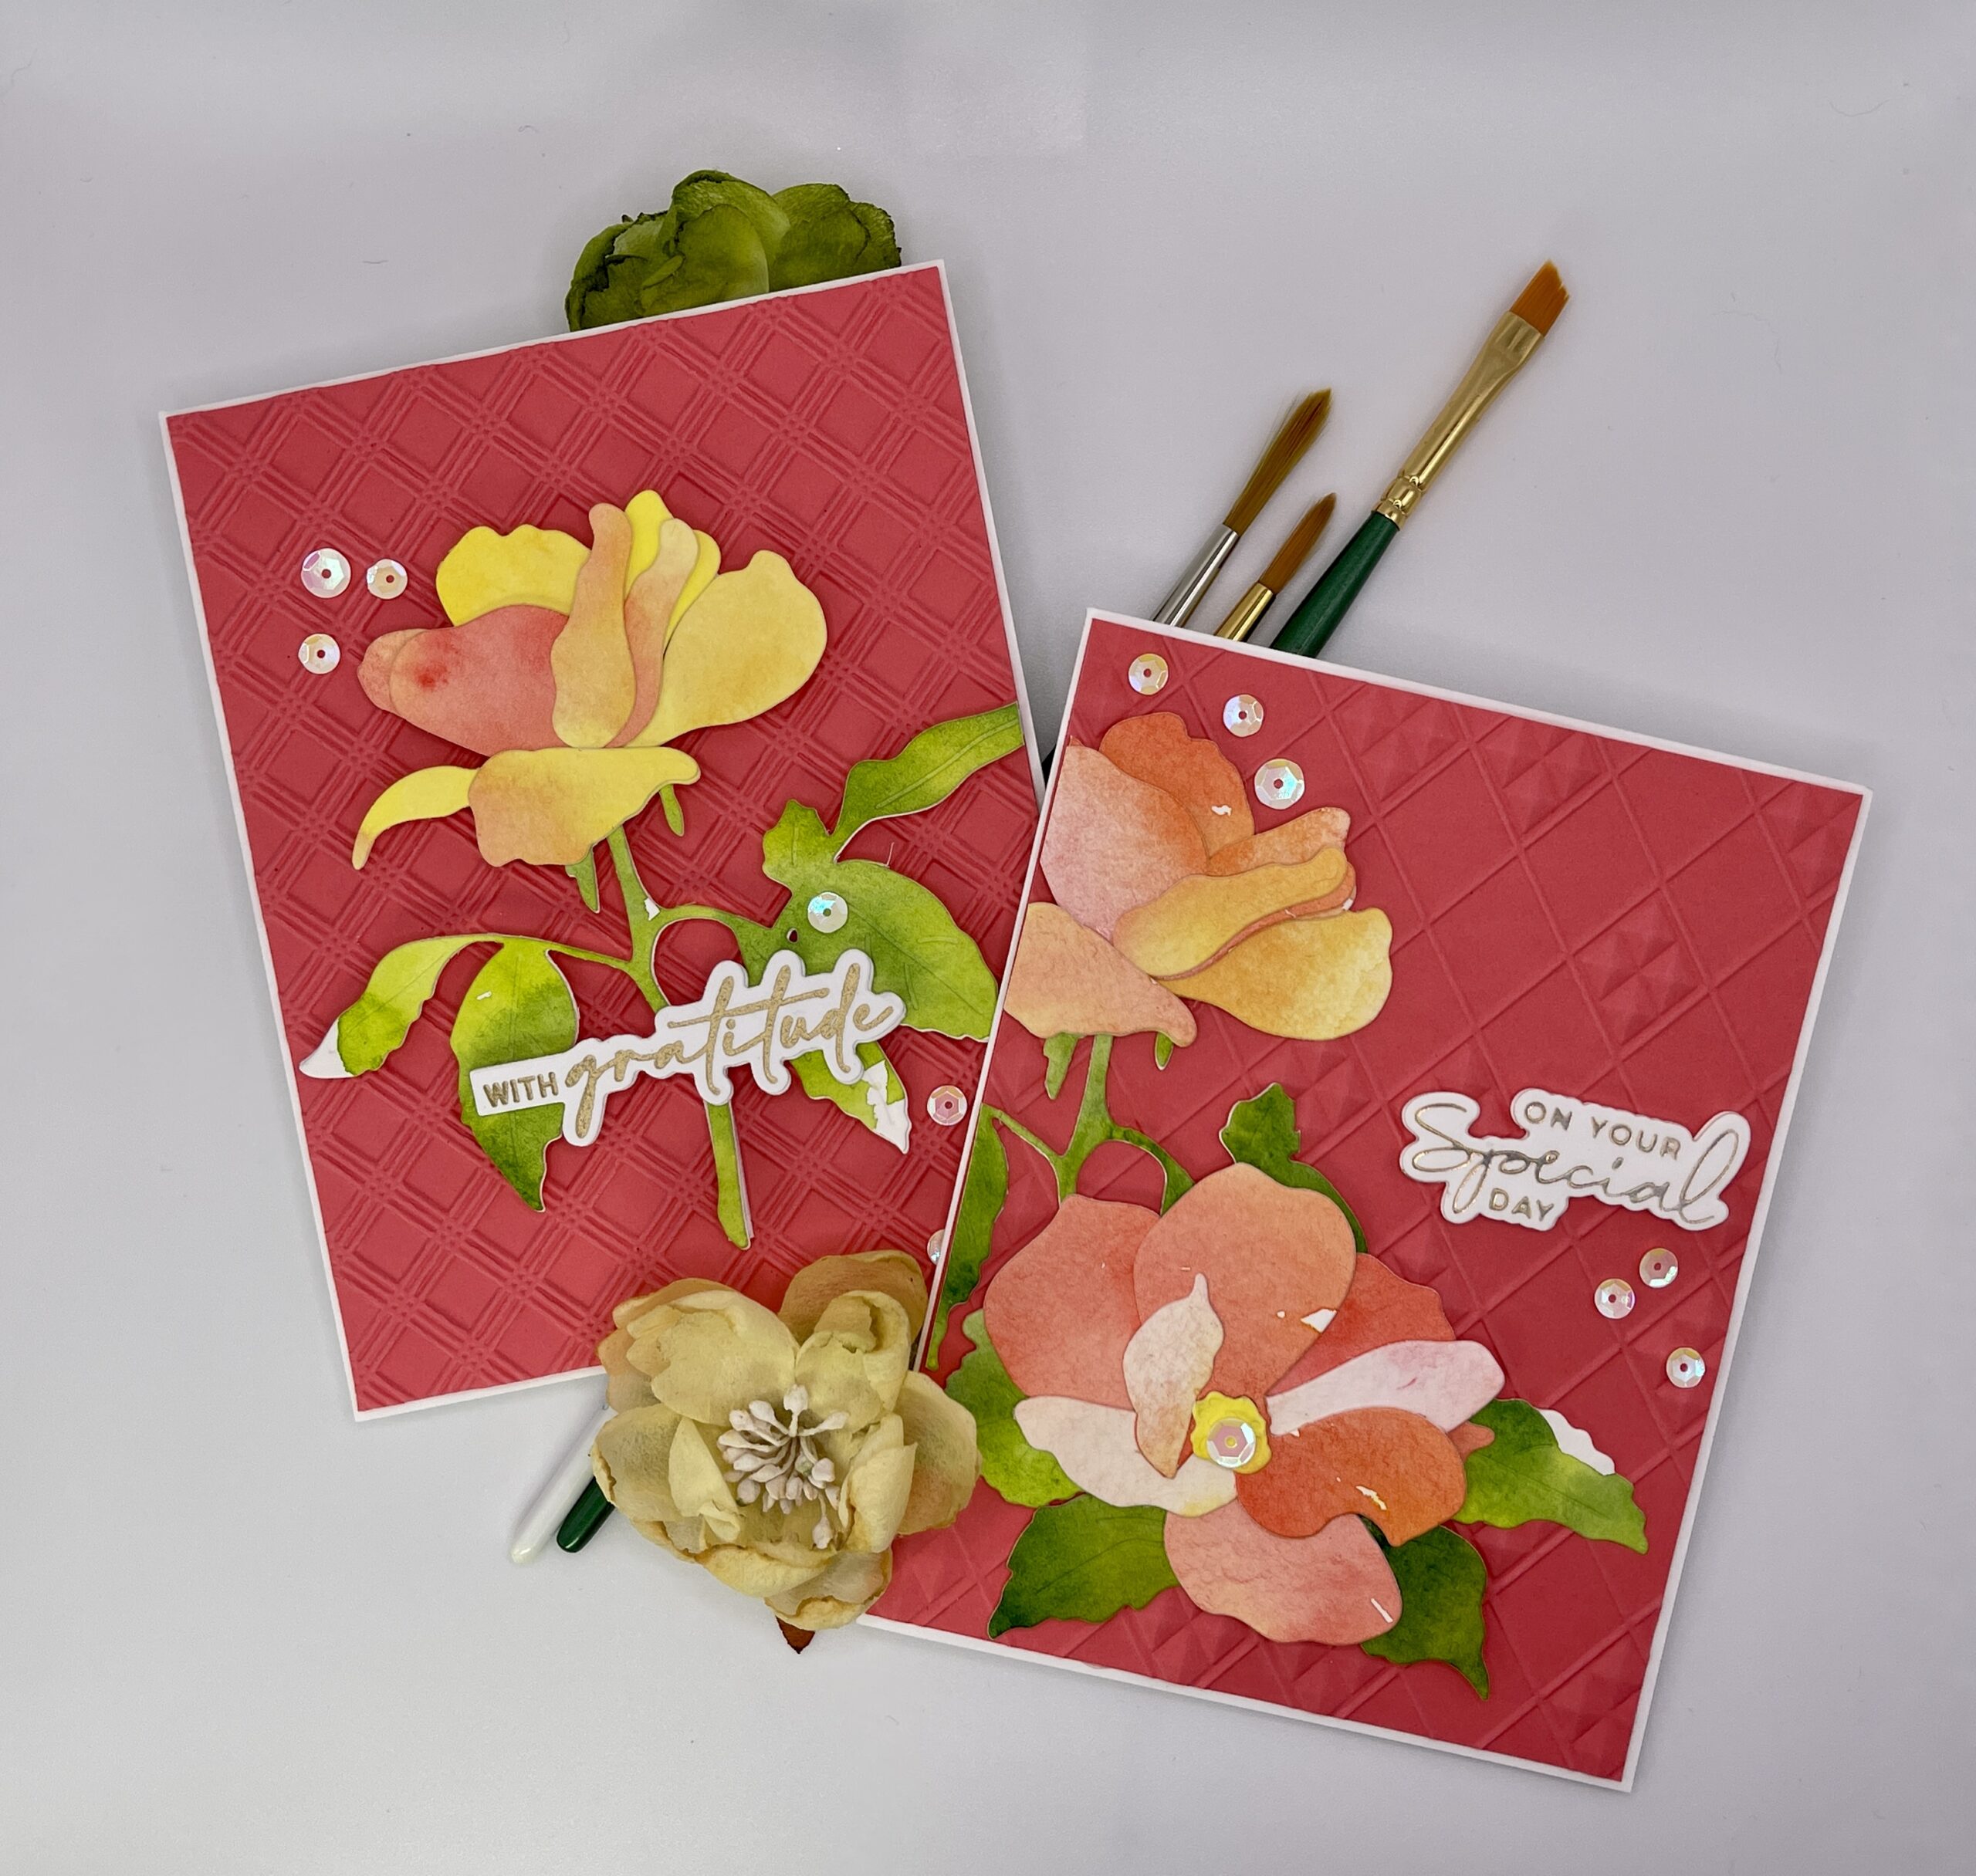

Looks wonderful! I love the blue background and the loose watercolor look of the florals. Thank you for submitting your work to the AECP assignment gallery.